Service Management
After setting up a processing flow, you can monitor the result of each service under Service Management.
How the Services Fit Together
The services under Service Management cover two stages: getting invoices into the system, then verifying and cross-checking them. Every valid invoice is ultimately consolidated into the Invoice List, and you can export it using Report Templates.
Stage 1 — Get invoices into the system: pick a service based on your situation.
| Your situation | Service to use |
|---|---|
| You already have the invoice as a PDF/XML file | Invoice Upload |
| You only have a scanned image or PDF that isn't machine-readable | OCR Invoice |
| You want to receive invoices automatically by email | Invoice Mailbox |
| You want the system to fetch invoices from the supplier portal | Supplier Invoice Download |
| You want the system to fetch invoices from the tax authority | Tax Authority Invoice Download |
Stage 2 — Verify and cross-check invoices: applies to invoices already in the system, or lets you quickly check a single document on its own.
| What you want to verify | Service to use |
|---|---|
| Cross-check the invoice against tax authority data | Tax Authority Invoice Lookup |
| Check whether the seller's tax code is still active | Taxpayer Lookup |
| Check the digital signature embedded in the XML file | Digital Signature Verification |
| Check handwritten signatures or physical stamps on an image/PDF | Signature/Stamp Verification |
If the processing flow you selected in Invoice Upload already includes these verification steps, the system runs all of them automatically — the Stage 2 services are only needed when you want to check a single invoice or document independently.
Beyond these two stages, File Management at the end of this page is a shared archive that lets you look up any file (original or intermediate result) that has passed through these services.
Stage 1 — Get Invoices into the System
Invoice Mailbox
Go to Service Management > Invoice Mailbox to receive supplier invoices sent by email.
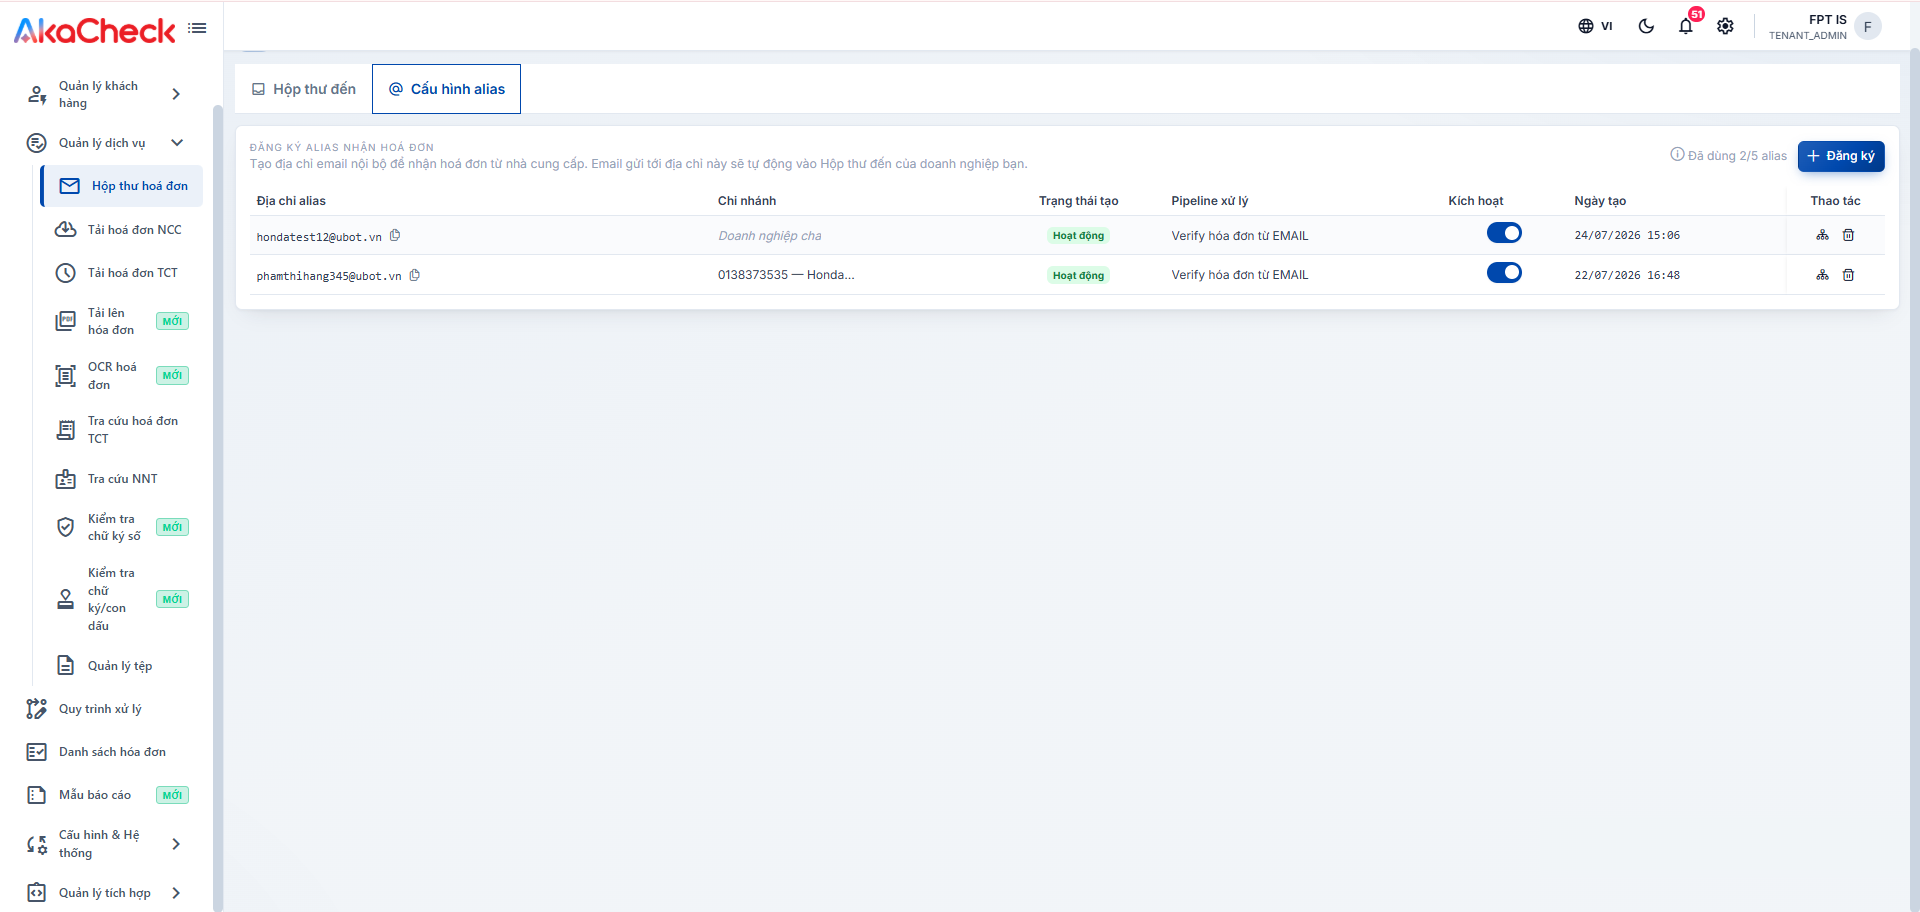
- Alias Configuration tab: Click Register to create an internal email alias (for example
yourcompany@ubot.vn), linked to a processing flow and optionally a branch. Give this address to your suppliers — emails they send to it are automatically added to your Inbox. Each account is limited to a number of aliases (for example 2/5), and each alias can be enabled or disabled.
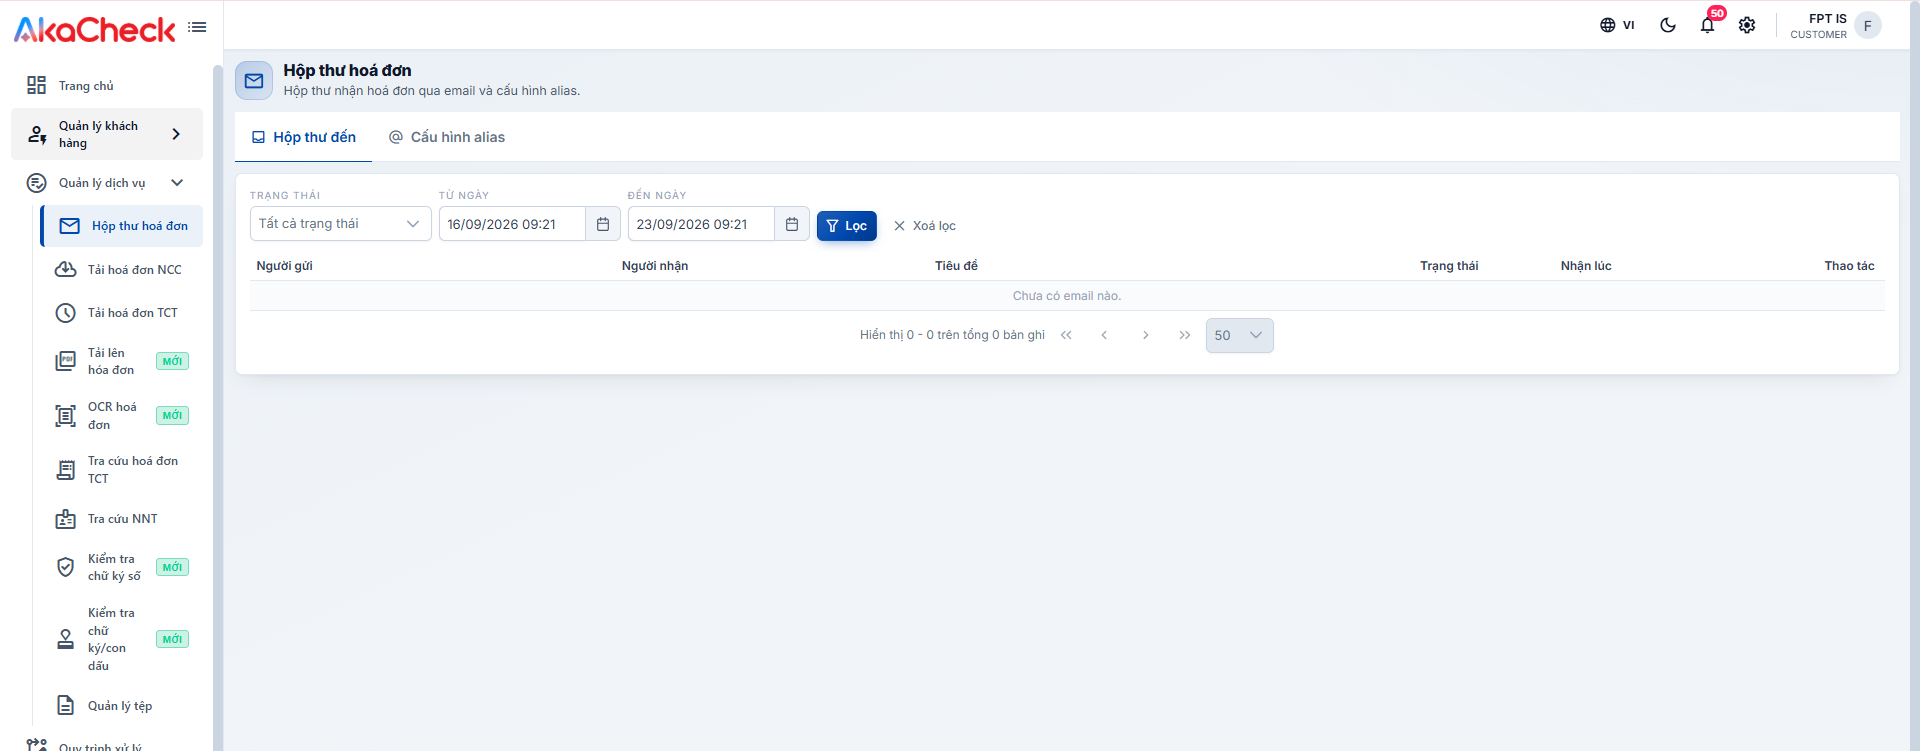
- Inbox tab: Received emails and their processing status appear here, where you can filter by status and date.
Supplier Invoice Download
Go to Service Management > Supplier Invoice Download to monitor invoice download requests from suppliers.
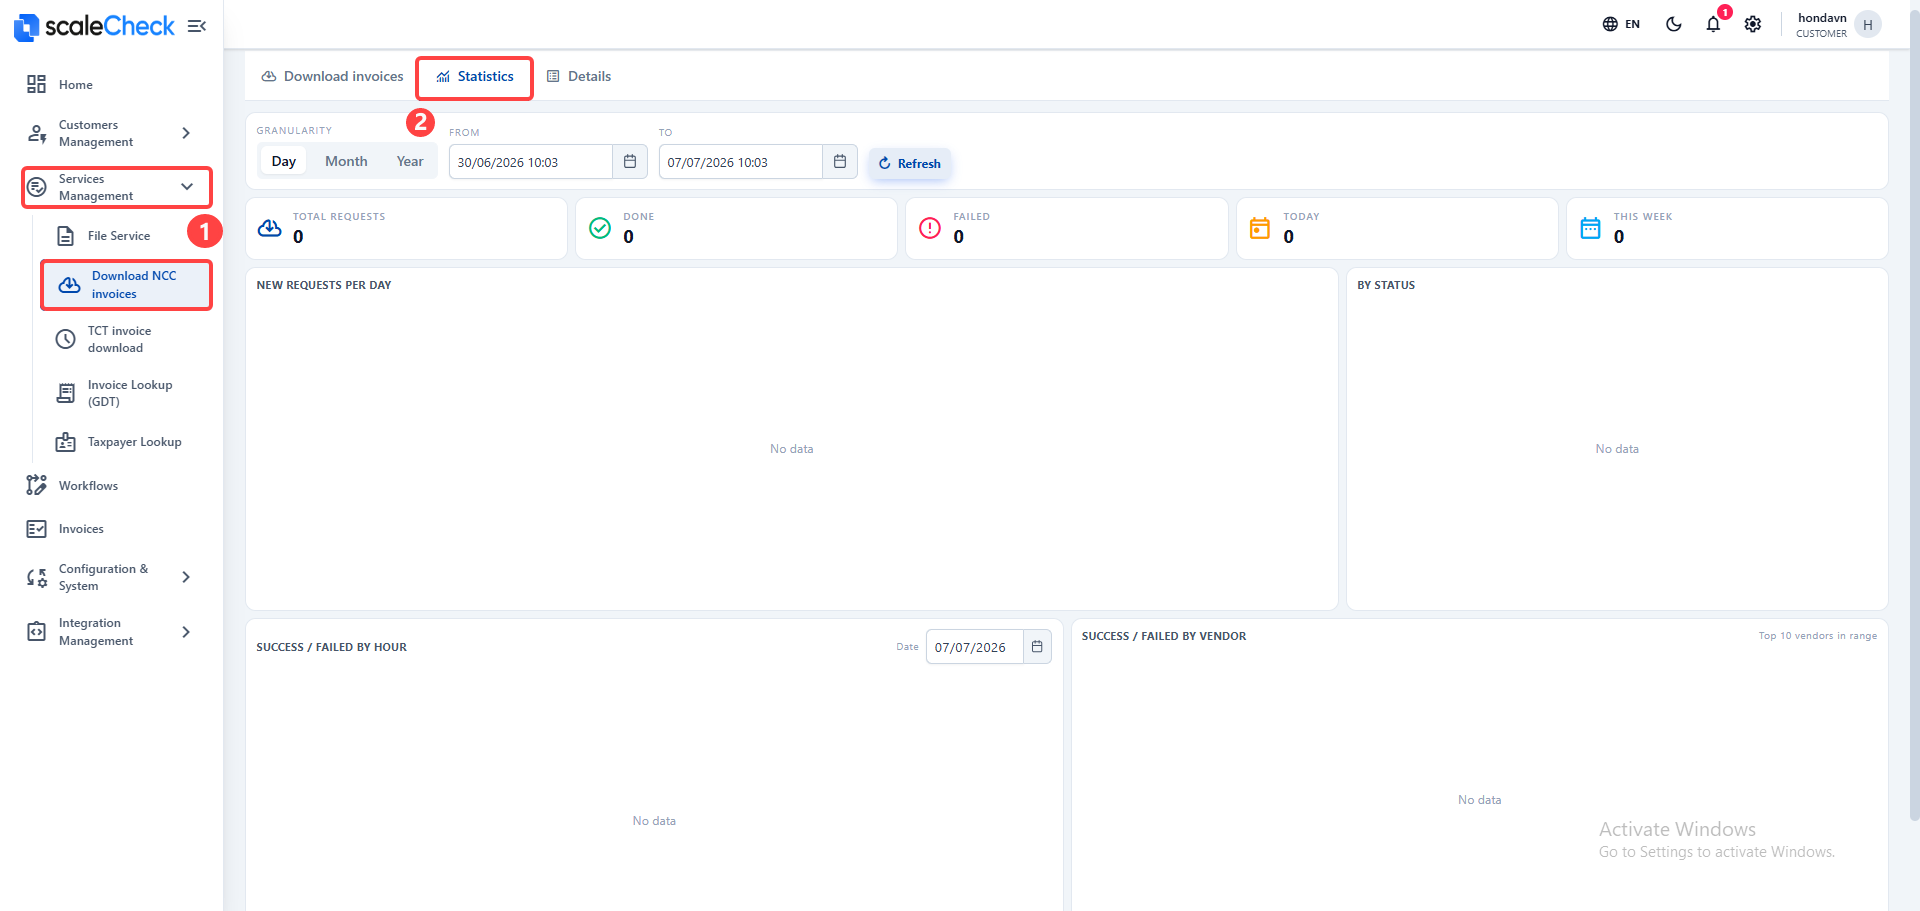
- Statistics tab: View total requests, successful requests, failed requests, today requests, and this week requests.
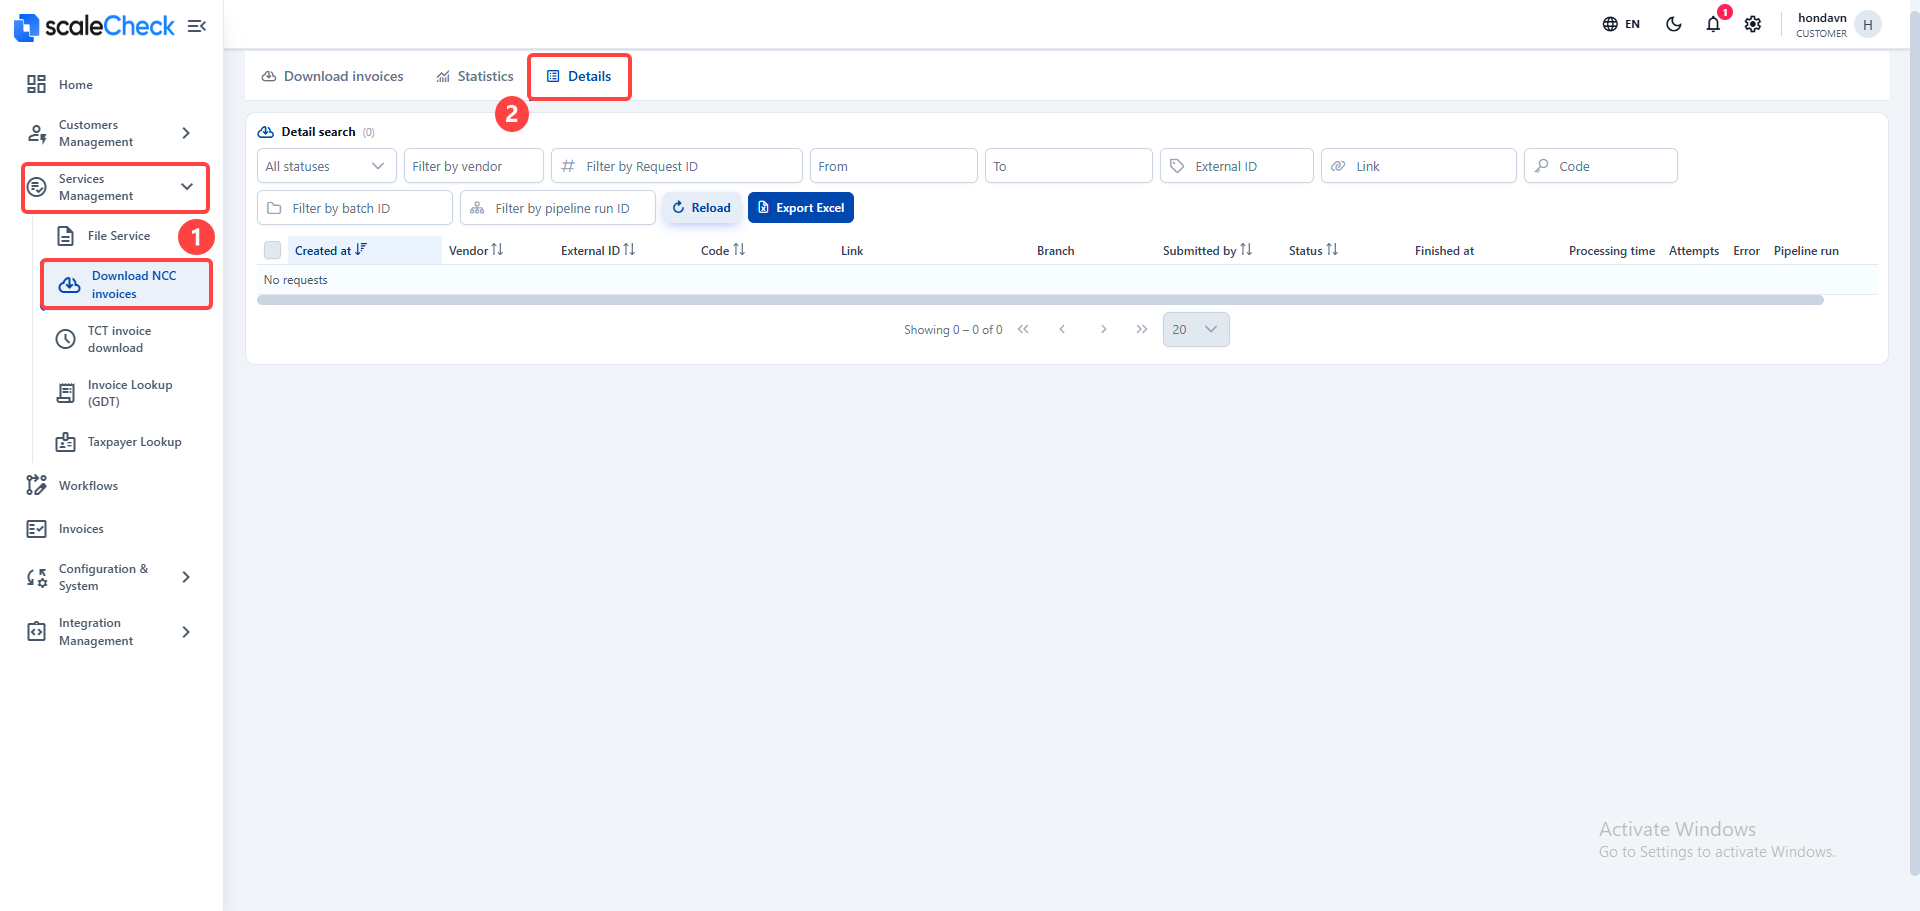
- Details tab: View each request, supplier, code, invoice link, status, processing time, retry count, and error details if any.
Tax Authority Invoice Download
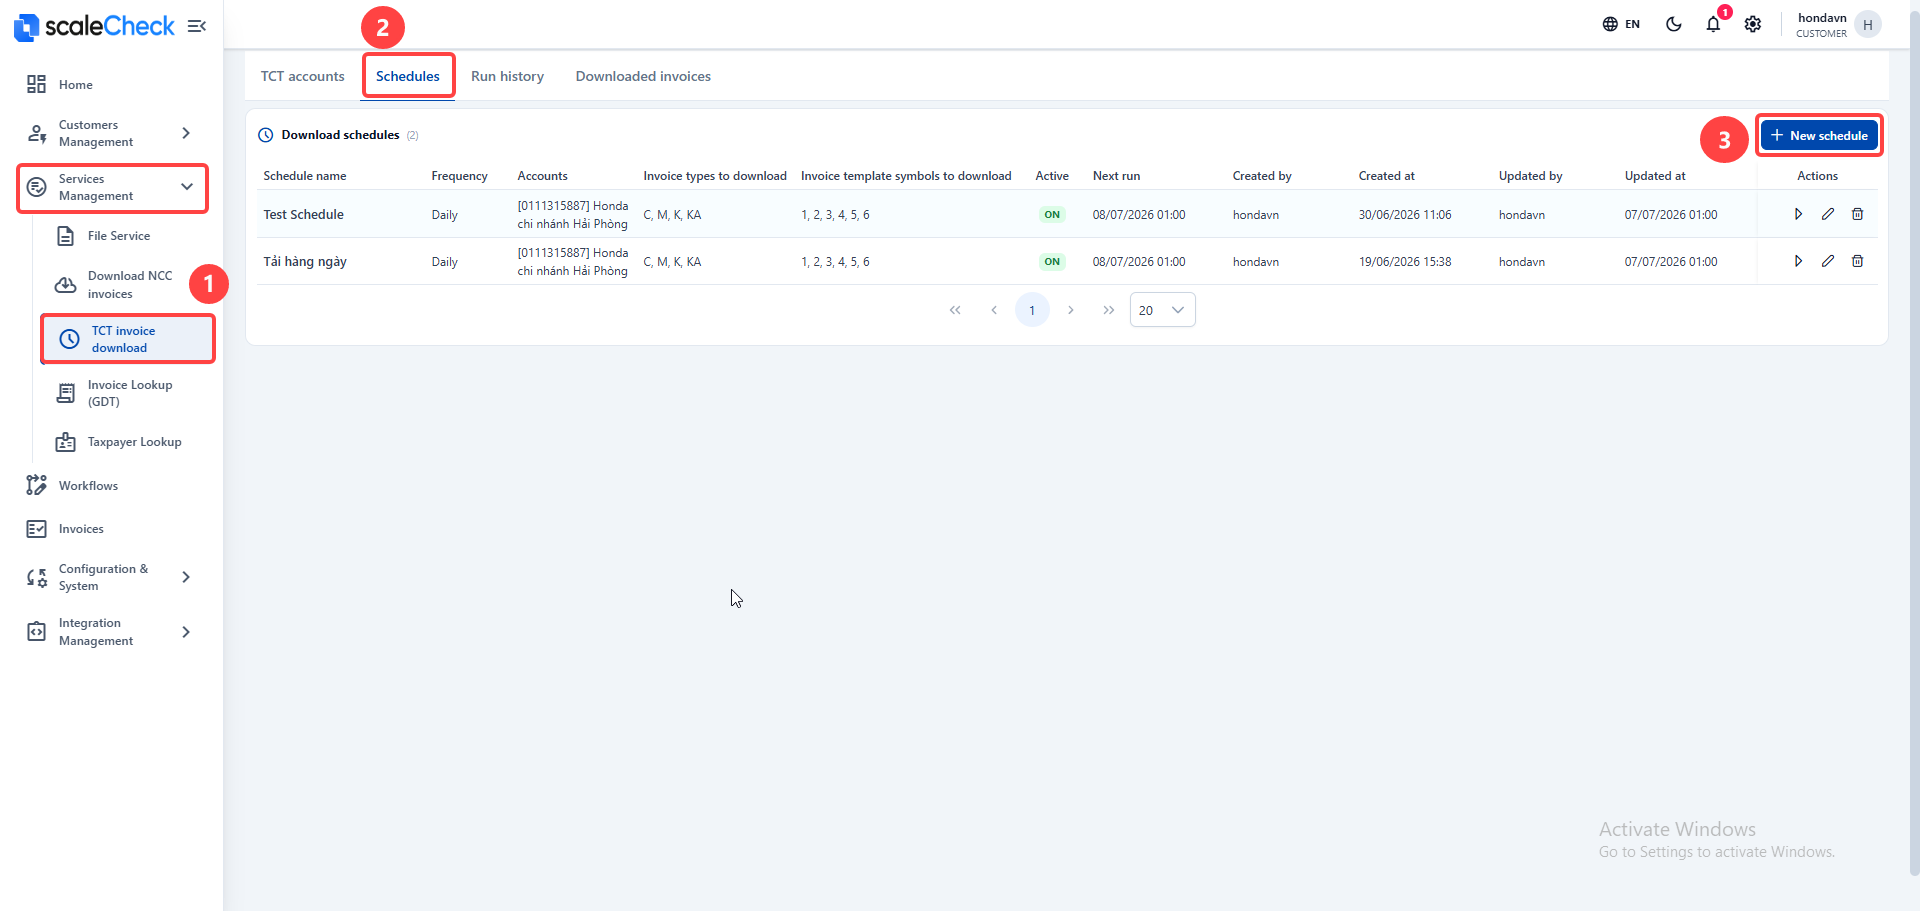
Go to Service Management > Tax Authority Invoice Download to set up tax authority accounts, create download schedules, and review invoice download results.
- Tax Authority Accounts: Manage login accounts used for the tax authority.
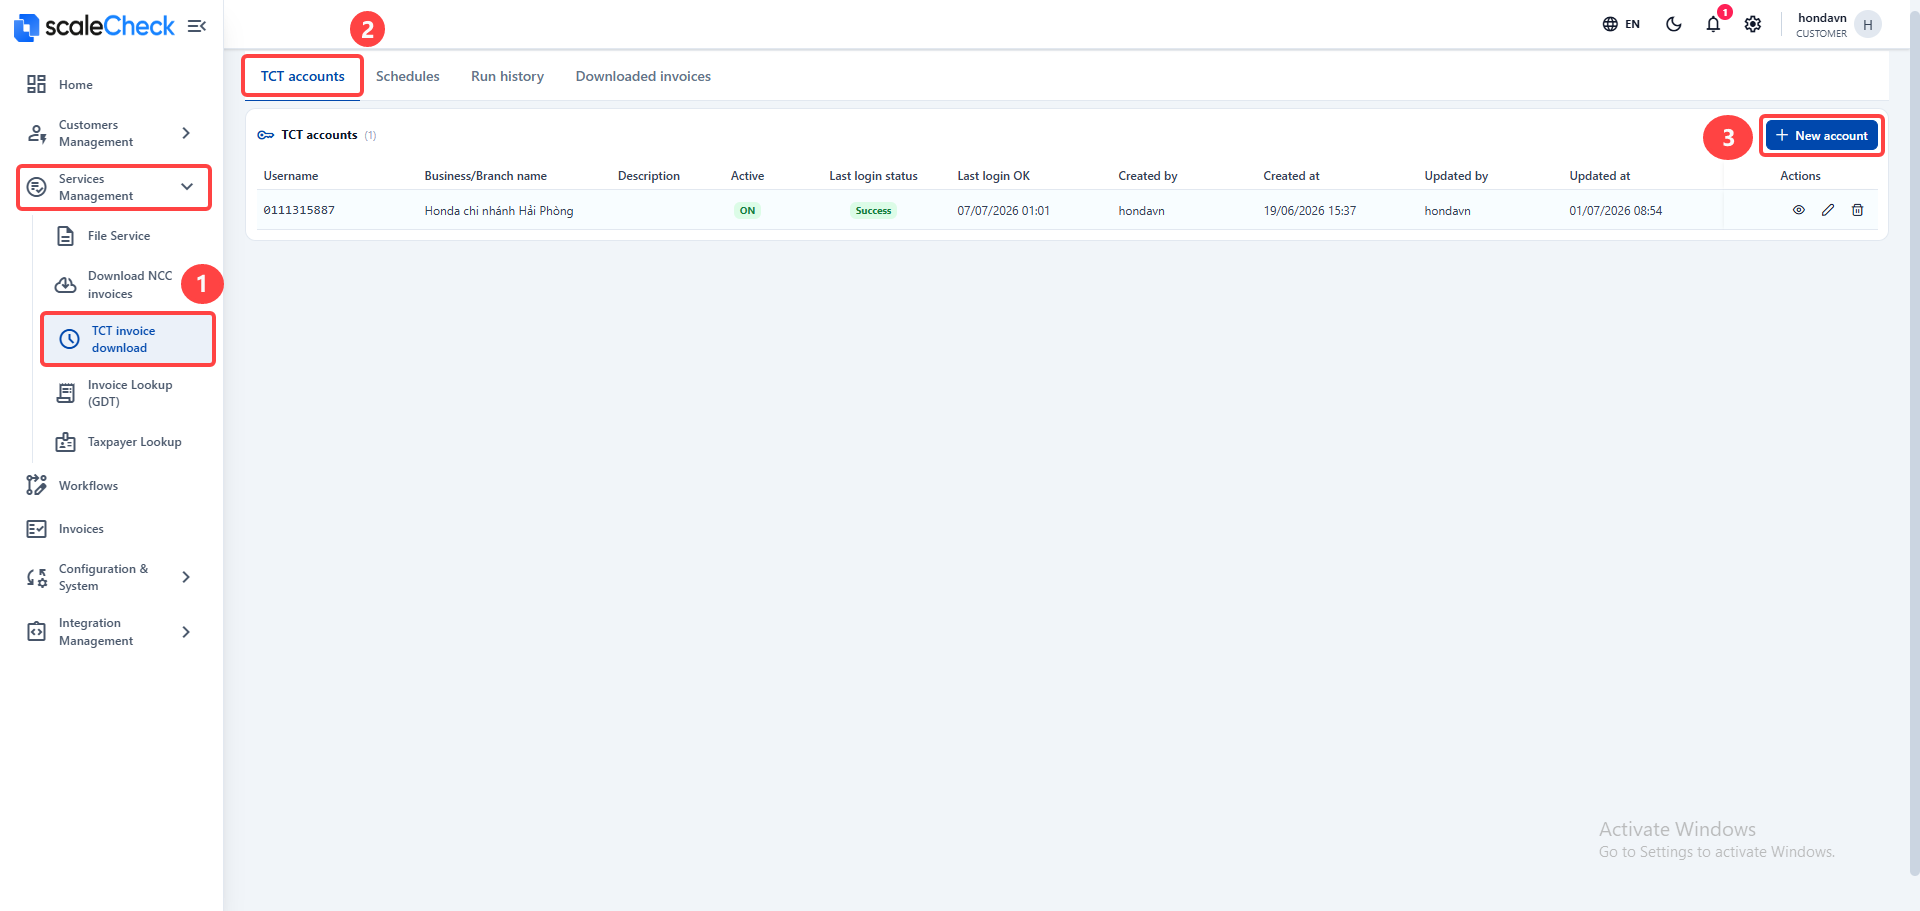
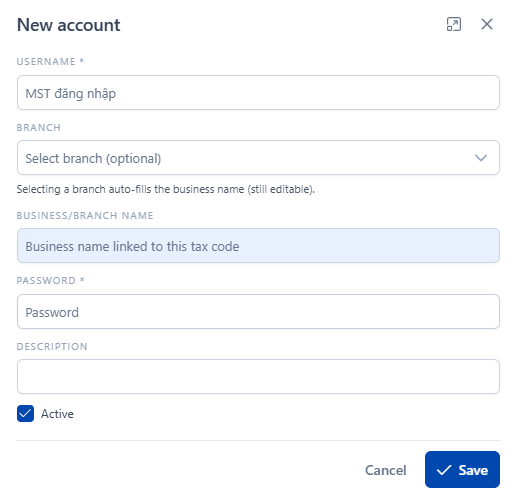
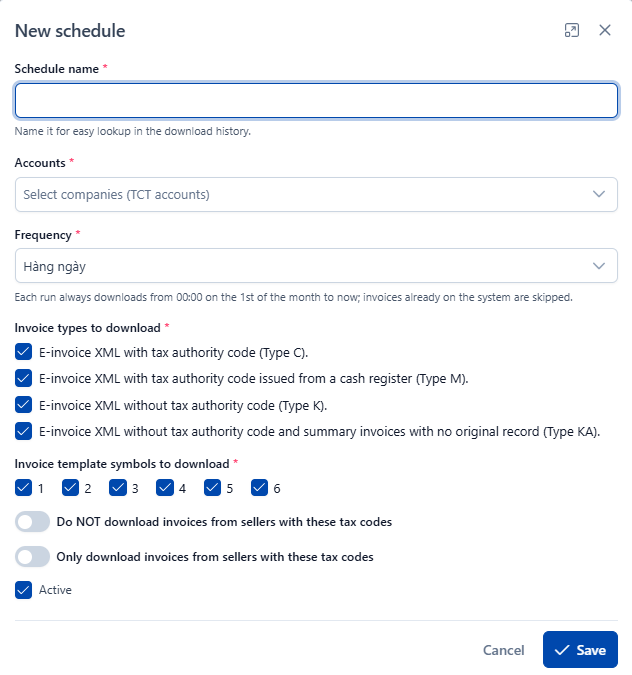
- Download Schedules: Create automatic daily invoice download schedules.
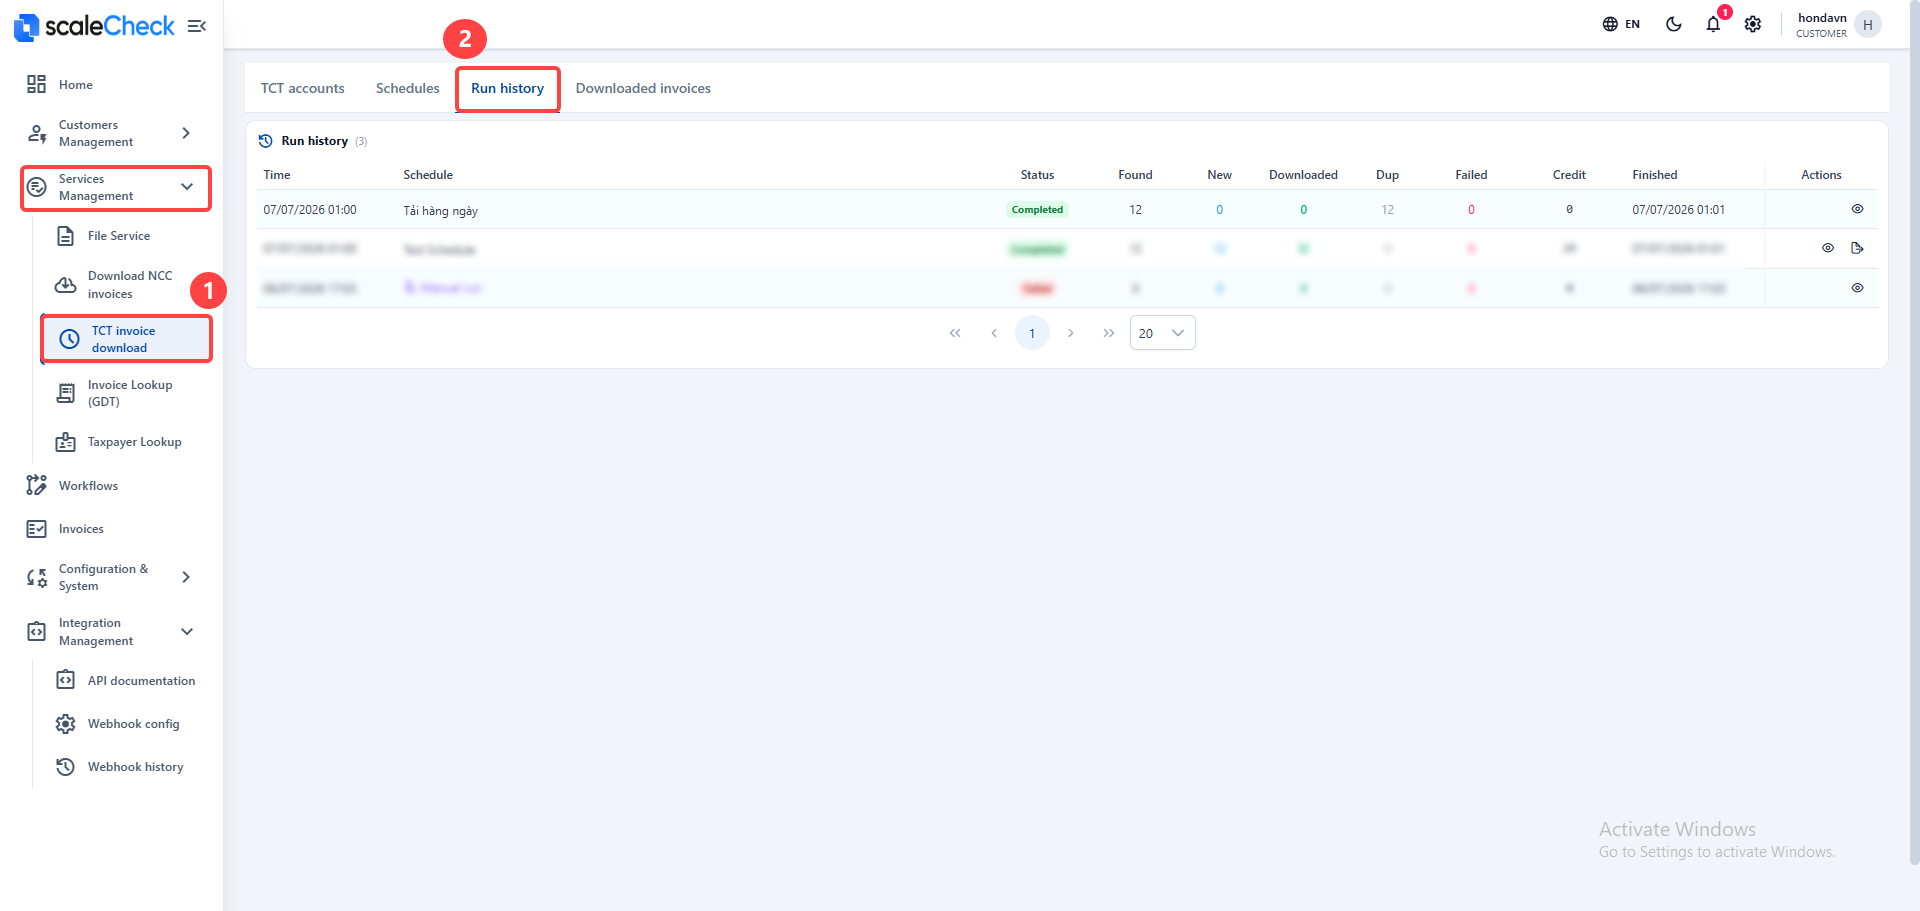
- Run History: Check each run result, including found invoices, new invoices, downloaded invoices, duplicates, errors, and credit usage.
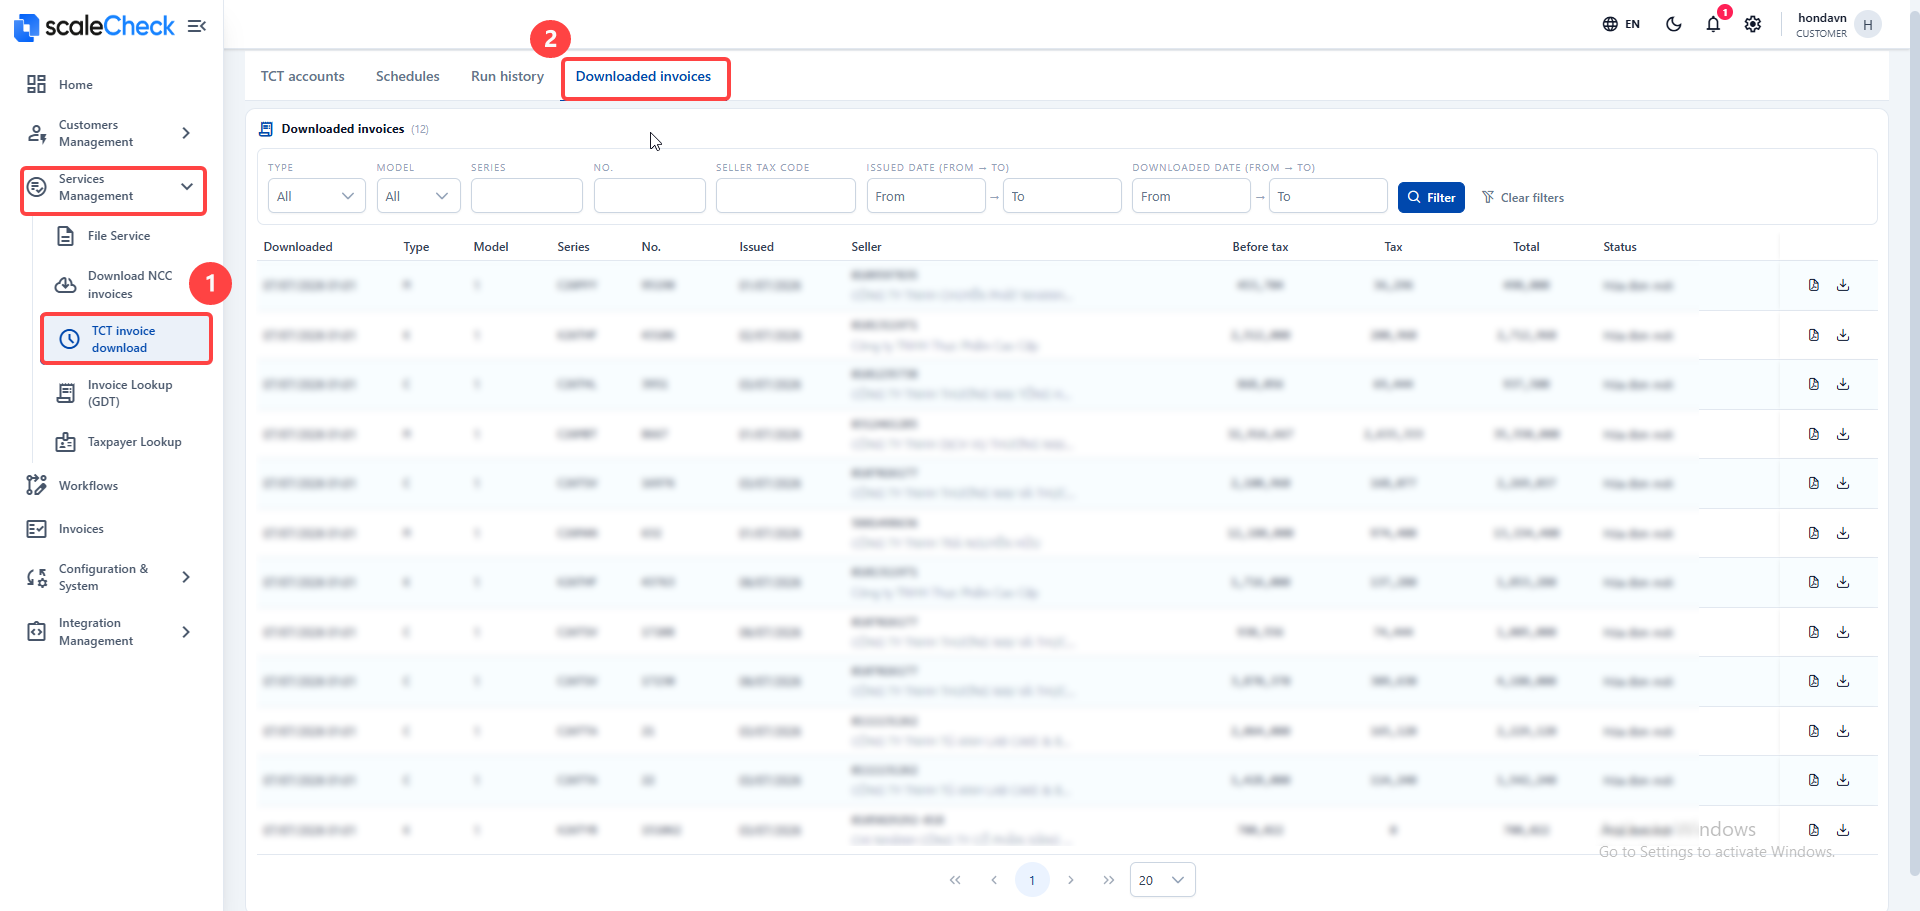
- Downloaded Invoices: Search and review invoices downloaded from the tax authority.
Invoice Upload
Go to Service Management > Invoice Upload to manually upload invoice files and run them through a processing flow.
- Choose the file type: File PDF or File XML.
- Select a processing flow from Processing Flow. If the flow includes an OCR step, you can turn on OCR when the PDF has no lookup code.
- Click Select Files to choose one or more files (up to 20 files per upload).
- Keep Check for duplicate invoices enabled if you want the system to skip invoices that already exist.
- Click Run to start processing.
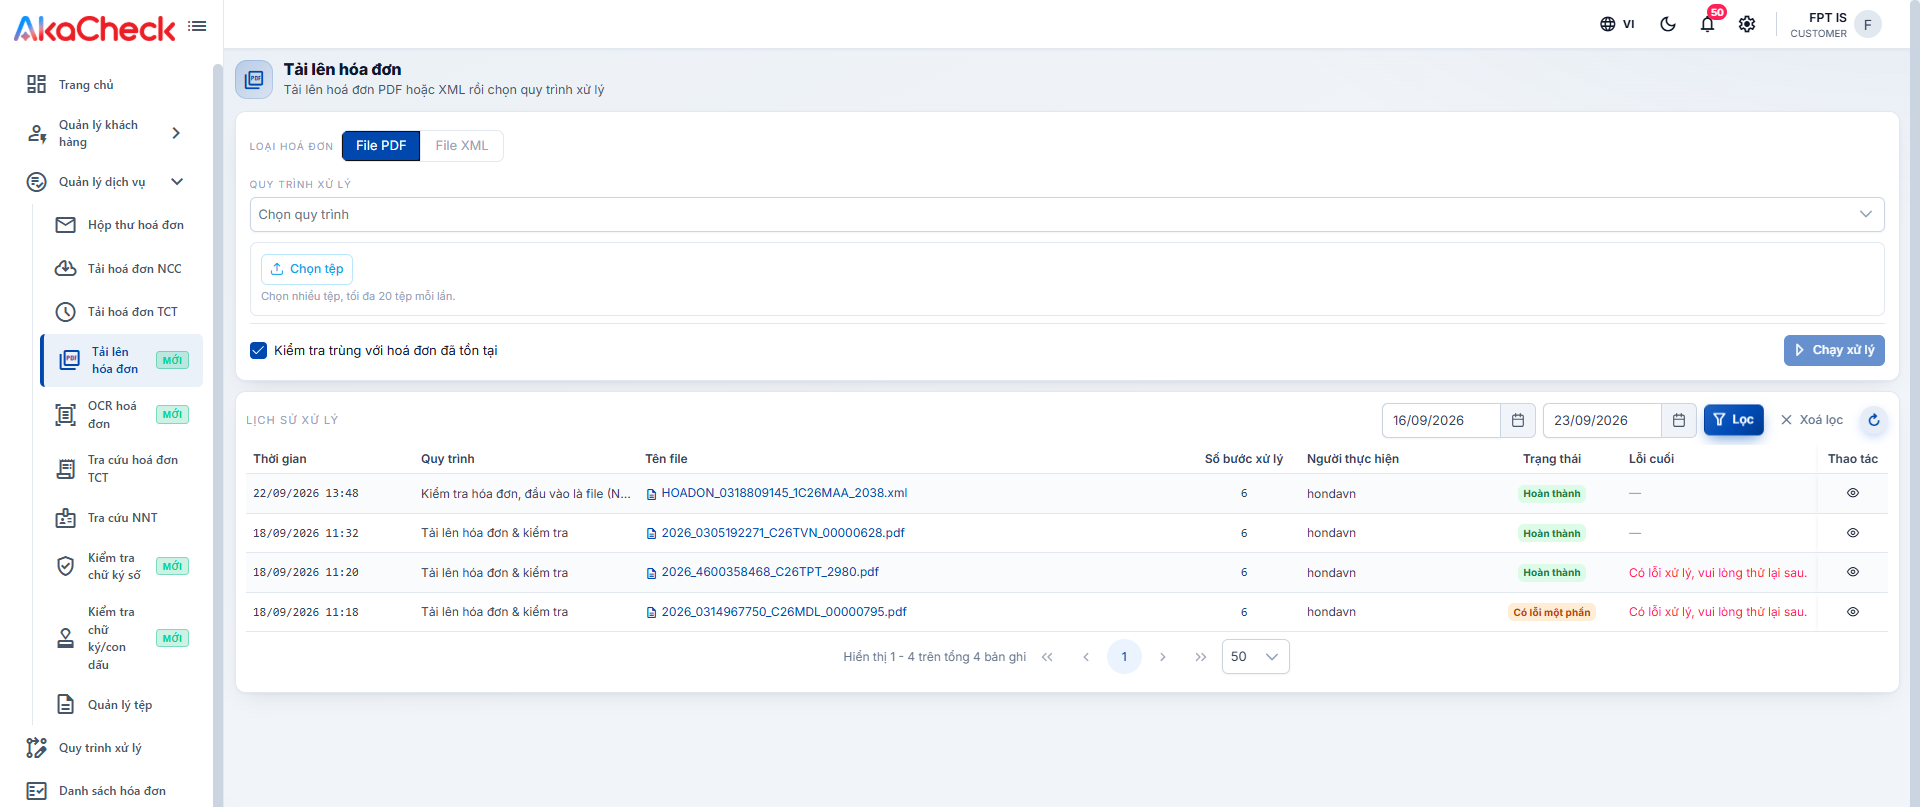
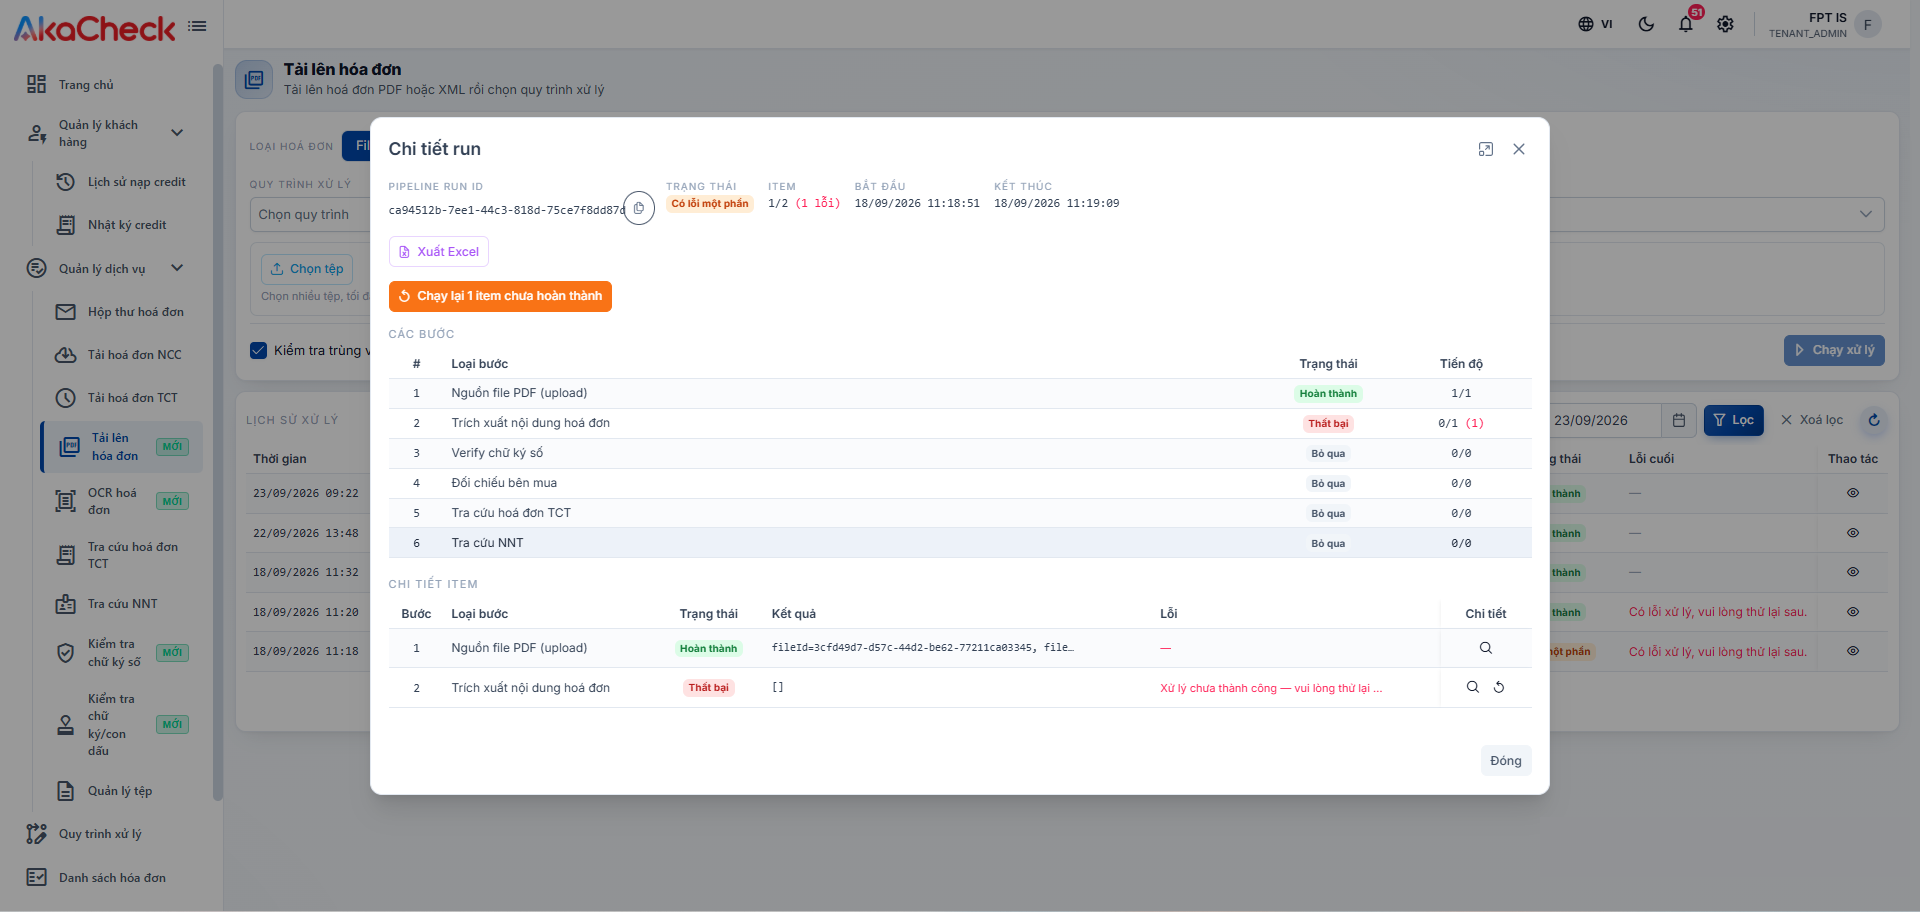
- Each upload is recorded in the processing history below. Click the eye icon on a row to open Run Details, where you can track the progress of each step and export the result to Excel. In the example below, the flow ran all 6 steps automatically — extract invoice content, verify digital signature, compare buyer information, tax authority invoice lookup, and taxpayer lookup — which are the same services described in Stage 2 below, so there's no need to repeat them manually.
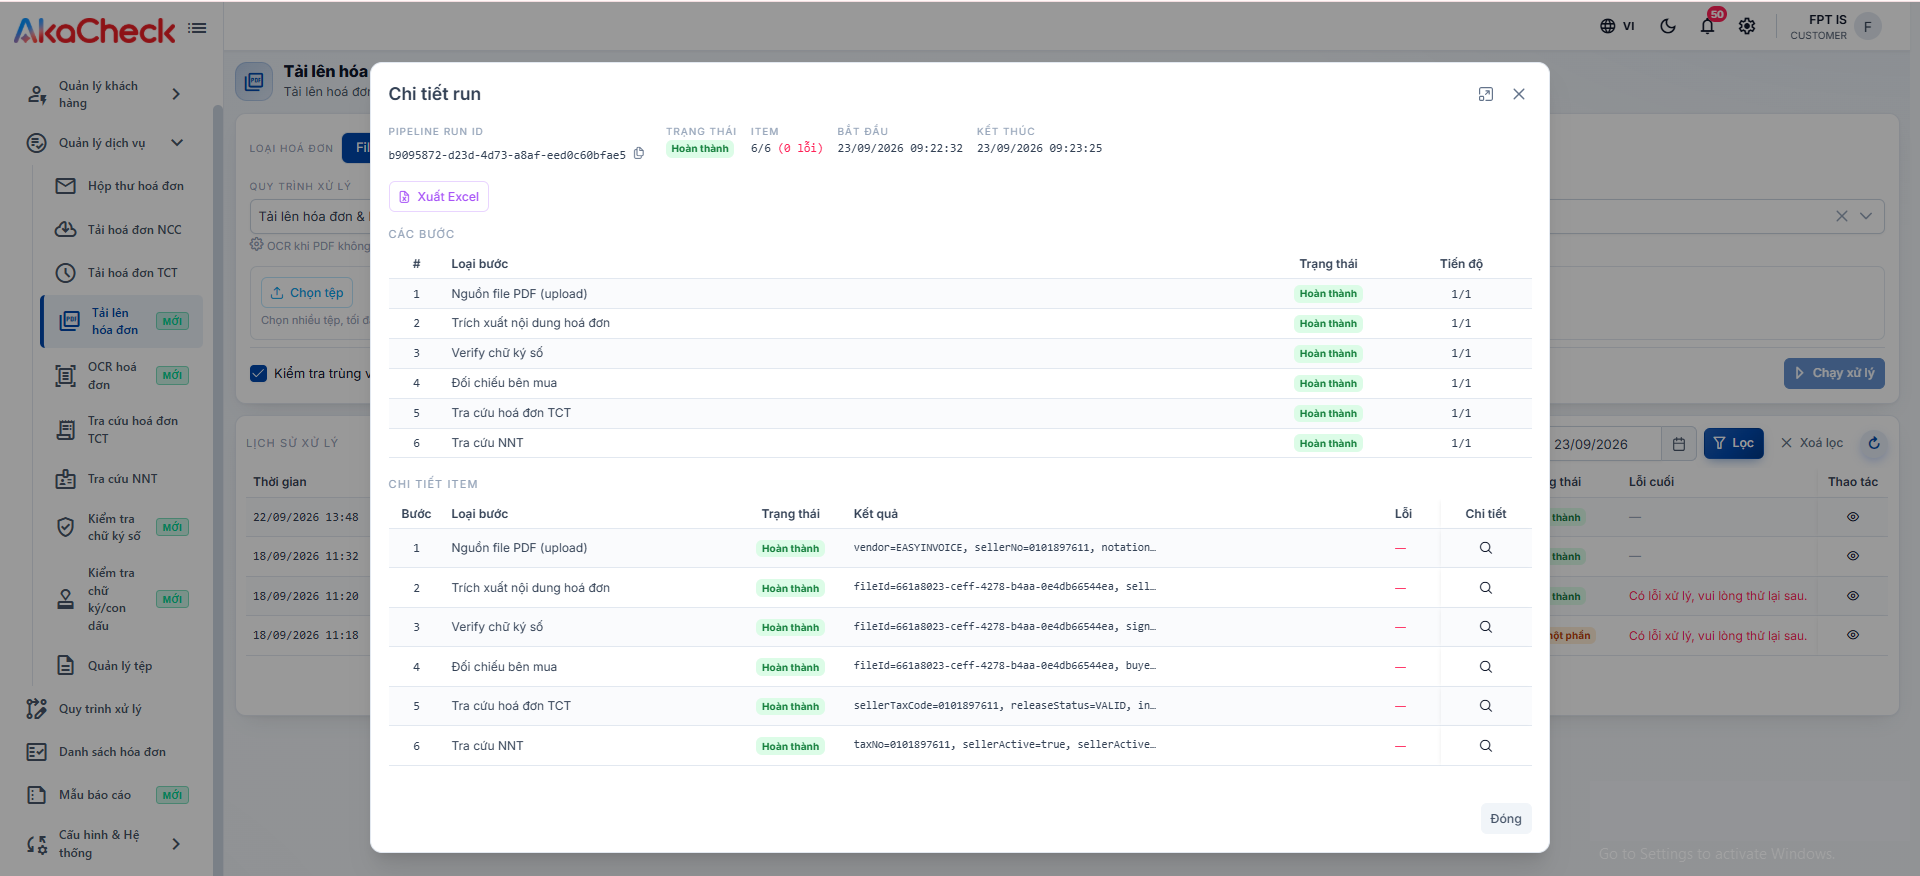
- Click the magnifying glass icon in the Details column of a step in the "Item Details" table to see that step's full input data and result.
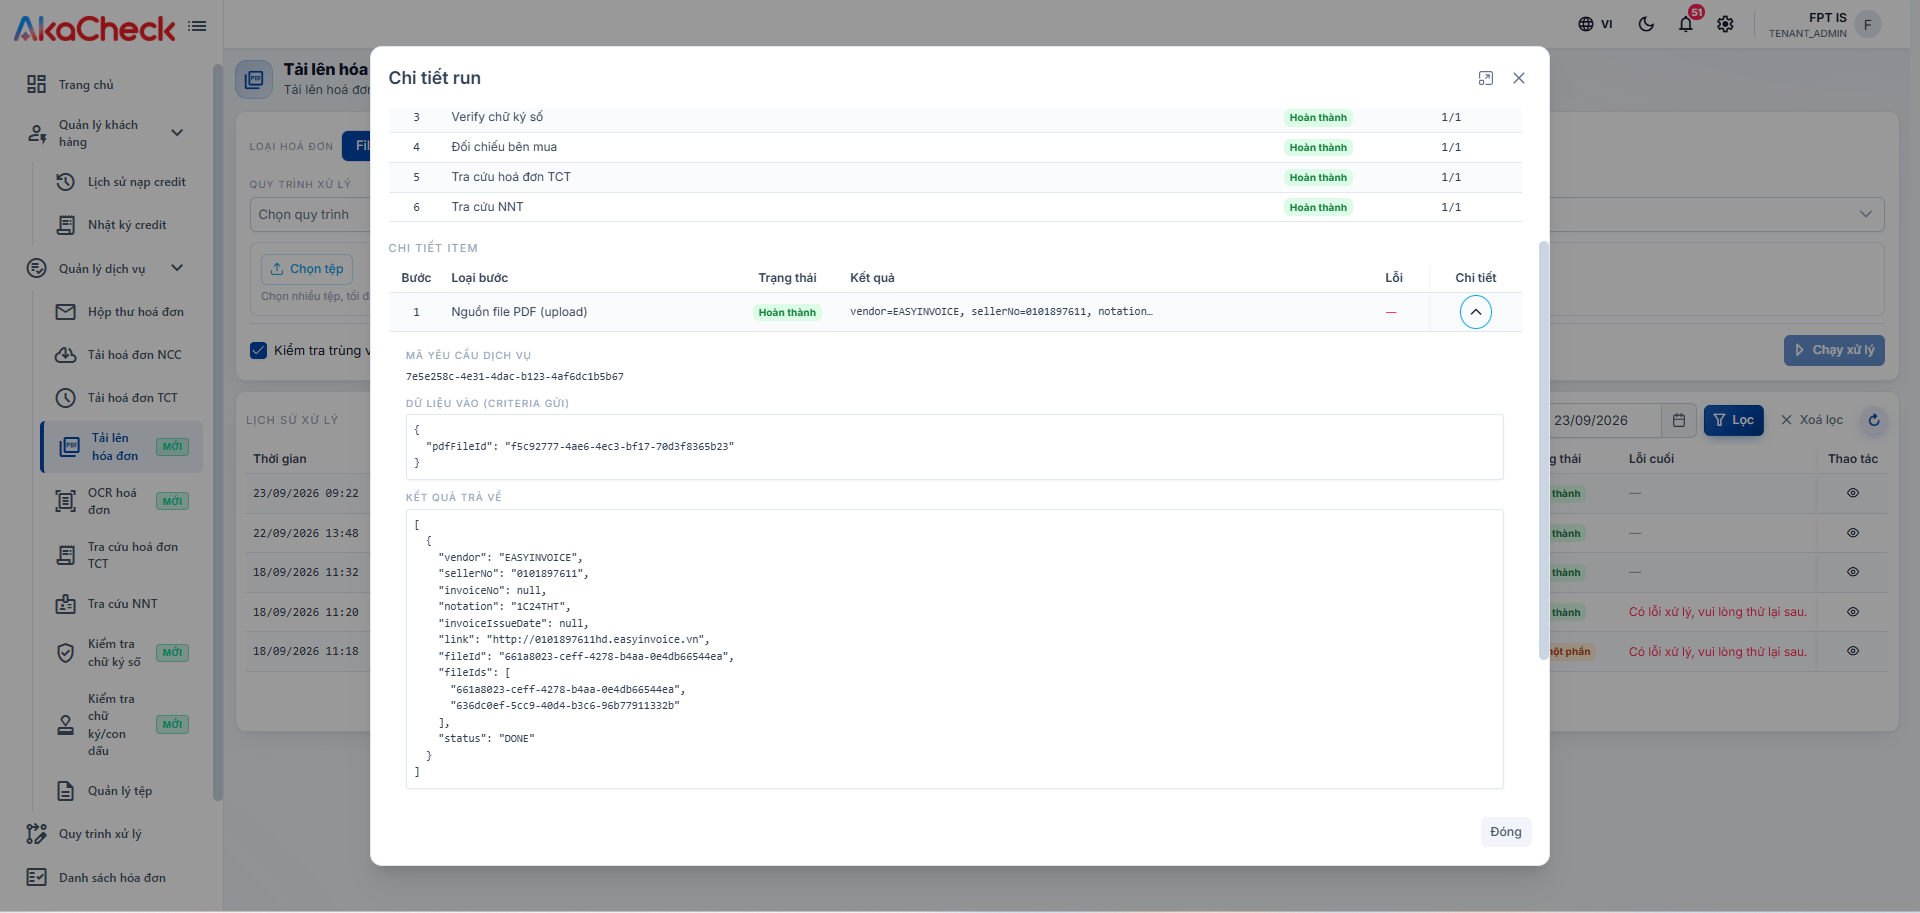
If a step fails, the flow stops there — later steps are marked Skipped, and you can click Retry incomplete items once you've resolved the cause of the error.
OCR Invoice
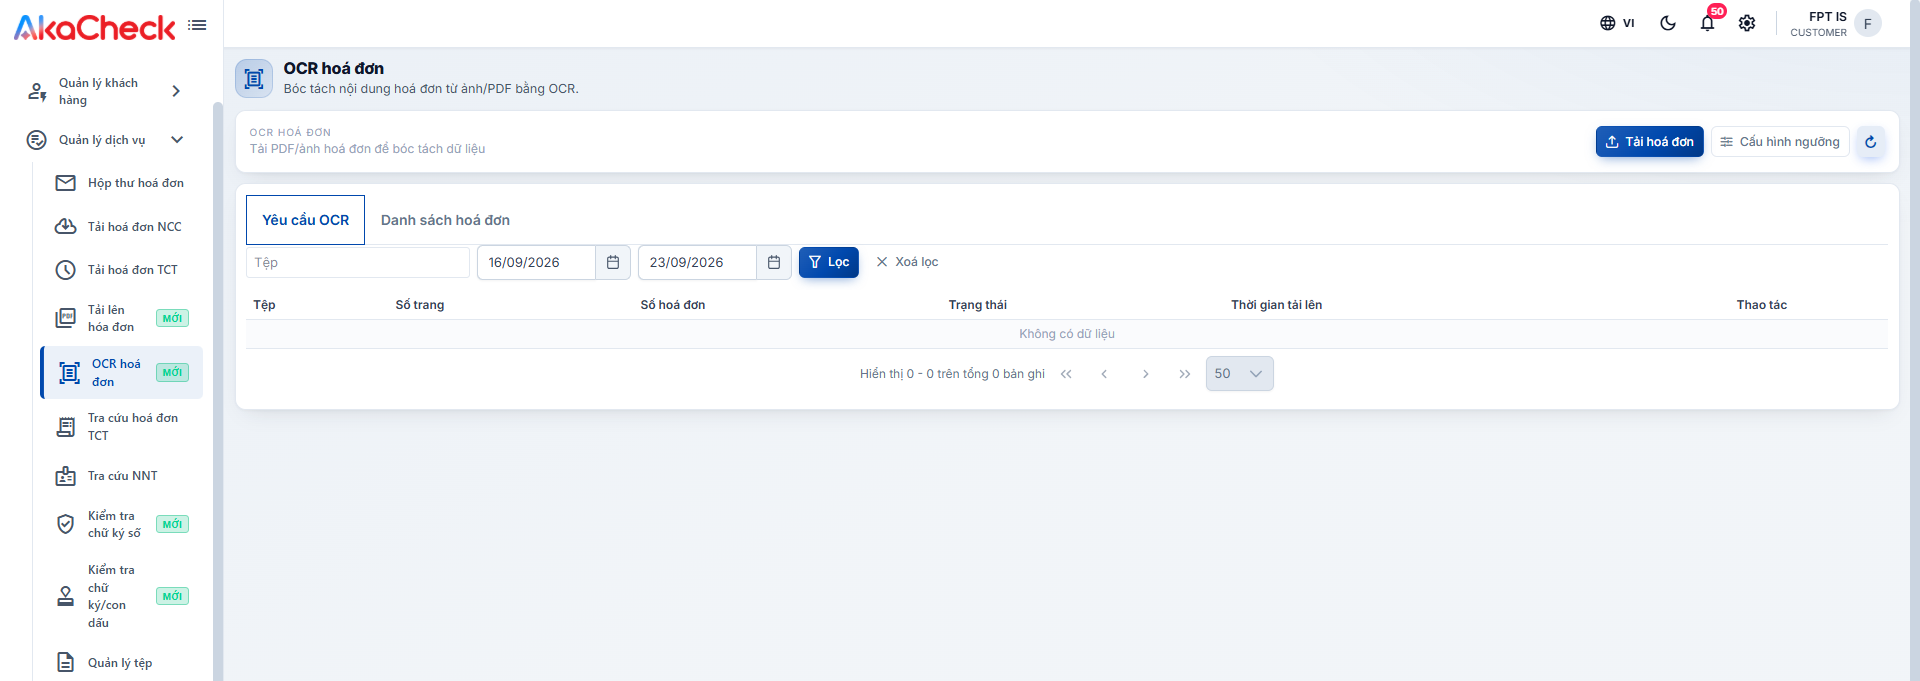
Go to Service Management > OCR Invoice to extract invoice data from a scanned image or PDF that does not have machine-readable content. Only use this service when your invoice is a scanned image; if you already have the original PDF/XML file, Invoice Upload above is faster.
- OCR Requests tab: Lists the files you've submitted for OCR, including file name, page count, number of invoices extracted, processing status (pending, processing, completed, failed), and upload time. You can filter by file name and date range.
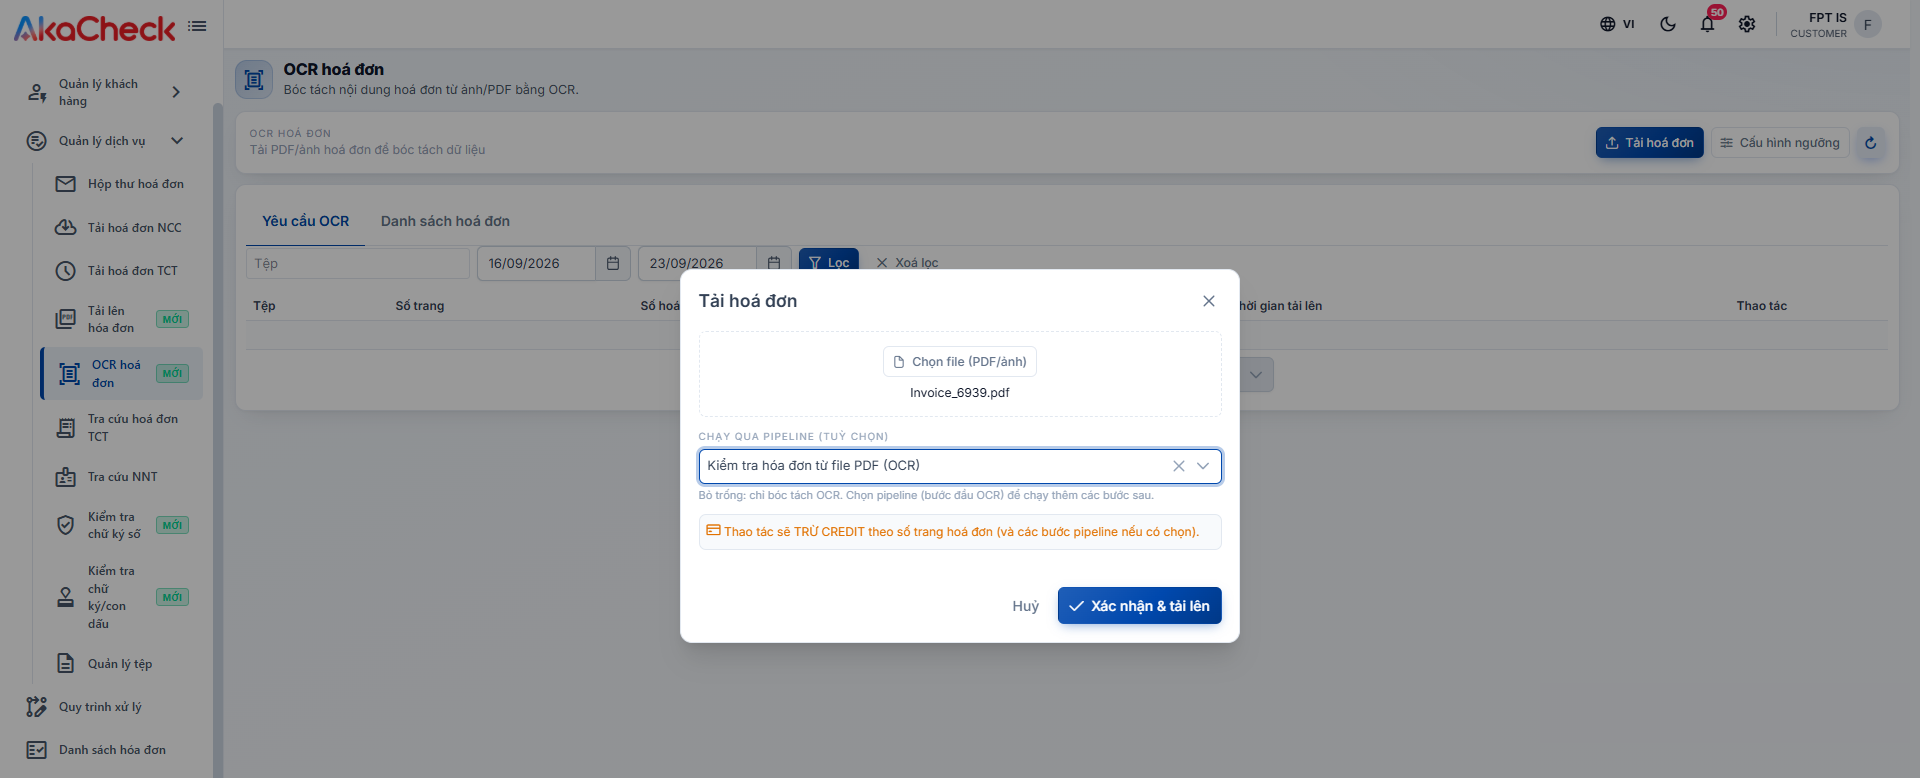
- Click Upload Invoice to select a PDF/image file. You can optionally run the file through a pipeline right after OCR (for example, a pipeline that also verifies the digital signature), or leave it as "No pipeline — OCR only" if you just need the data extracted. Note that this action deducts credits based on the number of invoice pages, plus any pipeline steps you choose.
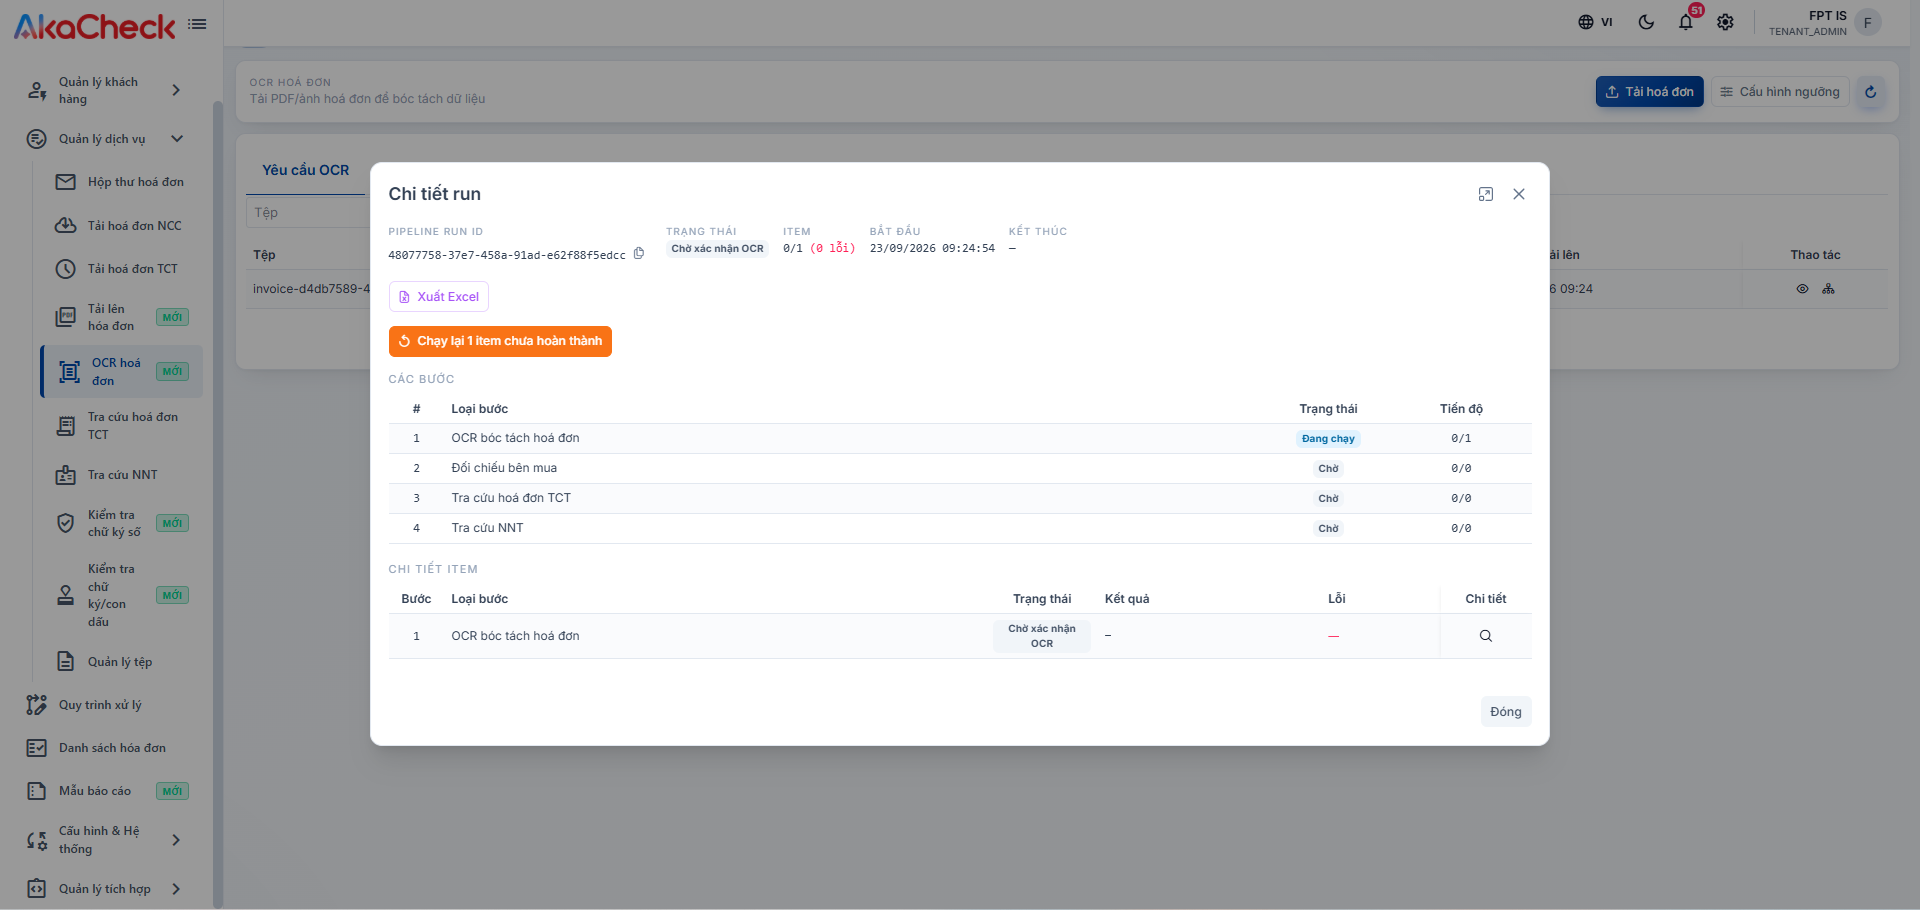
- If you chose a pipeline, click the network icon next to the eye icon to open Run Details — it includes similar steps to Invoice Upload. The "OCR extraction" step pauses at Pending OCR Confirmation until you confirm the extracted data on the Invoice List tab; only then do the later steps (compare buyer, tax authority invoice lookup, taxpayer lookup...) continue.
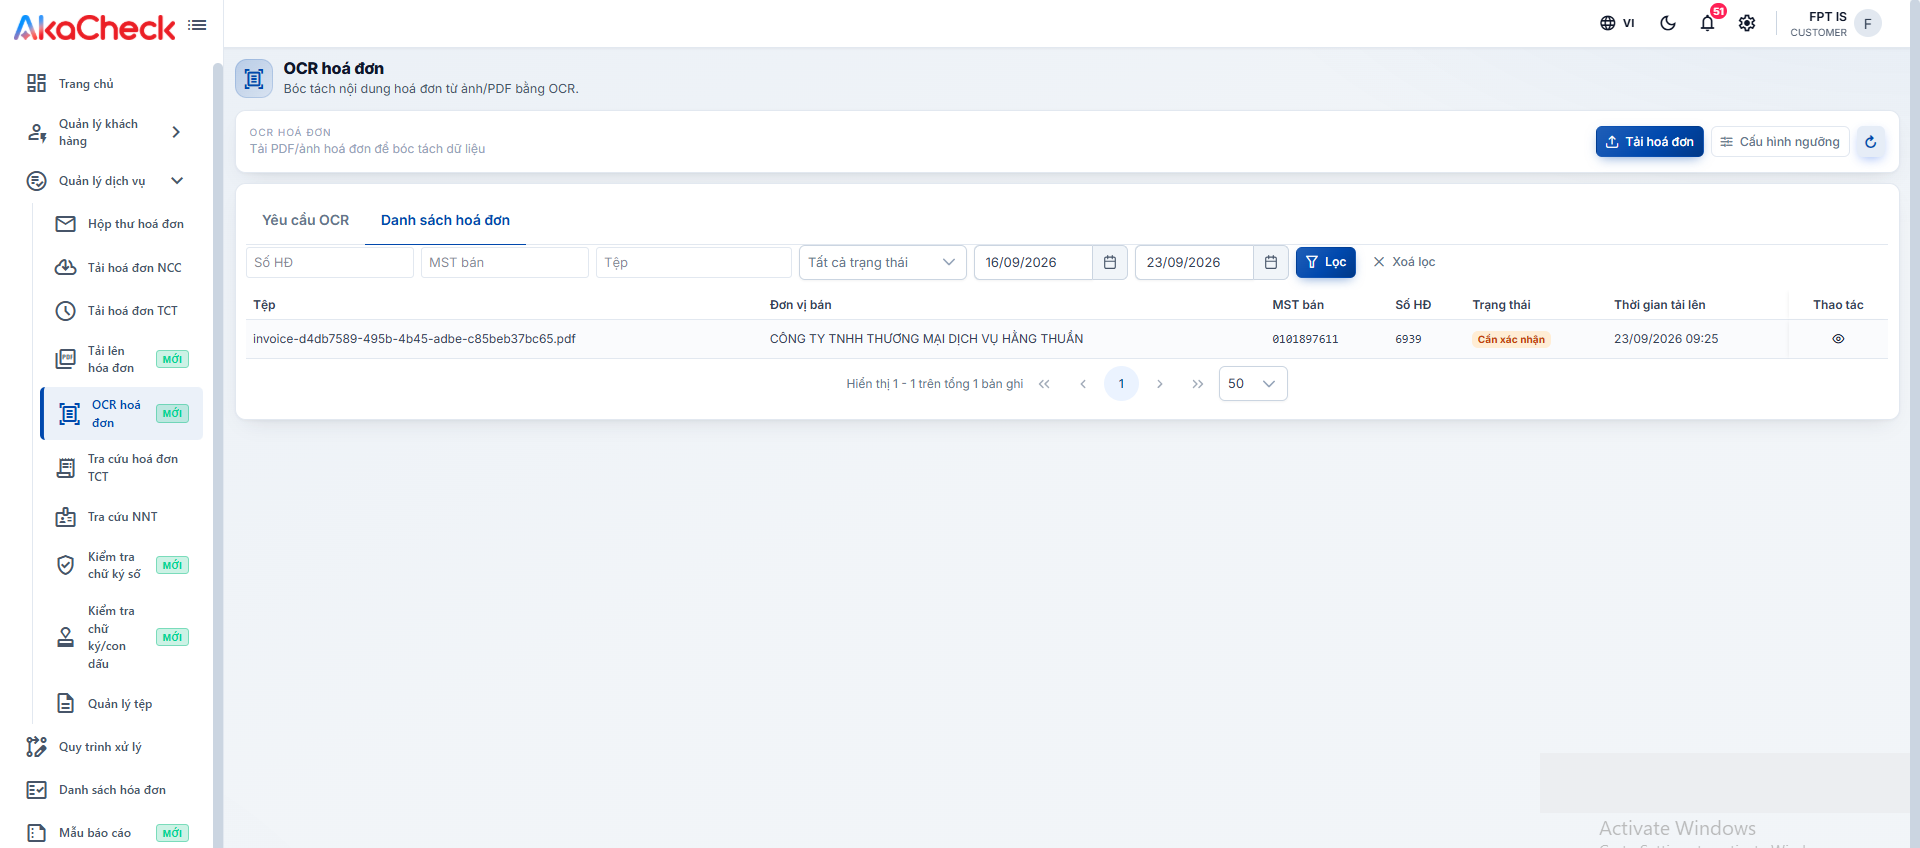
- Invoice List tab: Once OCR completes, the extracted invoice appears here. Invoices that need review are marked Needs Confirmation — open the invoice to confirm the extracted data is correct.
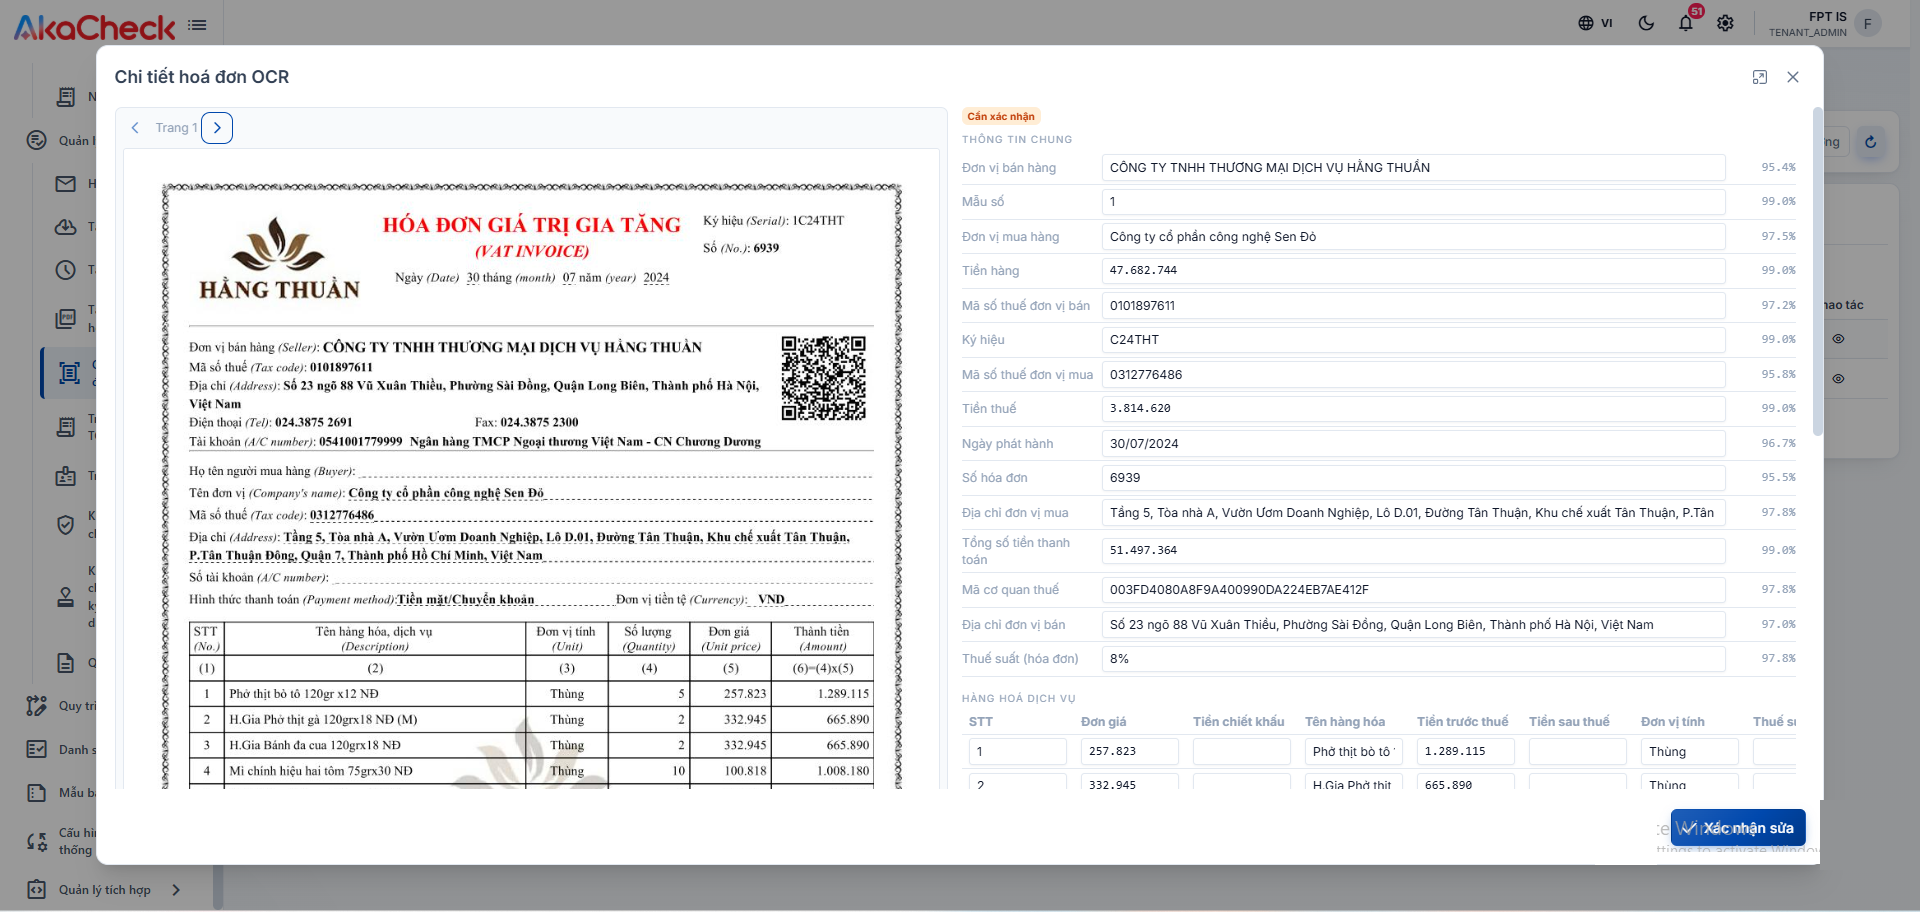
- Click the eye icon to open OCR Invoice Details: the original invoice image is on the left (you can page through it if the invoice has multiple pages), and the extracted data fields are on the right, each with a confidence percentage (General Information and Line Items). Correct any field that's wrong, then click Confirm Changes to save.
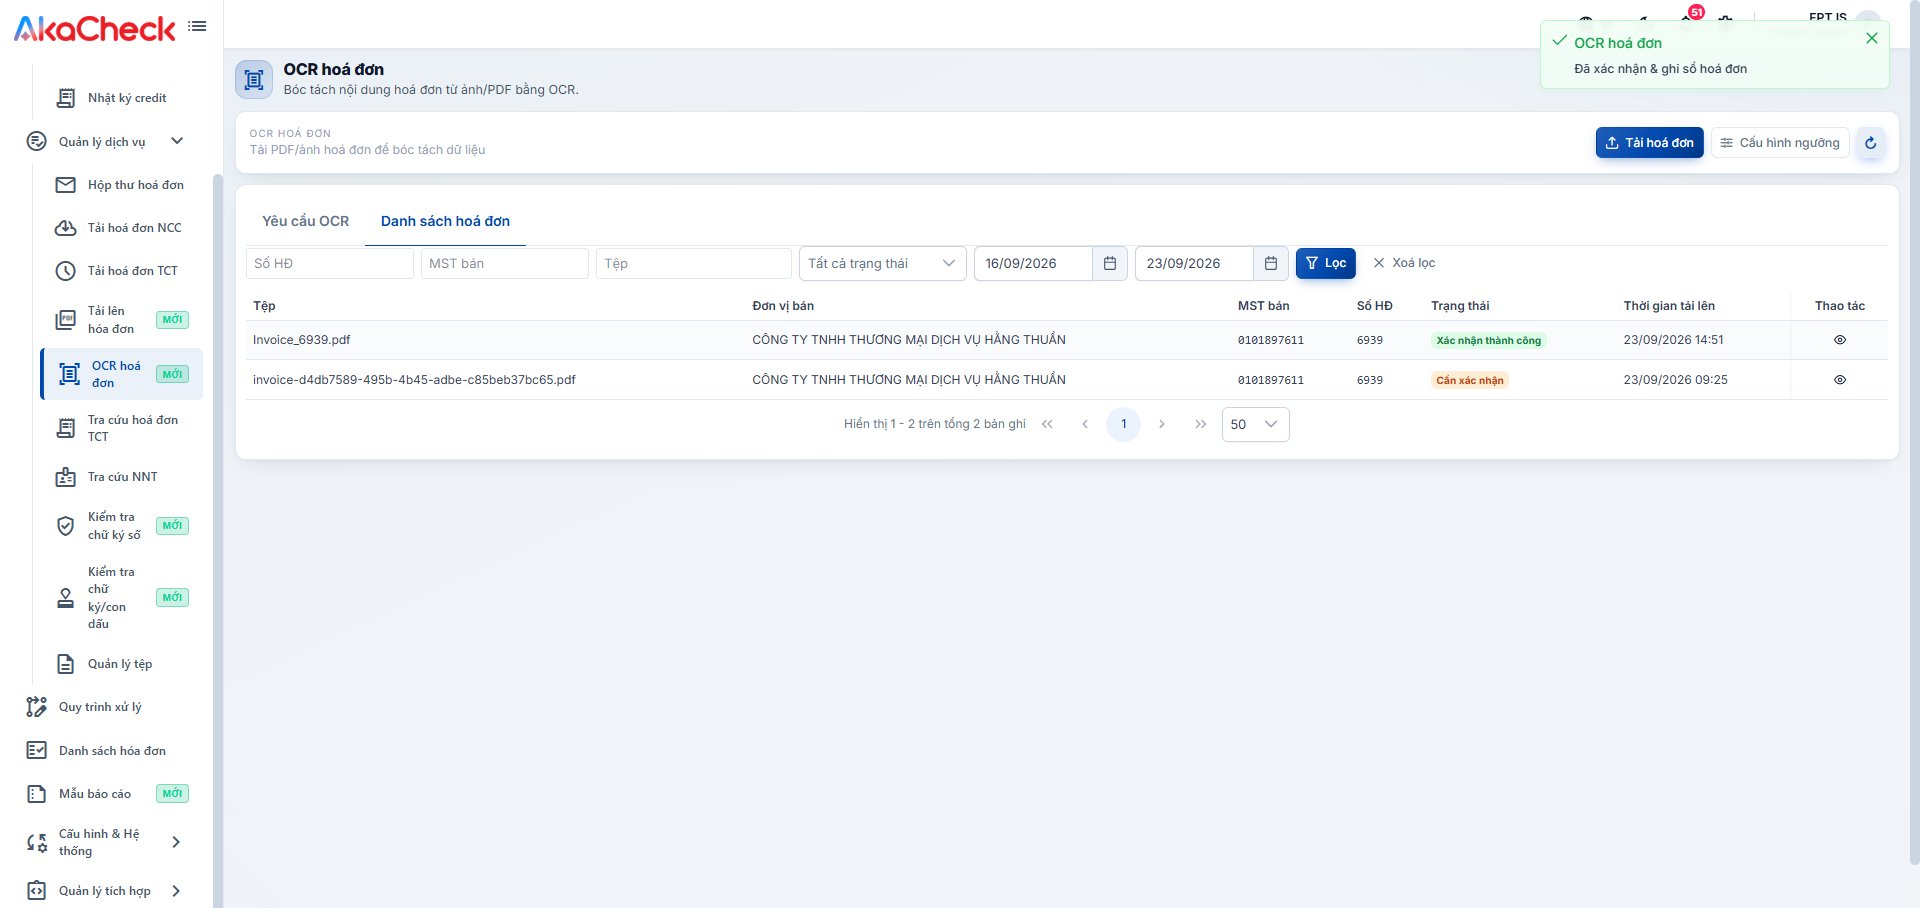
- Once confirmed, the invoice moves to Confirmed status and is recorded in the system.
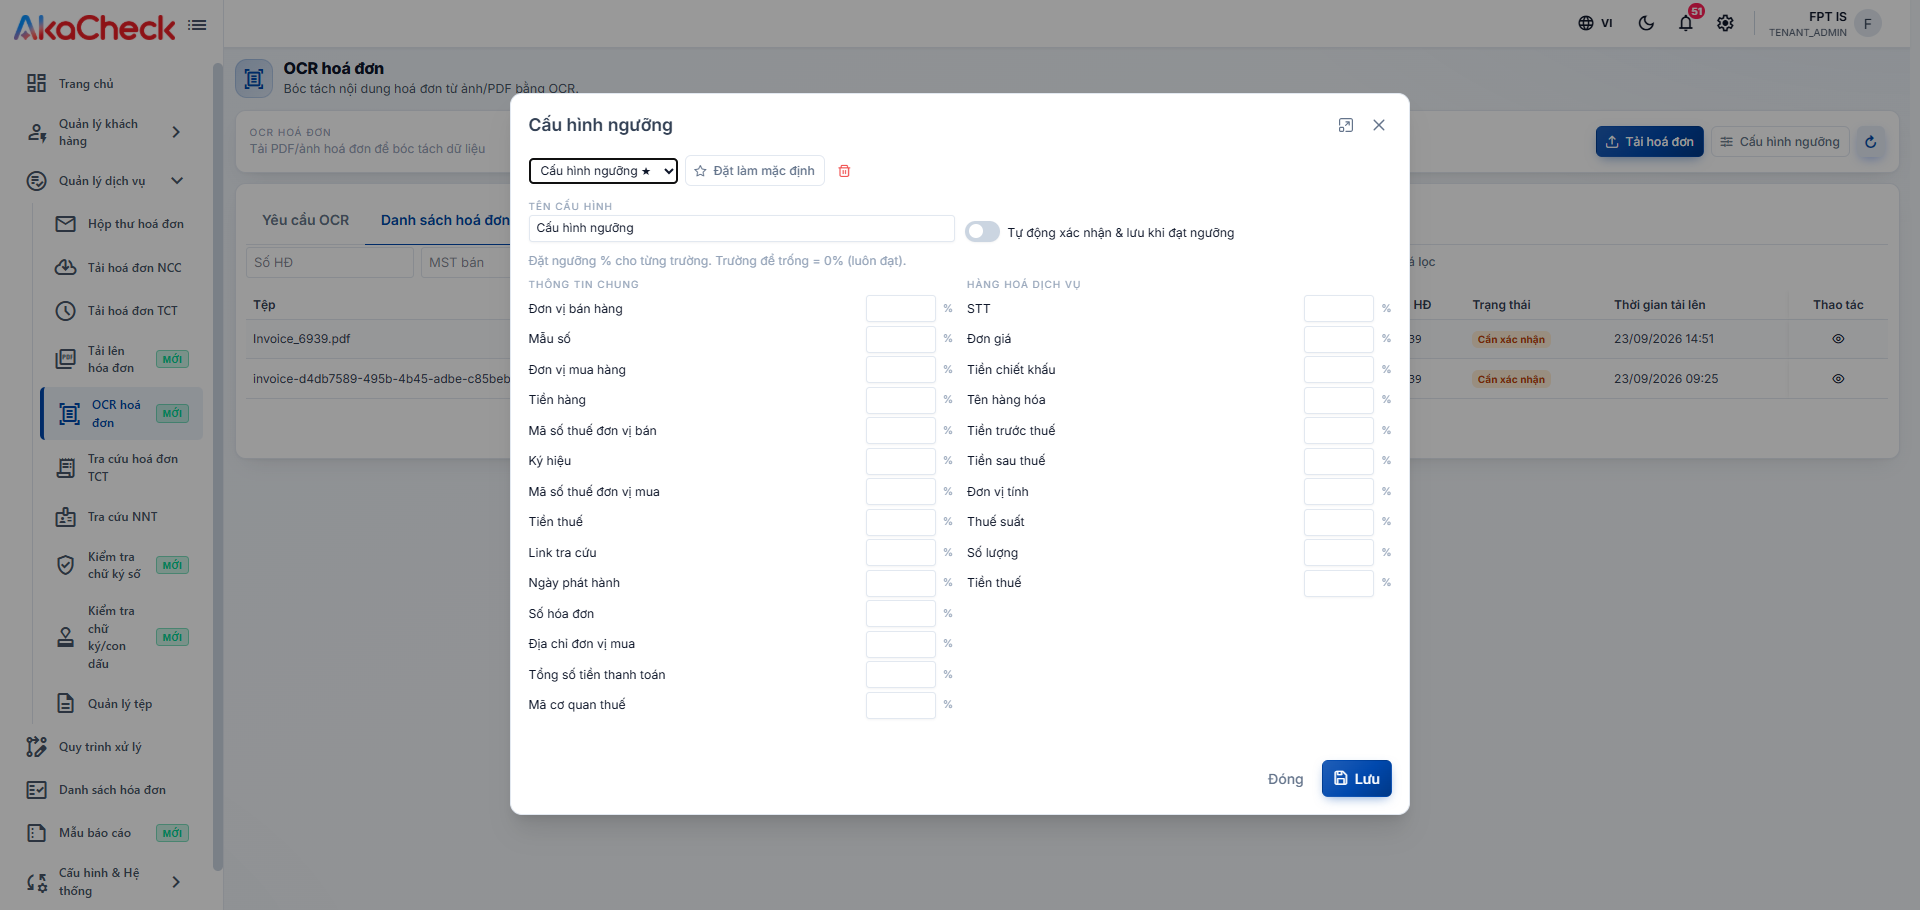
Separately from this flow, the Threshold Configuration button at the top of the page (next to Upload Invoice) lets you set a confidence threshold (%) for each data field (seller, tax code, amount, line items...) ahead of time — regardless of whether you've uploaded any invoice yet. Invoices with a field extracted below the threshold always require manual confirmation in step 5; you can also turn on Auto-confirm & save when threshold is met to skip confirmation for invoices that meet the threshold on every field.
Stage 2 — Verify and Cross-Check Invoices
Tax Authority Invoice Lookup
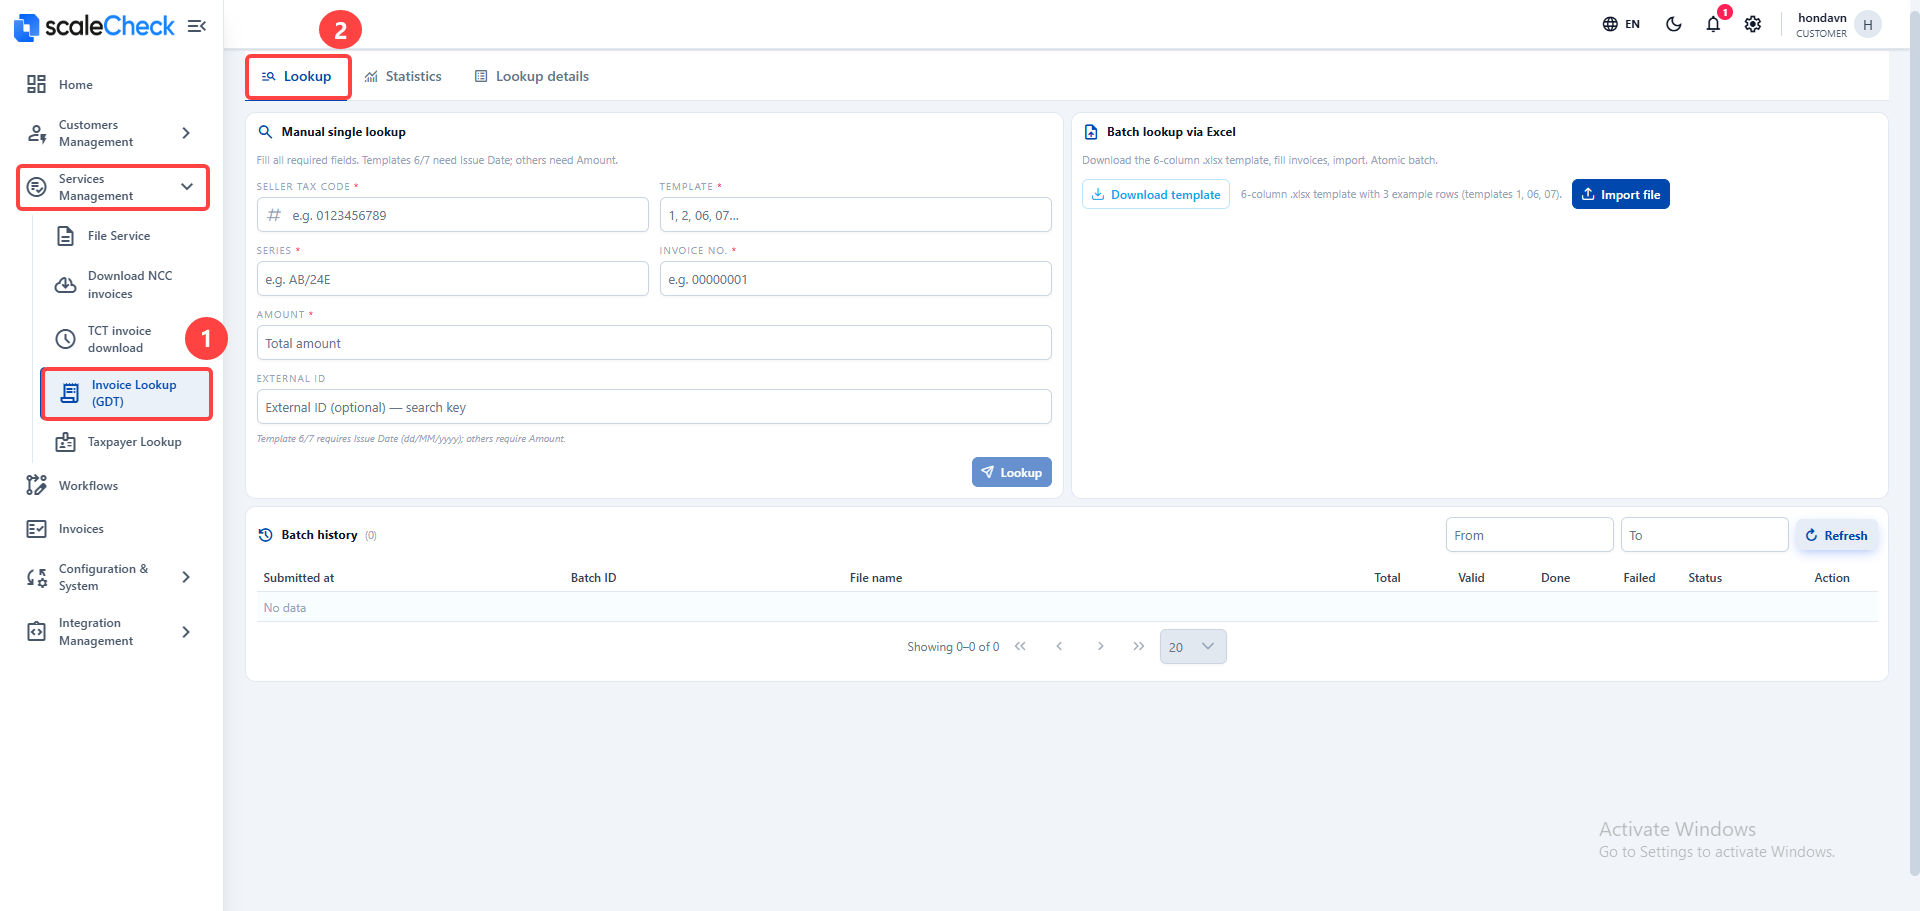
Use this service to compare and verify invoices against tax authority data.
- You can look up one invoice or process multiple invoices in bulk:
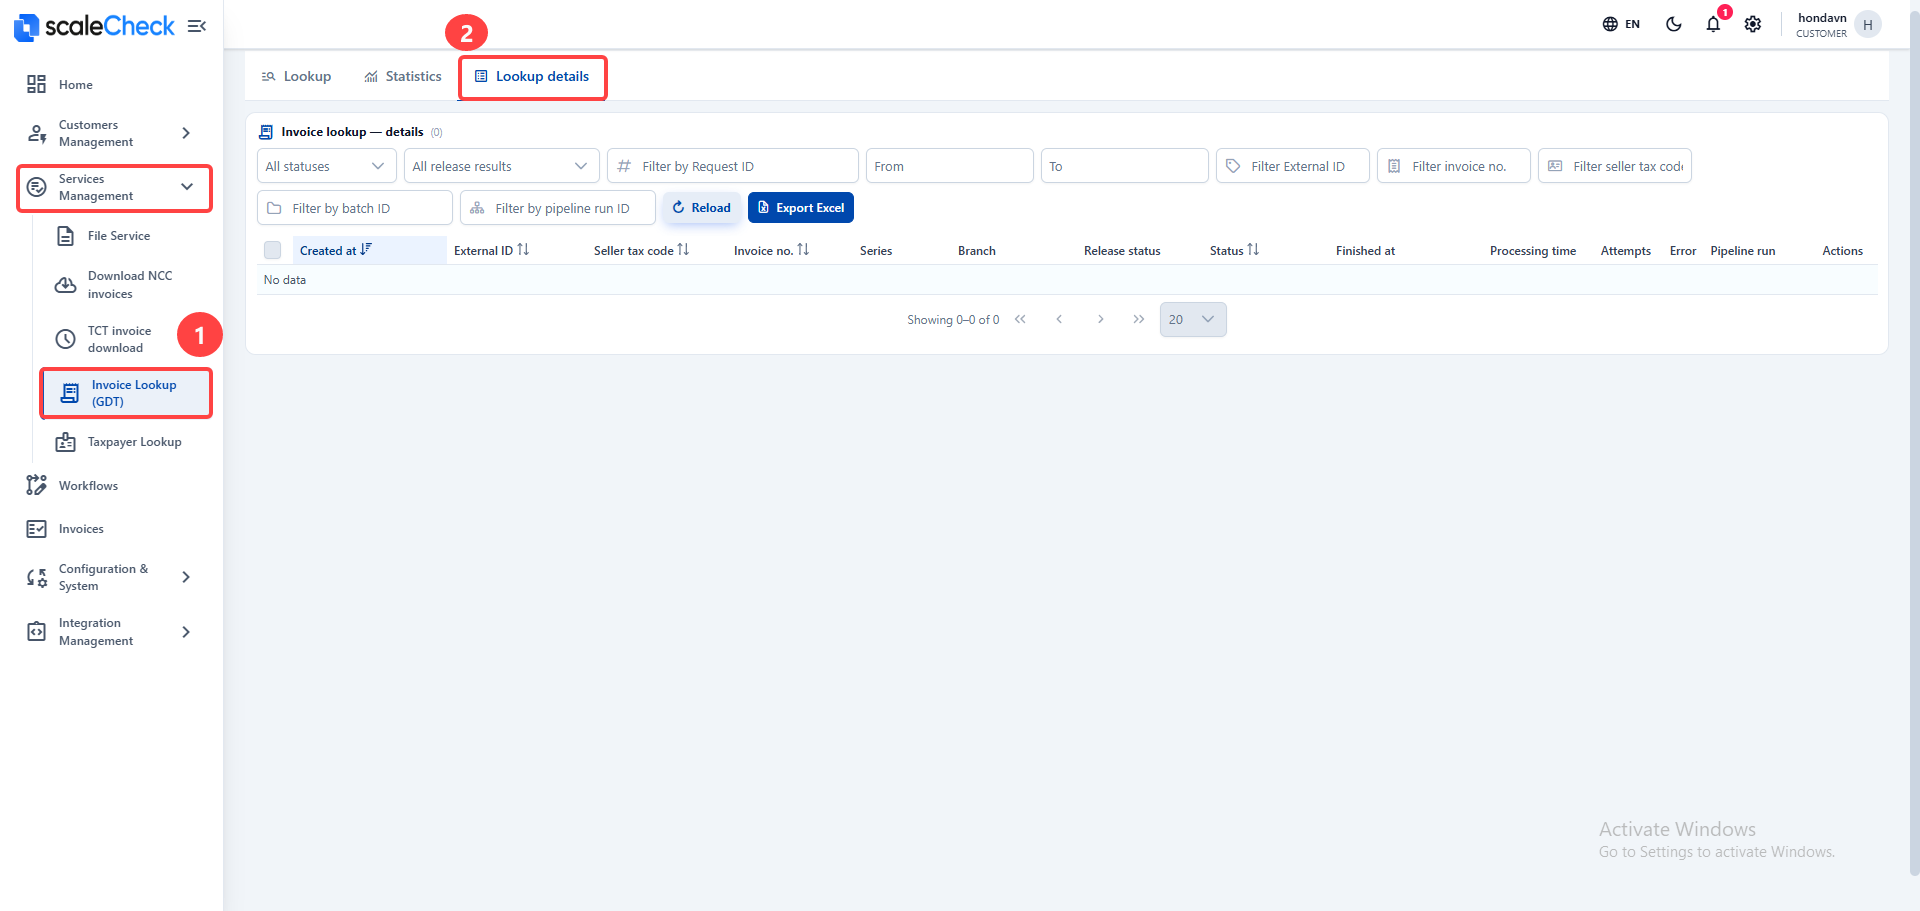
- Review the lookup details and history:
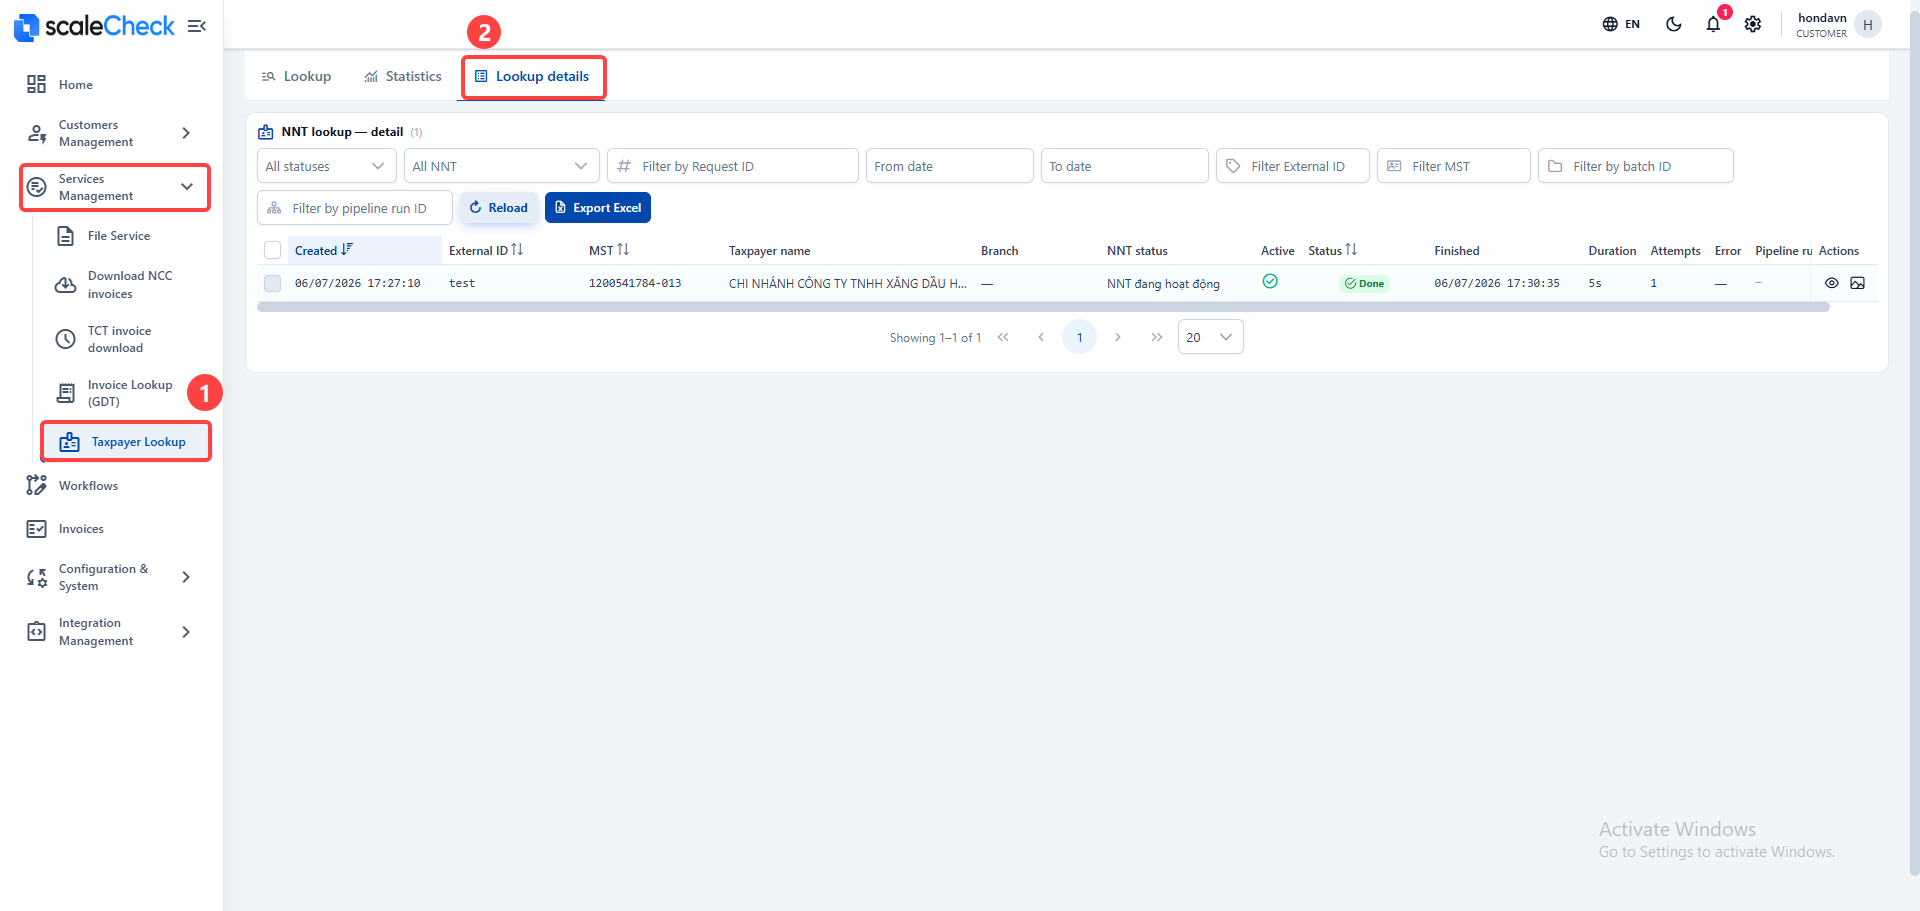
Taxpayer Lookup
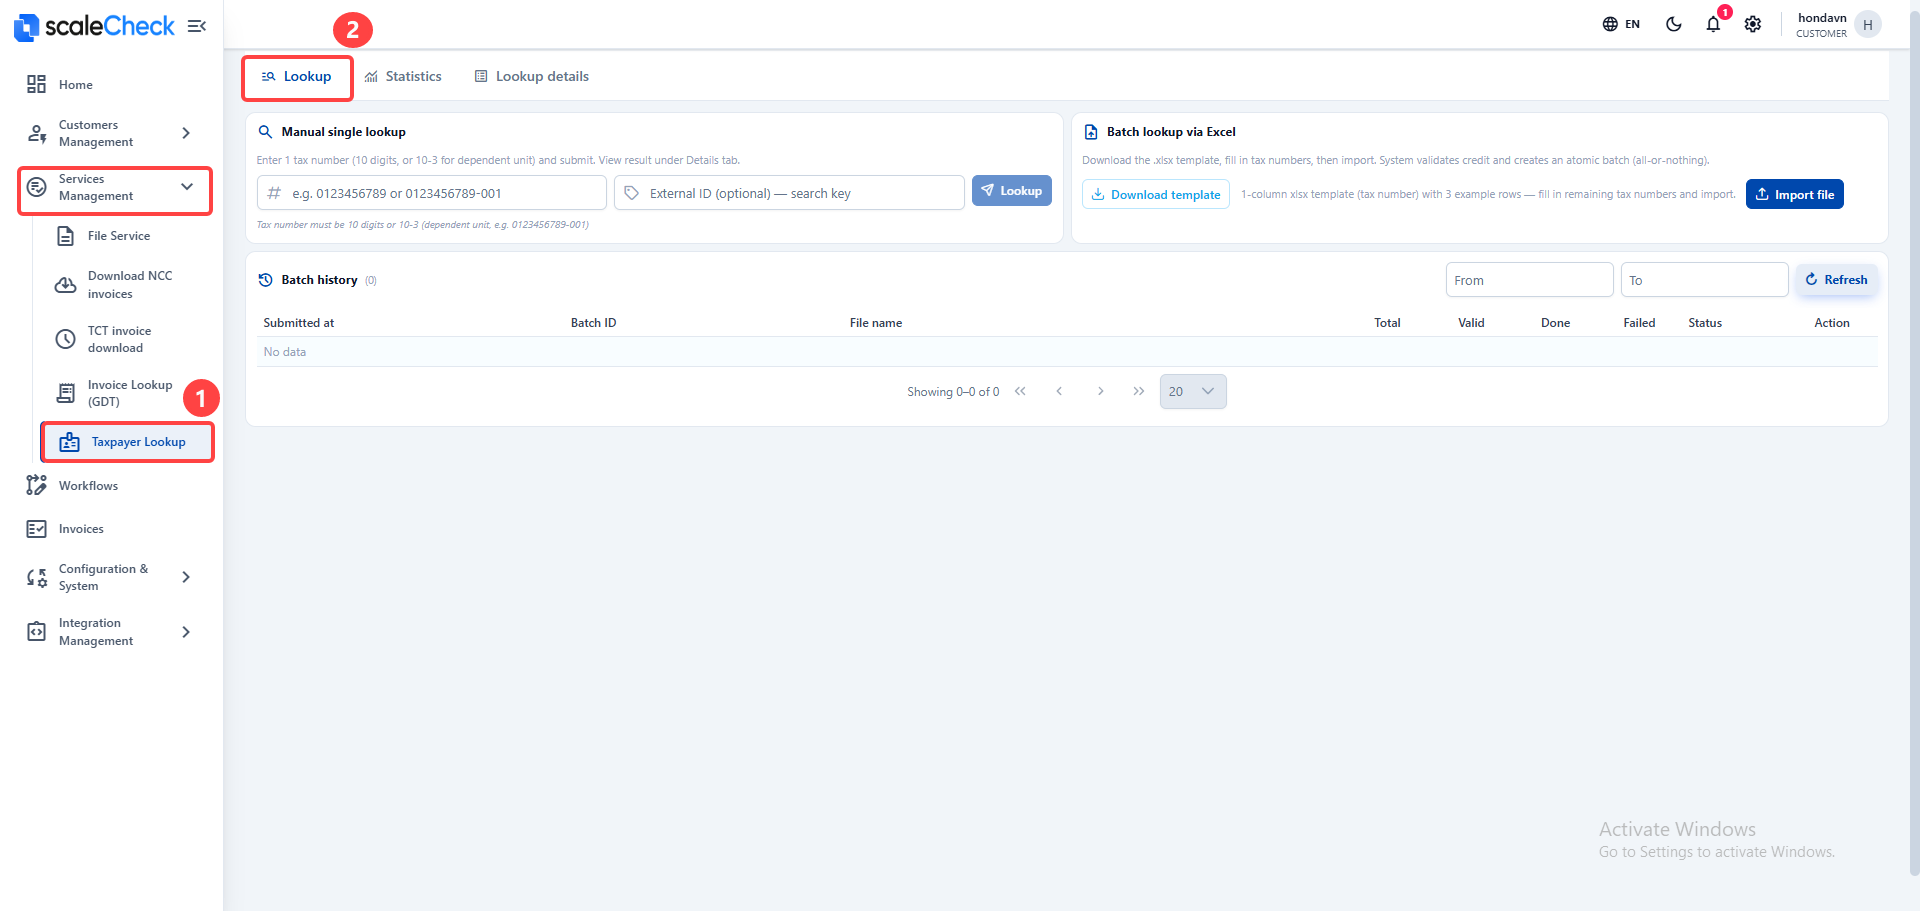
- Use this service to check the operating status of the seller or taxpayer tax code.
- Look up a single tax code or import an Excel file of tax codes:
- View history and results in the Details / Statistics tabs. Each lookup deducts credits based on the service pricing:
Digital Signature Verification
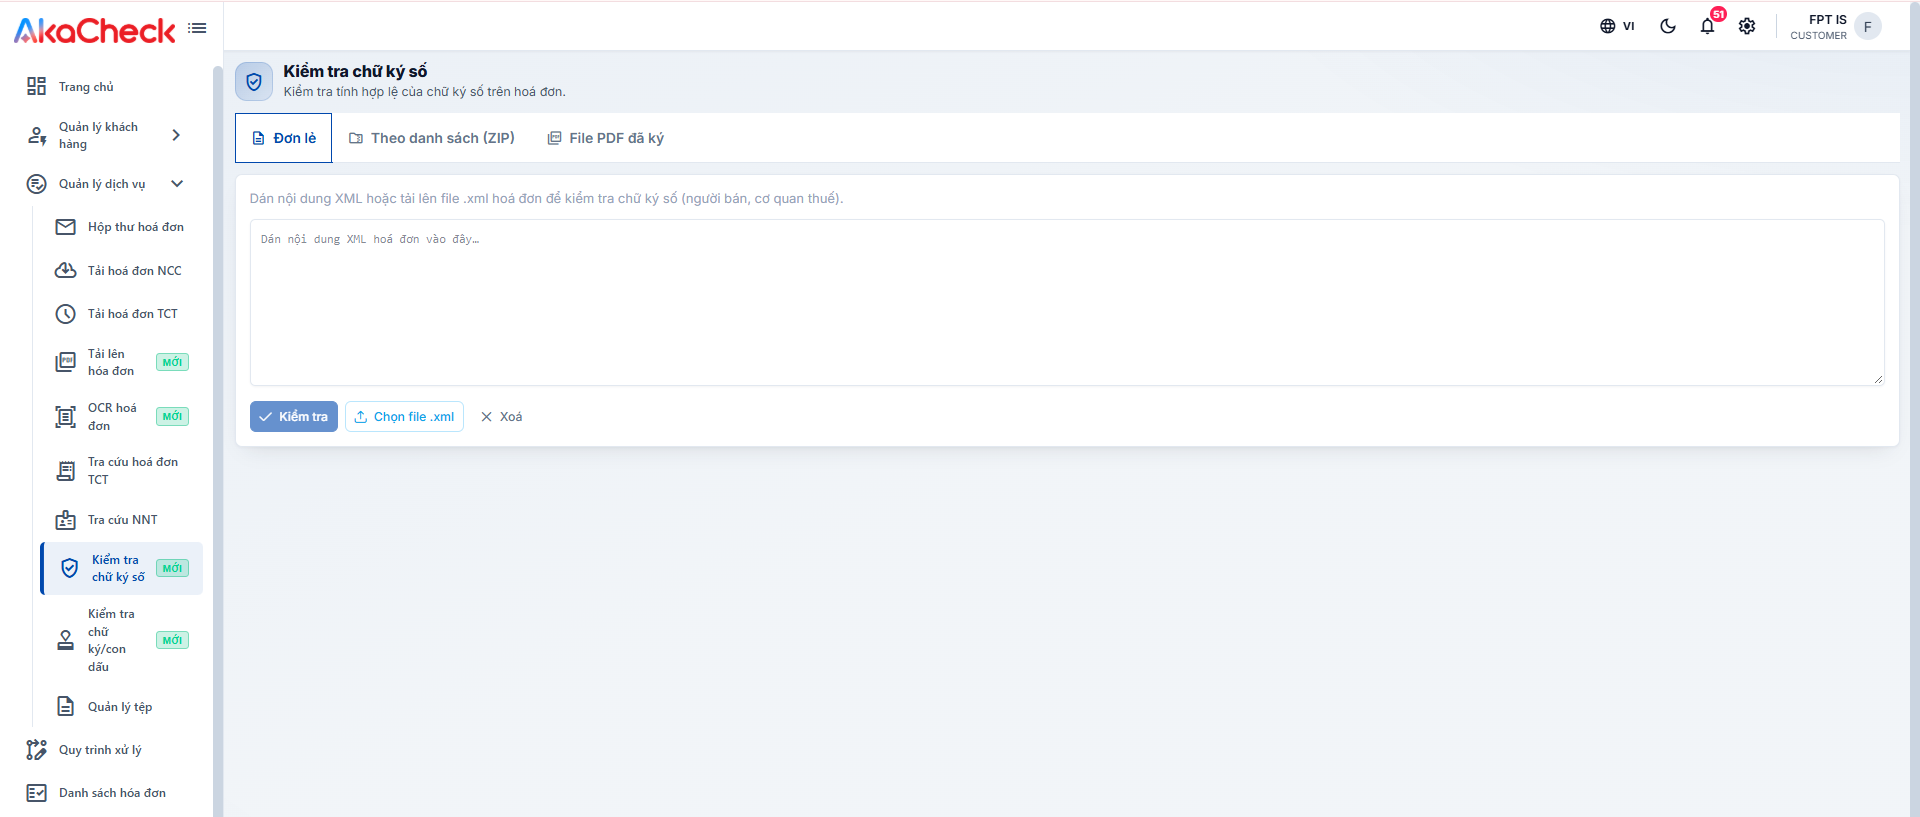
Go to Service Management > Digital Signature Verification to check whether the digital (electronic) signatures embedded in an invoice's XML file (seller and tax authority) are valid. There are three ways to submit invoices:
- Single: Paste the invoice XML content directly, or upload a single
.xmlfile.
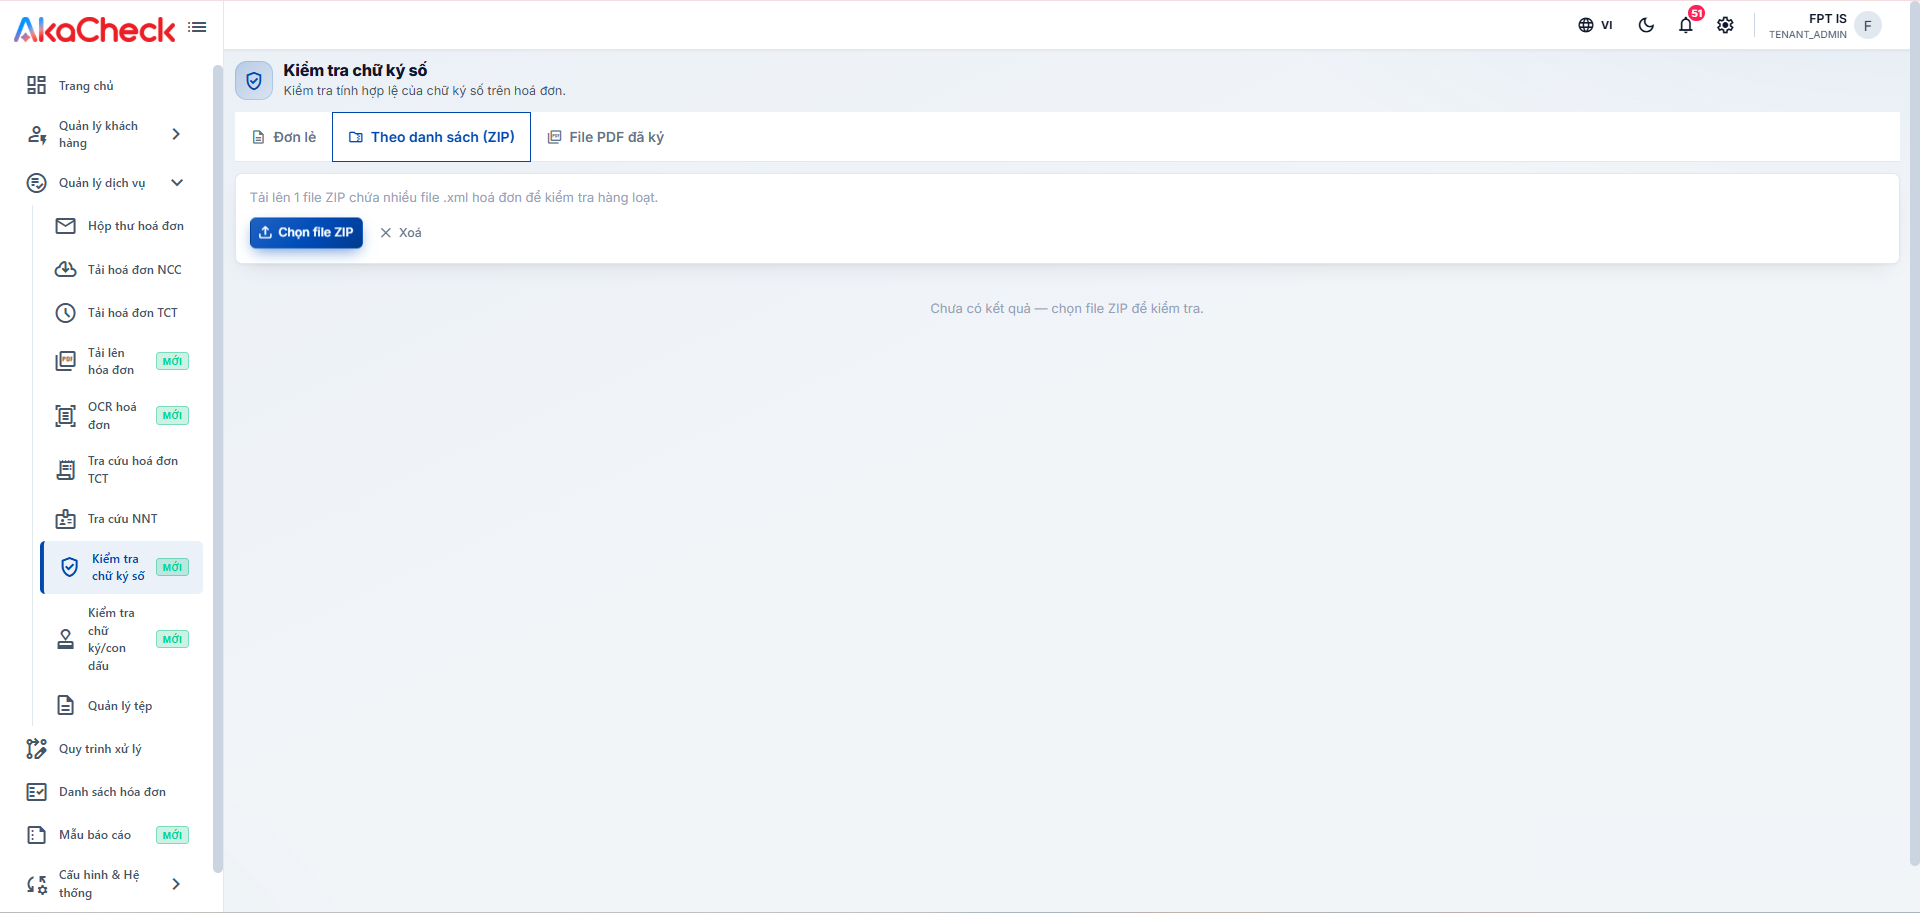
- By List (ZIP): Upload one ZIP file containing multiple invoice XML files to verify them in bulk.
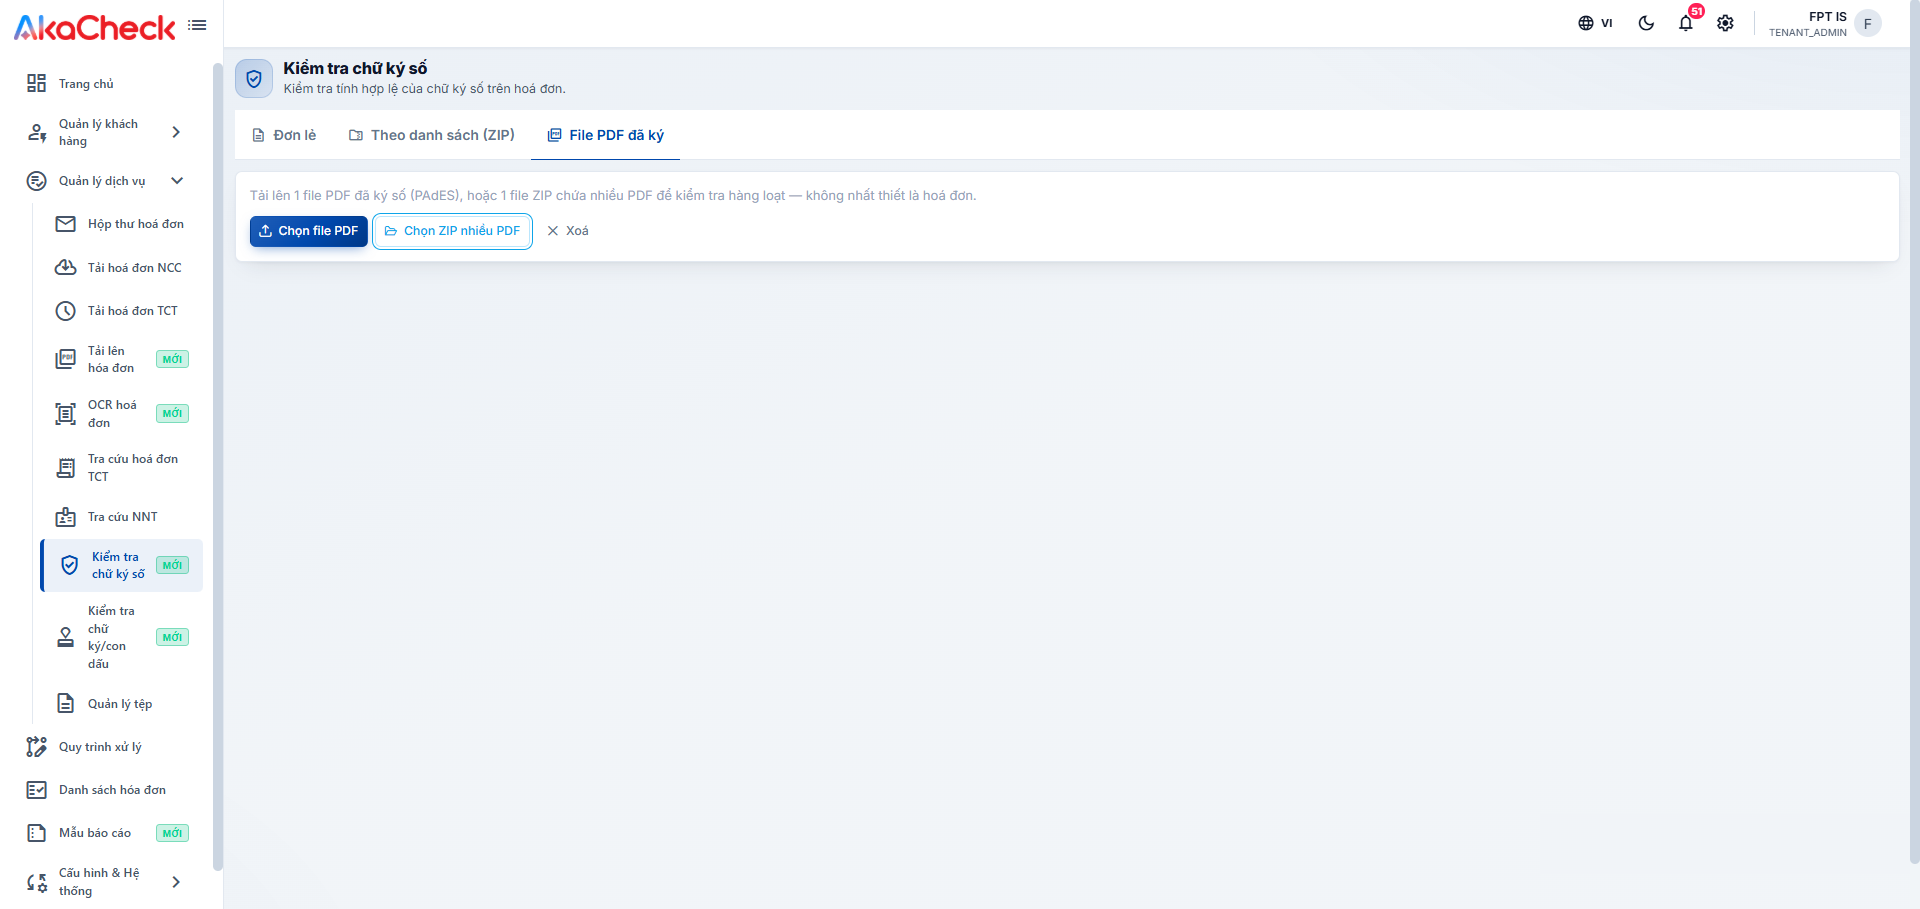
- Signed PDF File: Upload a digitally signed PDF (PAdES), or a ZIP of multiple PDFs, to verify signatures in bulk — the file does not have to be an invoice.
Signature/Stamp Verification
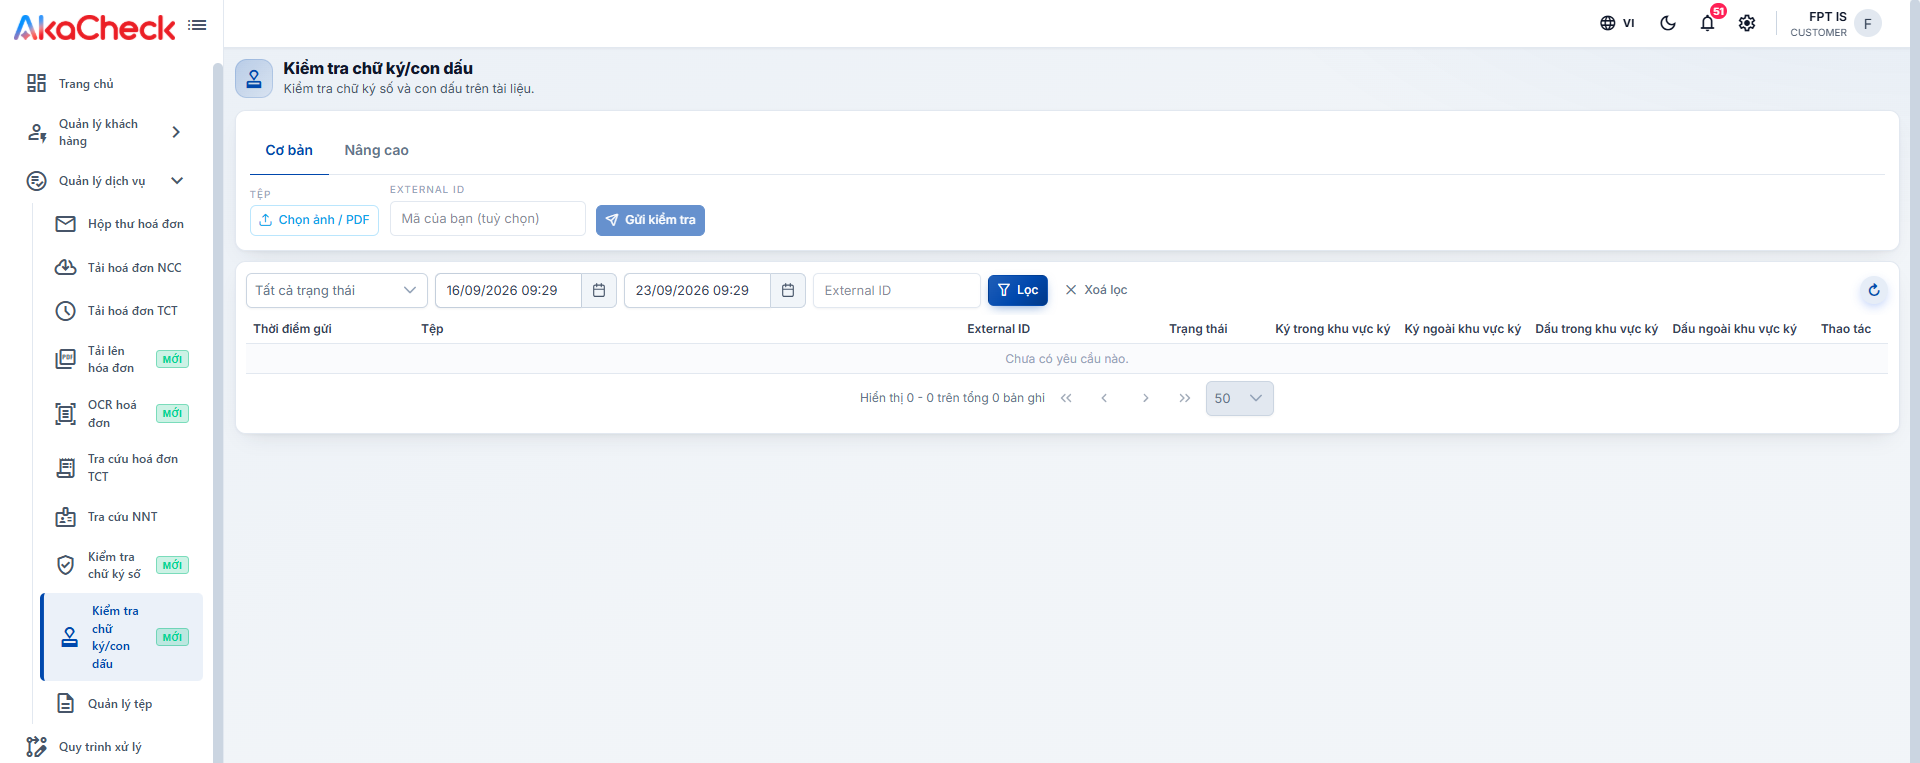
Go to Service Management > Signature/Stamp Verification to detect handwritten signatures and physical stamps on a document image or PDF (different from the digital signatures covered above), and check whether they fall inside or outside the defined signing area.
- Basic tab: Upload a file, optionally enter an External ID for your own tracking, then click Submit for Verification.
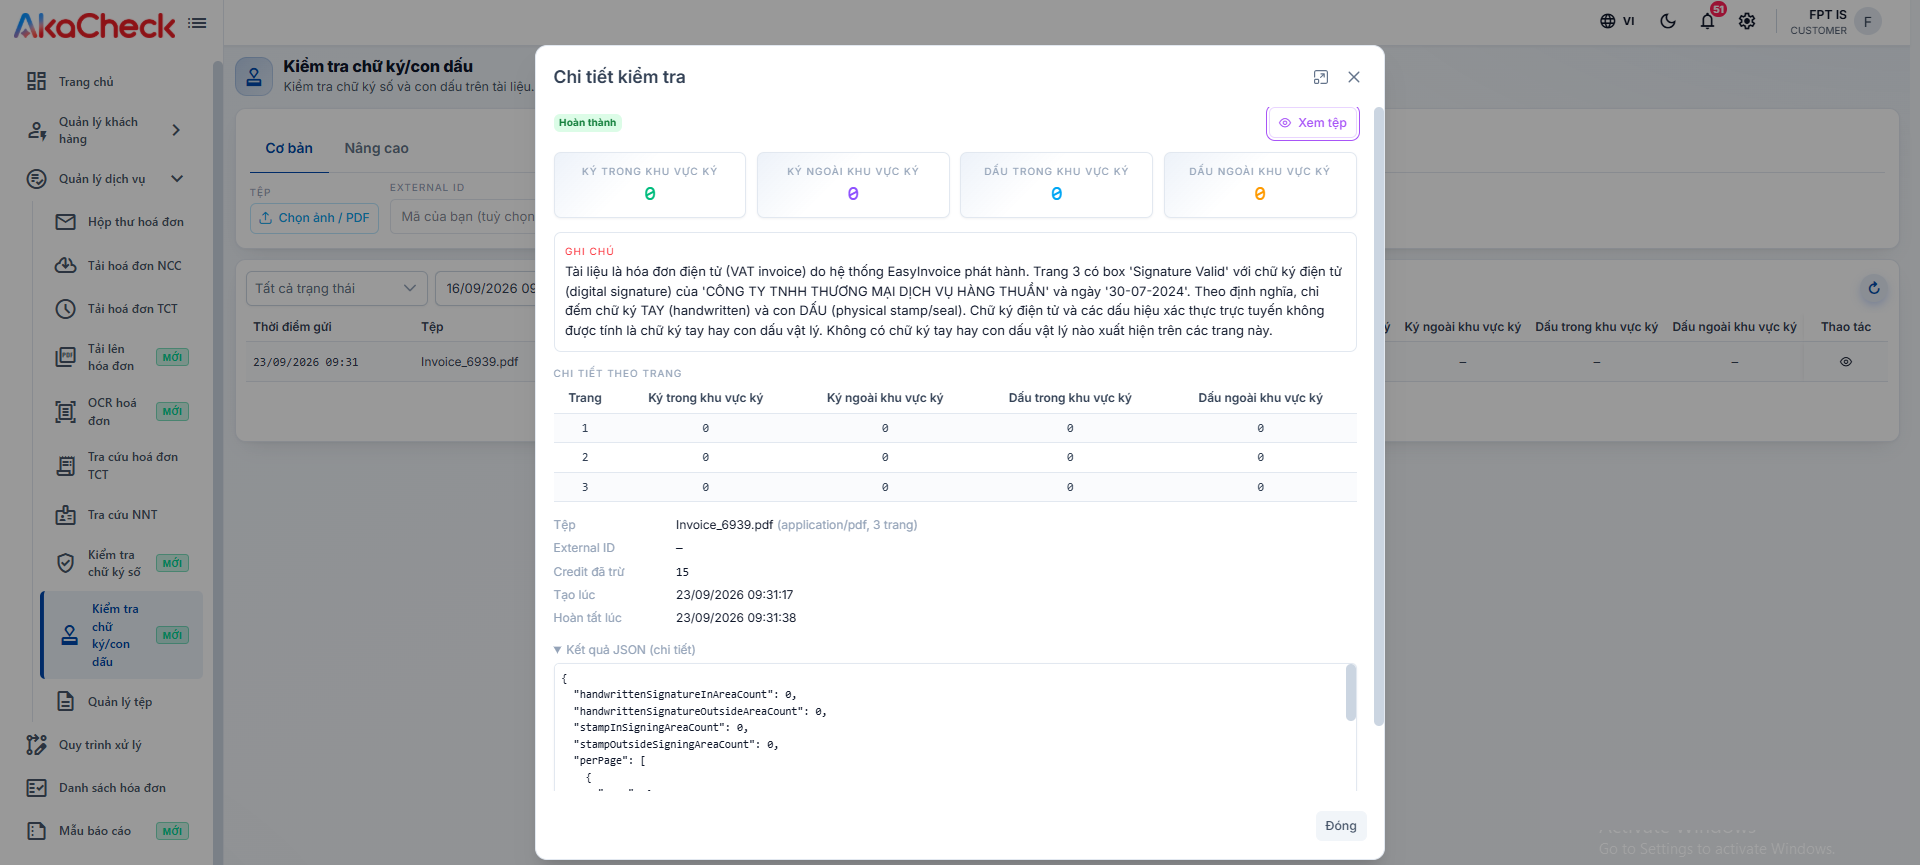
- The result table below shows, for each request, the number of signatures and stamps found inside and outside the signing area. Click the eye icon on a request to open Verification Details — including a breakdown by page and an AI-generated note explaining what was found on the document (for example, confirming the number of handwritten signatures/physical stamps detected, or clarifying that an on-screen "Signature Valid" badge on an e-invoice is not the same as a handwritten signature or a physical stamp):
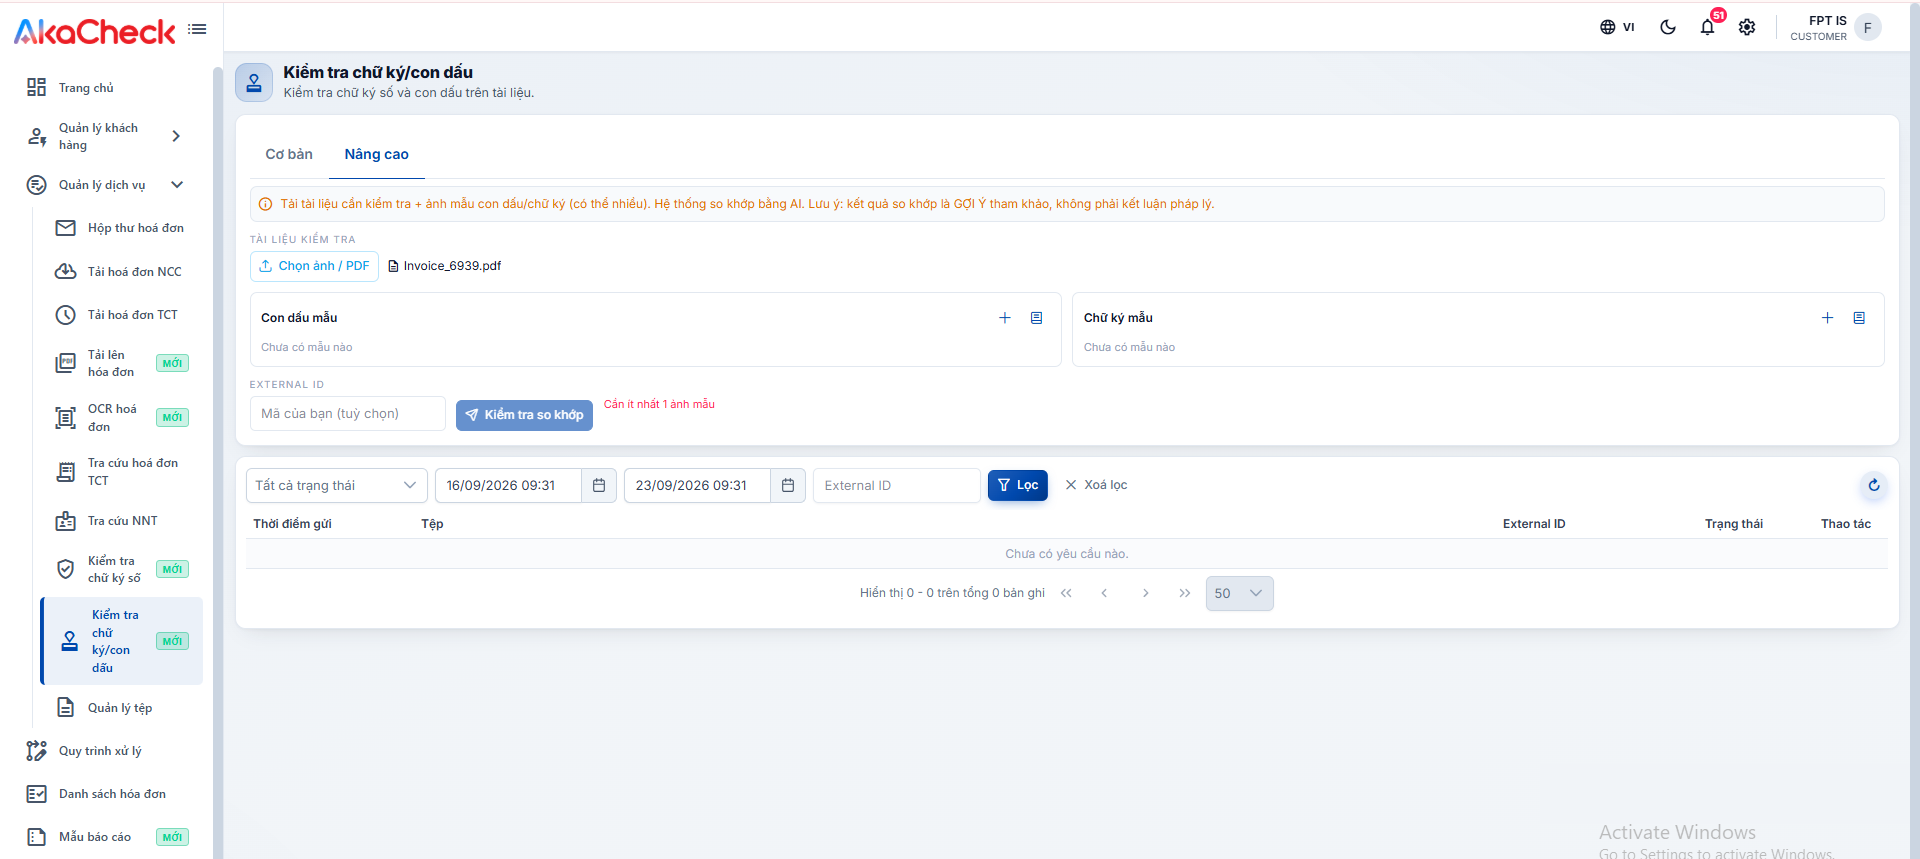
- Advanced tab: Upload the document to check together with one or more sample stamp and/or signature images, then click Check Match. The system uses AI to compare the document against your samples.
This matching result is a reference suggestion only, not a legal conclusion.
File Management
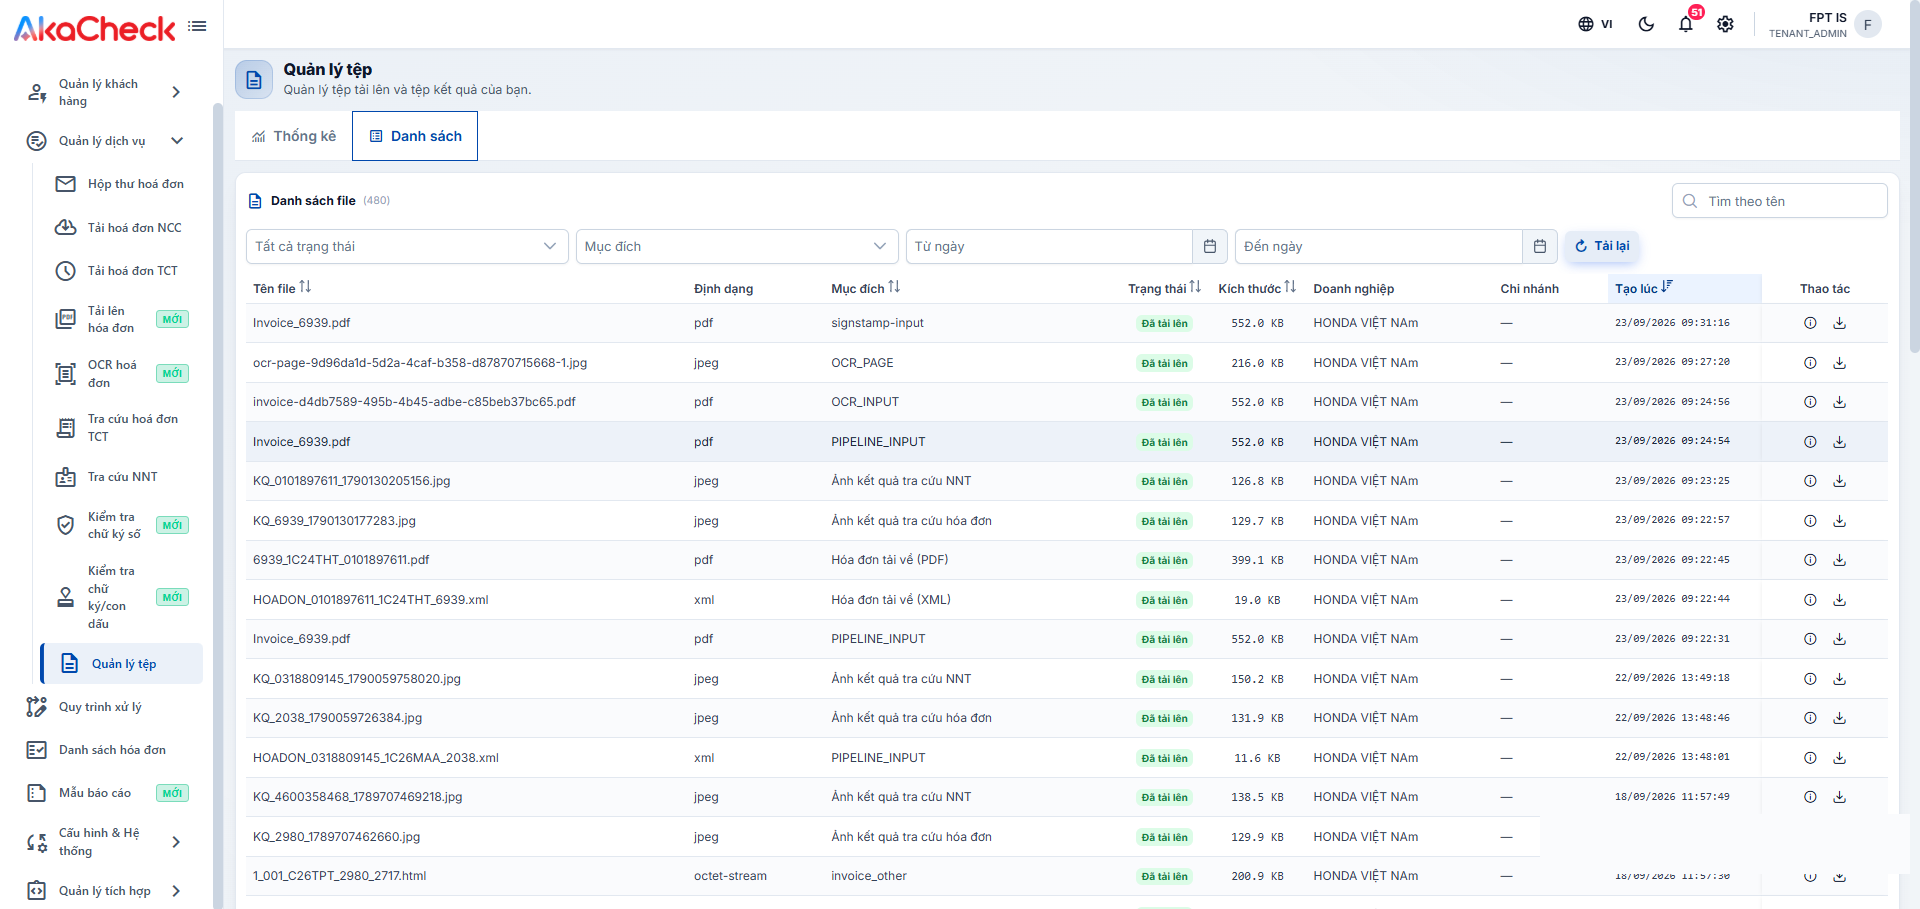
This is a shared archive for every file that has passed through the services above — not specific to Stage 1 or Stage 2. Go to Service Management > File Management to look up or re-download an original file (a PDF/XML invoice you uploaded) or an intermediate result file (an OCR page image, a lookup result image...) generated while processing it.
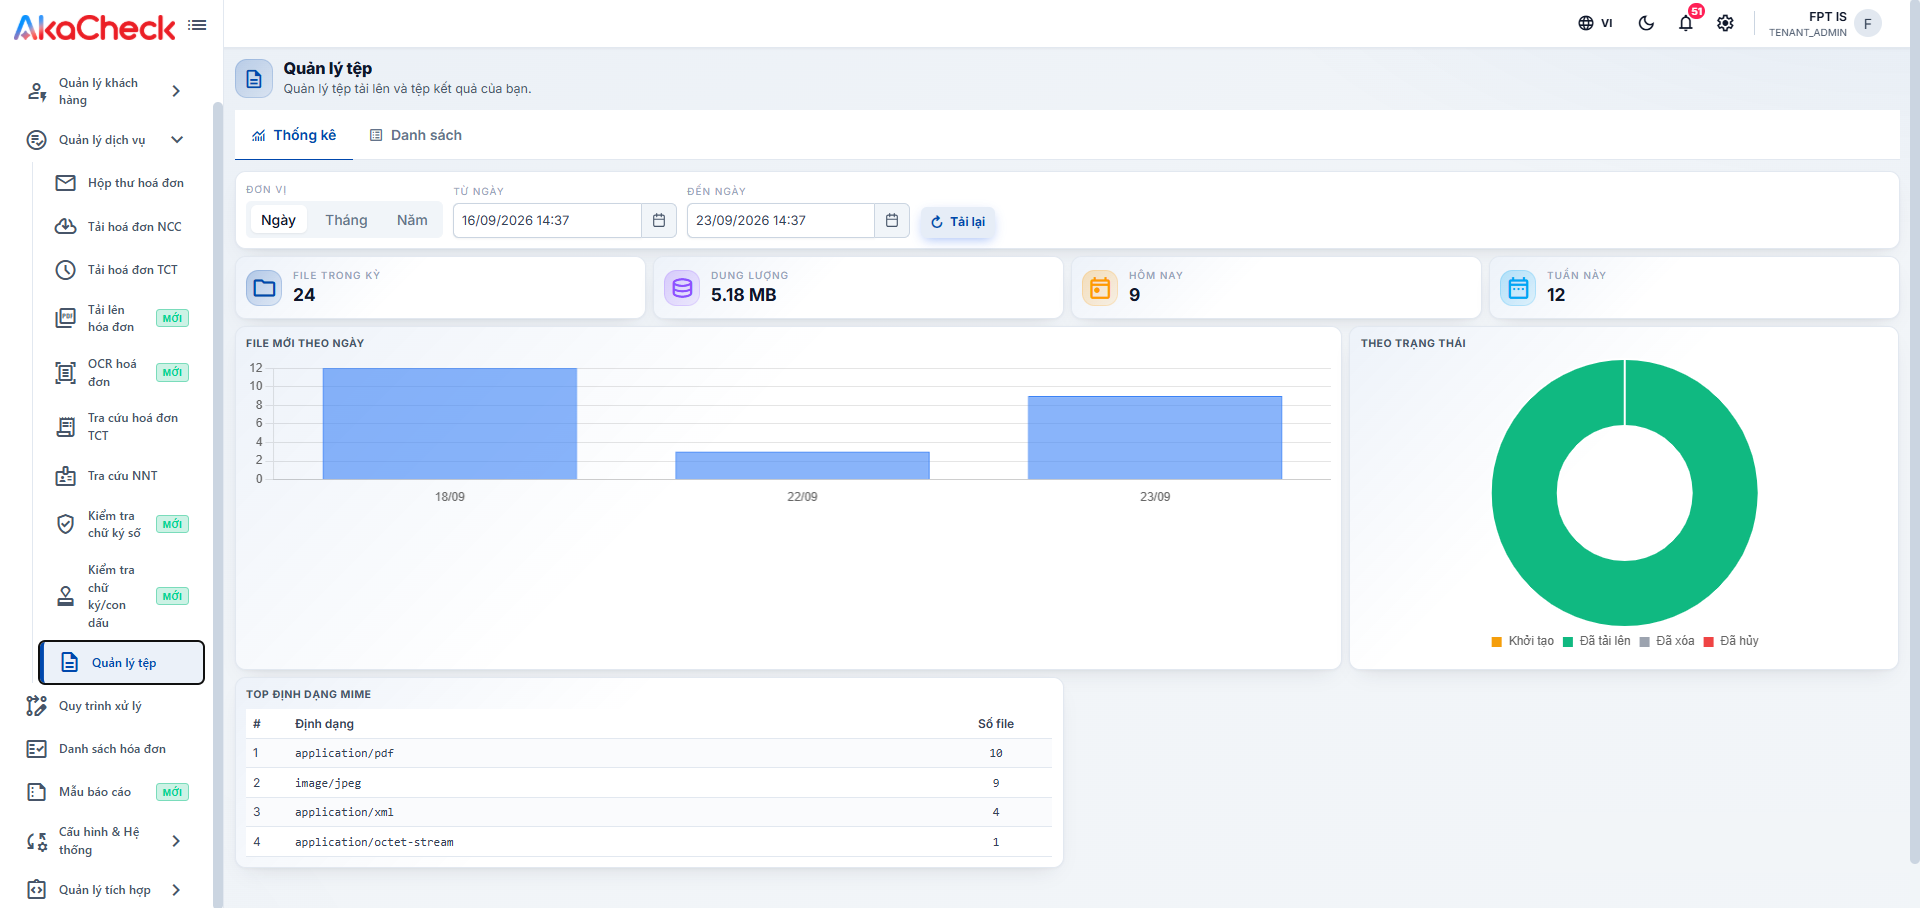
- Statistics tab: View the number of files in the period, total storage used, files created today/this week, a chart of new files by day and by status (Created, Uploaded, Deleted, Cancelled), and a table of the most common file formats (PDF, JPEG, XML...).
- List tab: Look up individual files by name, format, purpose (for example, an original file used as pipeline input, an OCR page image, or a lookup result file), status, size, business, and branch. Click the download icon to retrieve the original file.
Every valid invoice from Stage 1 is consolidated into a single location, regardless of the Stage 2 verification results. Move to Invoice List to manage all your data, or to Report Templates to export a report.