How to use Center’s Agent Pool
An Agent Pool lets you run one workflow on a group of Agents without choosing a specific Agent for each run. Center keeps a queue of requests for the pool, and the next available Agent in the pool picks up each request. Use an Agent Pool when you need to process many requests of the same workflow, for example requests that come from another system, or runs that repeat on a fixed time.
How the Agent Pool works
- You create an Agent Pool with one workflow and one or more Agents.
- You send a request to the pool. Each request becomes a queue item.
- An available Agent in the pool takes the queue item and runs the workflow. If all Agents are busy, the queue item waits in New status.
Agent Pool and Agent Group
An Agent Group and an Agent Pool both contain Agents, but they have different roles:
| Agent Group | Agent Pool | |
|---|---|---|
| Role | Groups Agents so that a workflow can be deployed to them. | Groups the Agents that run one workflow, so that an available Agent picks up each request. |
| Relation to the workflow | A workflow links a package to an Agent Group. The package is distributed to all Agent machines in that group. | You create a pool for one workflow. The Agents in the pool must belong to the Agent Group of that workflow. |
| In a Schedule | Available as a Target Type in the Create a new schedule dialog. | Available as a Target Type in the Create a new schedule dialog, if your Center supports it (see Option A in Step 3). |
In short, the Agent Group is where the workflow is deployed, and the Agent Pool is the group of those Agents that takes requests for the workflow.
To set up and use an Agent Pool, follow these steps:
- Prerequisites: prepare what you need.
- Create Agent Pool: required for every deployment.
- Trigger the Agent Pool: choose one of the two options below.
- Option A: Schedule: not available on Center Cloud.
- Option B: 3rd-party client: available on Center Cloud and on-premises.
Option A and Option B are two alternative ways to send requests to the pool. They are not consecutive steps. For help choosing, see the beginning of Step 3.
Using Center Cloud? On Center Cloud, an Agent Pool can currently be triggered only through an HTTP request. Follow Step 1, Step 2, and Option B in Step 3. Skip Option A.
1. Prerequisites
Before using the Agent Pool feature, ensure that the following requirements are met:
- akaBot Center is installed and accessible.
- If you trigger the Agent Pool through HTTP requests (Option B), you also need:
- Postman or another HTTP client.
- A managed token. Create it by following the instructions in the Managed Token Guideline document.
2. Create Agent Pool
An Agent Pool is a group of akaBot Agents that are configured to execute a specific workflow. All Agents within the same pool should have identical environments to ensure consistent and stable execution.
To create a new Agent Pool in akaBot Center, navigate to: Agent > Agent Pool > Create New
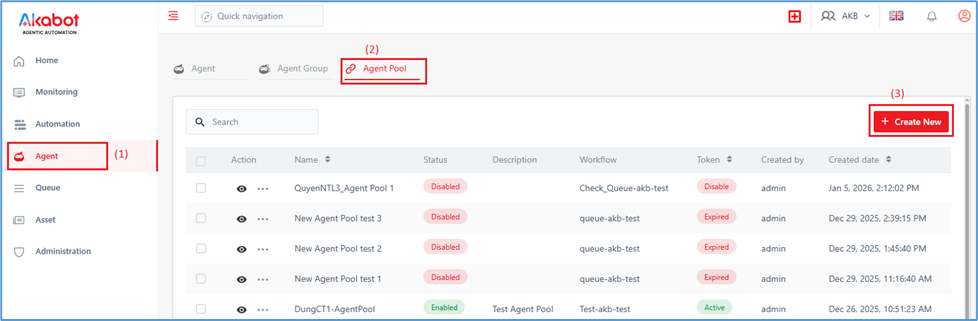
In the Create Agent Pool dialog:
- Enter a meaningful name for the Agent Pool.
- Select the workflow that the Agents will execute. The Agents that you select in item 4 below must belong to the Agent Group of this workflow.
- In the Token dropdown list, select a managed token that will be used to invoke HTTP requests for pushing messages to the Agent Pool.
Select a token if you plan to trigger the Agent Pool through HTTP requests (Option B). On Center Cloud, select a token. On-premises, this field is optional if you plan to trigger the Agent Pool only through the Center’s Schedule feature (Option A). - Select one or more Agents that will be responsible for executing the workflow.
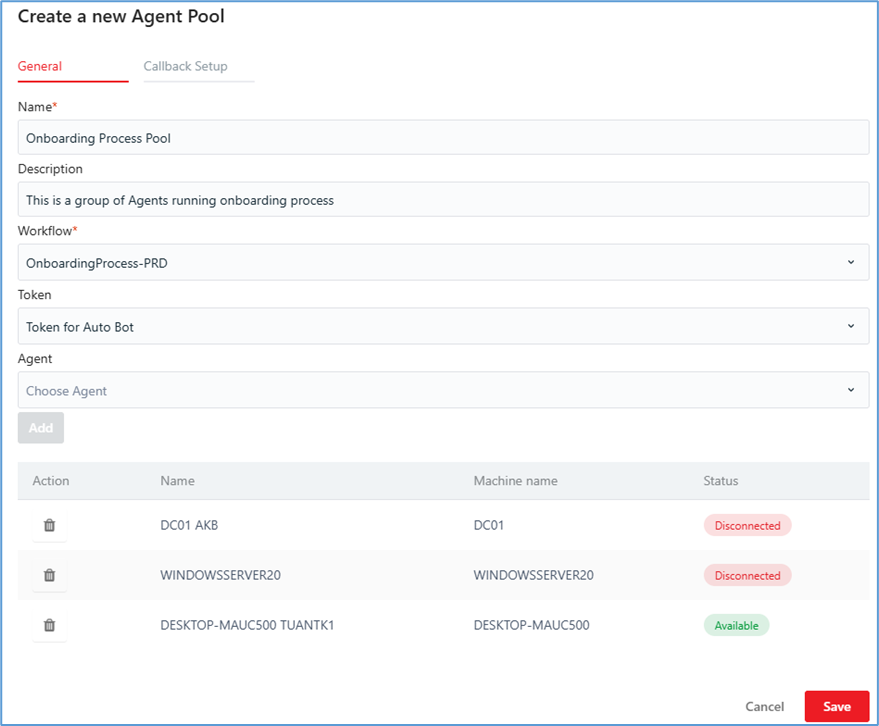
After creation, the new pool will appear in the Agent Pool list.
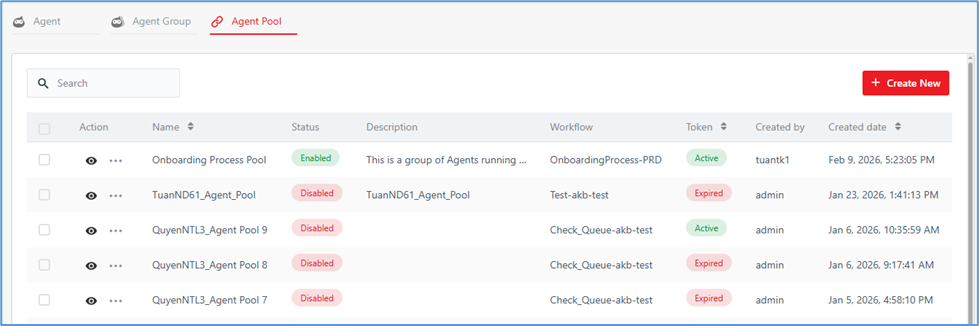
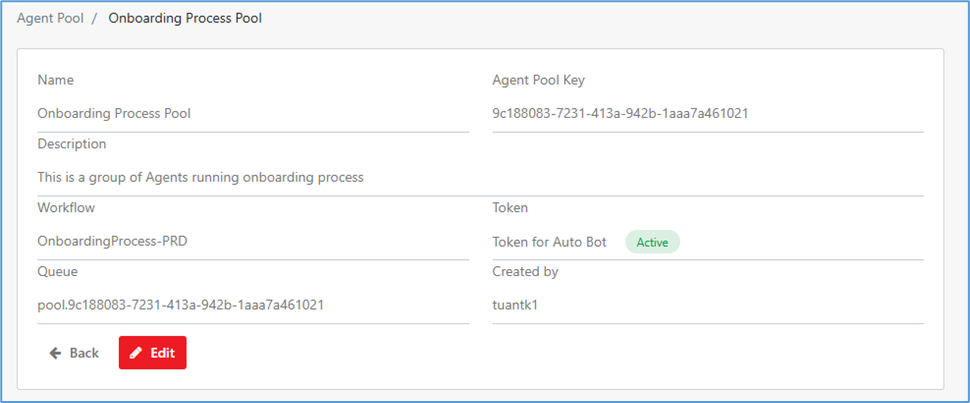
You can click on an Agent Pool to view its detailed configuration.
3. Trigger the Agent Pool
After you create the Agent Pool, choose one of the two options below to send requests to it. The options are alternatives, not consecutive steps.
| Option A: Schedule | Option B: 3rd-party client | |
|---|---|---|
| Use it when | The workflow must run automatically at a fixed time or interval. | Another system or tool must start the workflow on demand. |
| How it works | Center creates a queue item at each scheduled time. | The client sends an HTTP request, and Center creates a queue item. |
| Managed token | Not required | Required |
| Availability | On-premises, Center v4.0.0.5 or later. Not available on Center Cloud. | Center Cloud and on-premises |
On Center Cloud, the Execution Target tab in the Create a new schedule dialog lists only individual Agents, and there is no Agent Pool to select. In this case, use Option B.
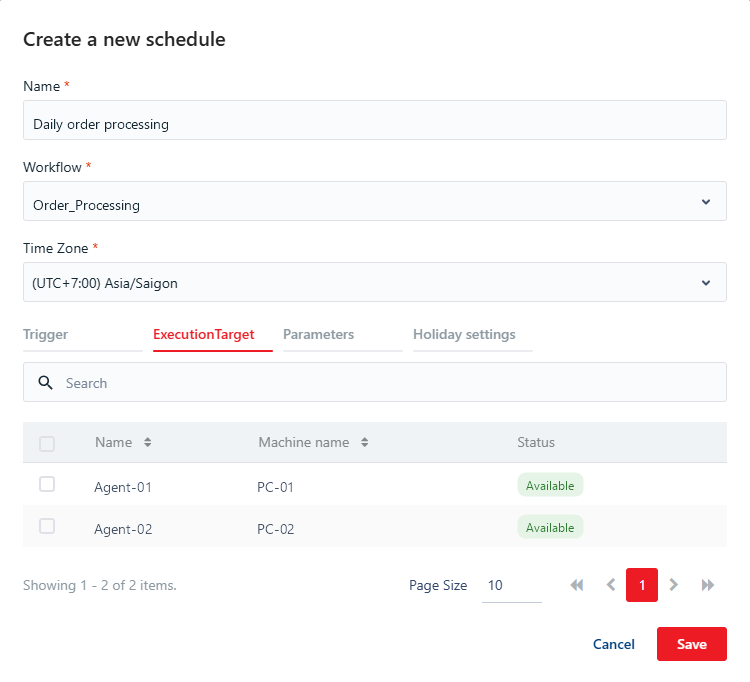
To check, open Automation > Schedule > Create New and select the Execution Target tab. If the Target Type list contains Agent Pool, you can use Option A.
Option A: Trigger by using Schedule (on-premises only)
Use this option when the workflow must run automatically at a fixed time or interval. You do not need a managed token for this option. This option is not available on Center Cloud. If you use Center Cloud, go to Option B.
You can trigger an Agent Pool automatically using akaBot Center’s scheduling feature.
Navigate to: Automation > Schedule > Create New
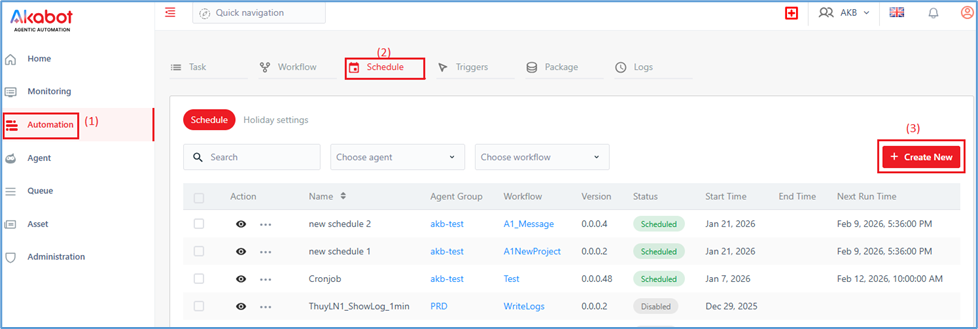
In the Create a new schedule dialog:
- Enter a meaningful name for the schedule.
- Select the target workflow. This workflow must be the same as the one configured in the Agent Pool.
- Select the time zone.
- In the Trigger tab, configure the time recurrence to define how frequently the schedule will run.
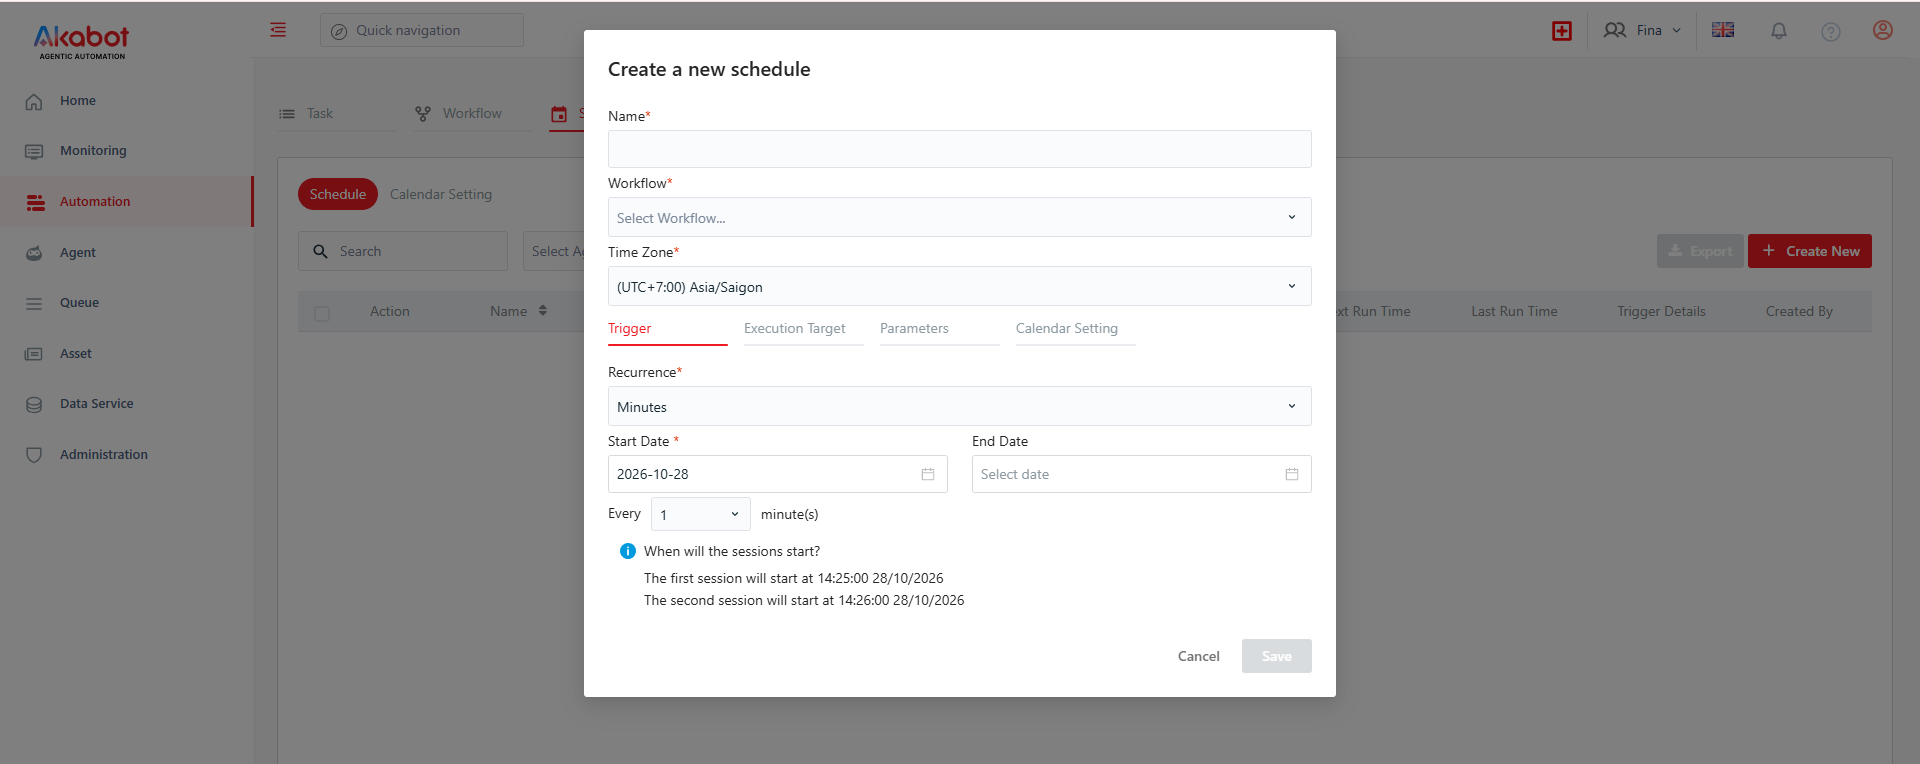
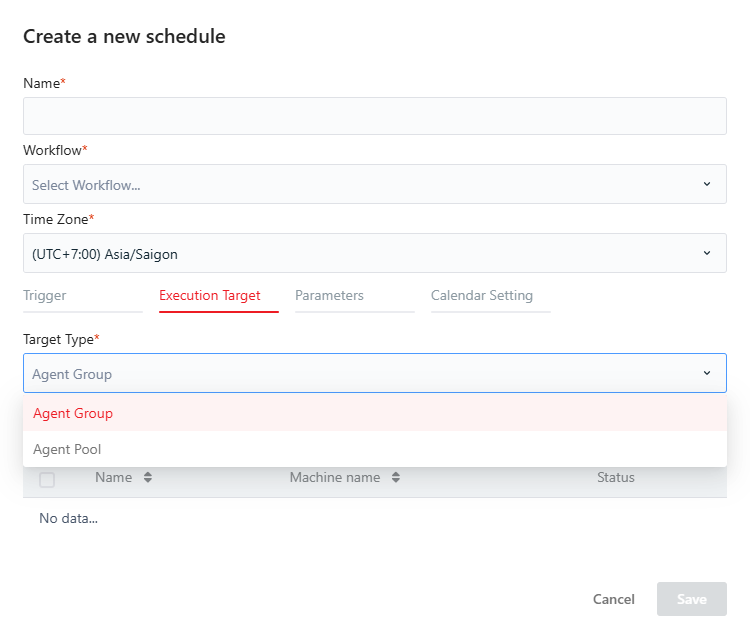
Next, navigate to the Execution Target tab:
- The Target Type list has two options: Agent Group and Agent Pool. Select Agent Pool, and then select the Agent Pool that you want to trigger.
- Click Save to complete the configuration.
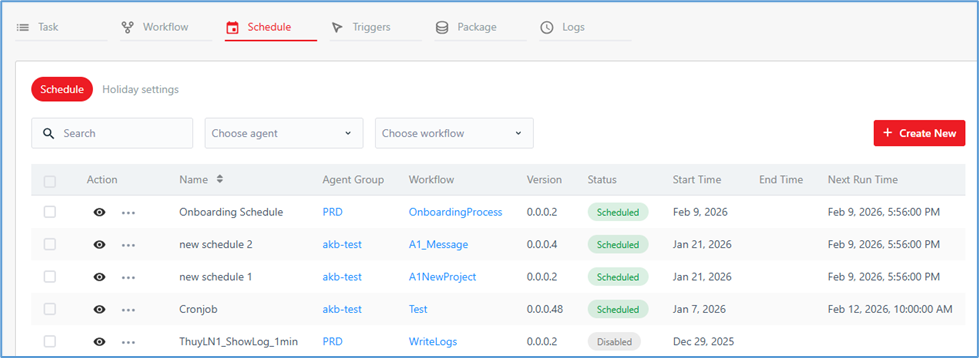
After the schedule is created, it will appear in the Schedule list.
Execution Behavior
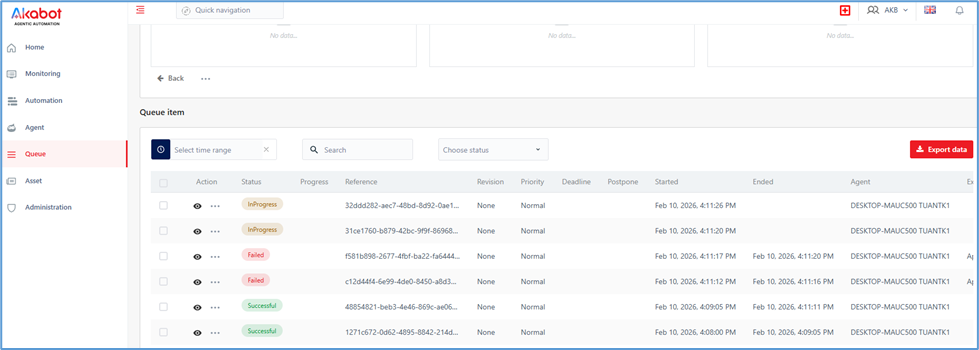
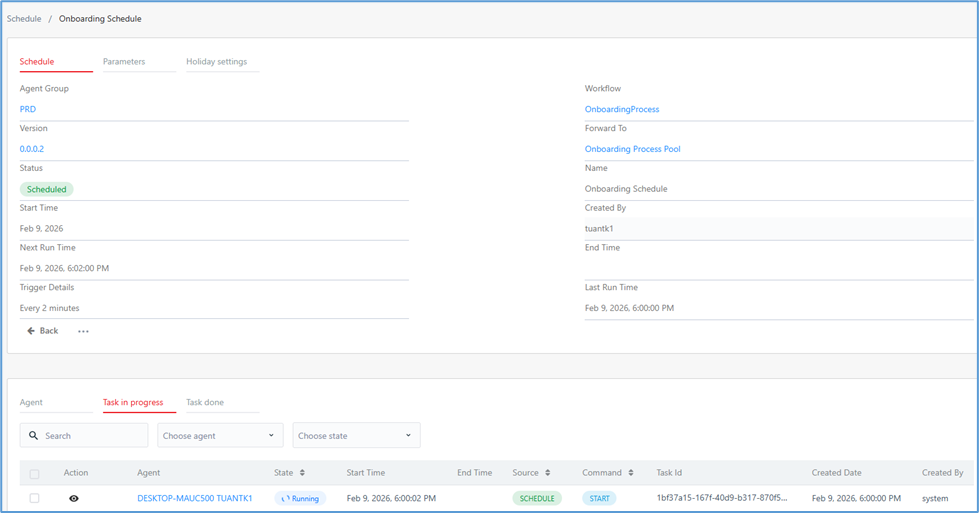
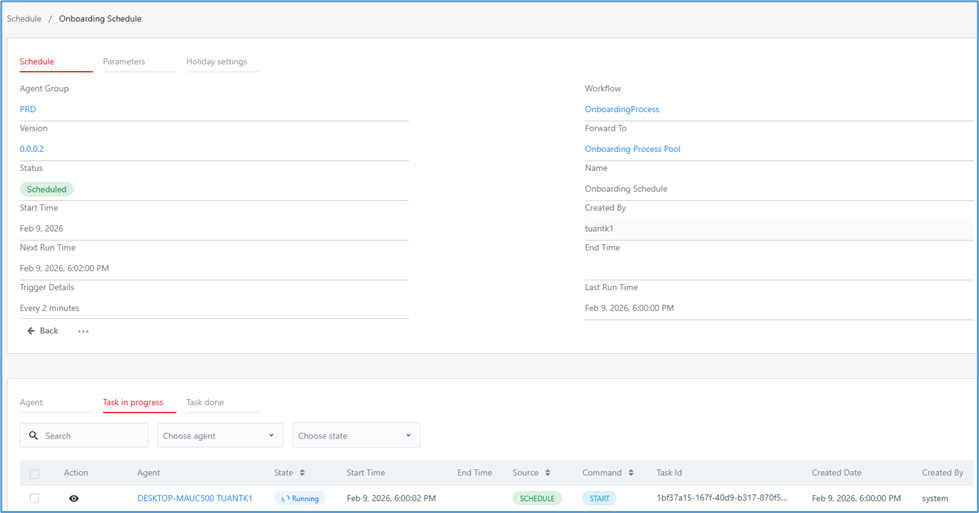
When the schedule is triggered:
- A new queue item is created.
- One available Agent in the pool will pick up the queue item and start execution.
- While the task is running, the queue item status is InProgress.
- If no Agent is available, the queue item remains in New status until an Agent becomes available.
- After execution:
- The status becomes Successful if completed successfully.
- The status becomes Failed if a business exception occurs.
Option B: Trigger by using a 3rd-party client (Center Cloud and on-premises)
Use this option when another system or tool must start the workflow on demand. On Center Cloud, this is the way to trigger an Agent Pool. The client sends an HTTP request to the Agent Pool, and Center adds the request to the pool queue. This option requires a managed token, which you select in the Token field when you create the Agent Pool (Step 2).
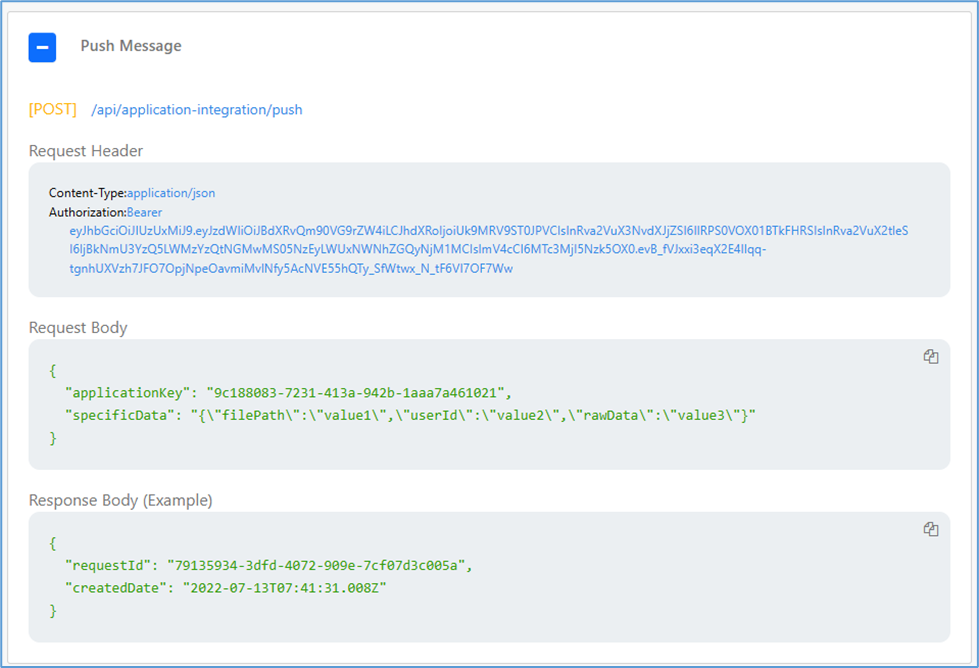
To send a request, you need:
- The Agent Pool Key
- A valid Managed Token
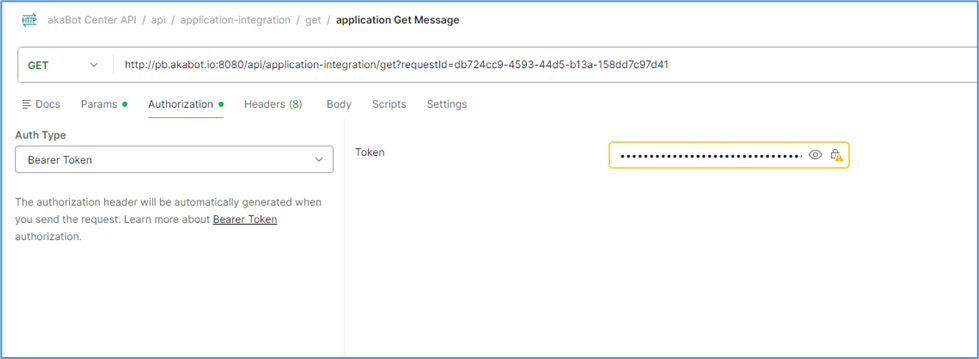
For example, you can use Postman to invoke the API.
Passing Input Data to the Workflow
If you want to pass input data to the workflow, include an escaped JSON string in the specificData property of the request body.
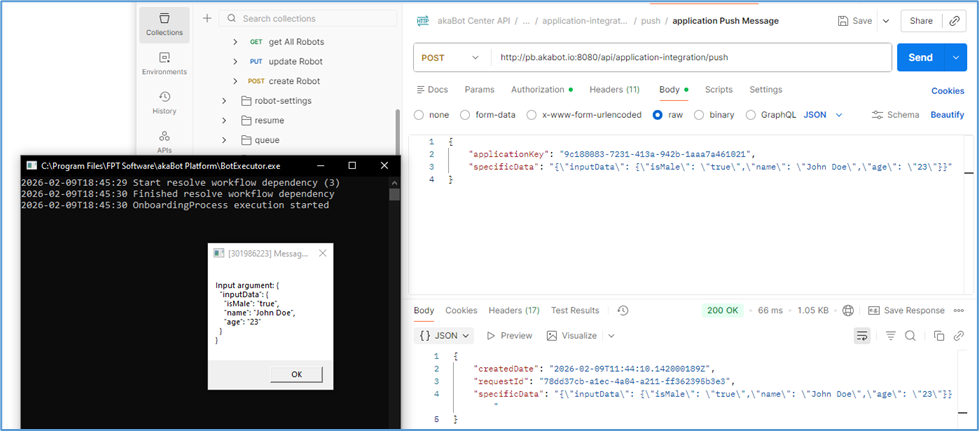
The workflow must:
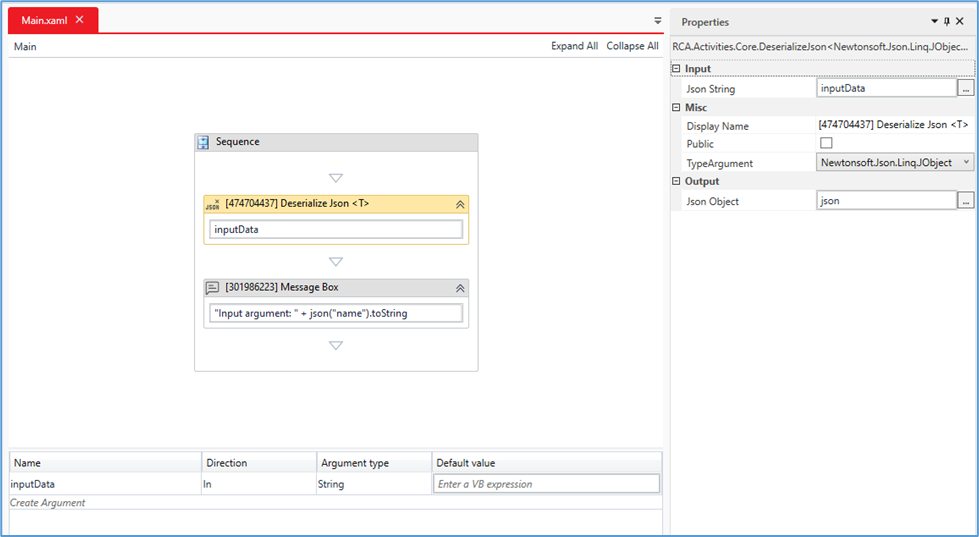
- Define an input argument named inputData of type String.
- Use the Deserialize Json<T> activity to convert the input string into a JSON object for further processing.
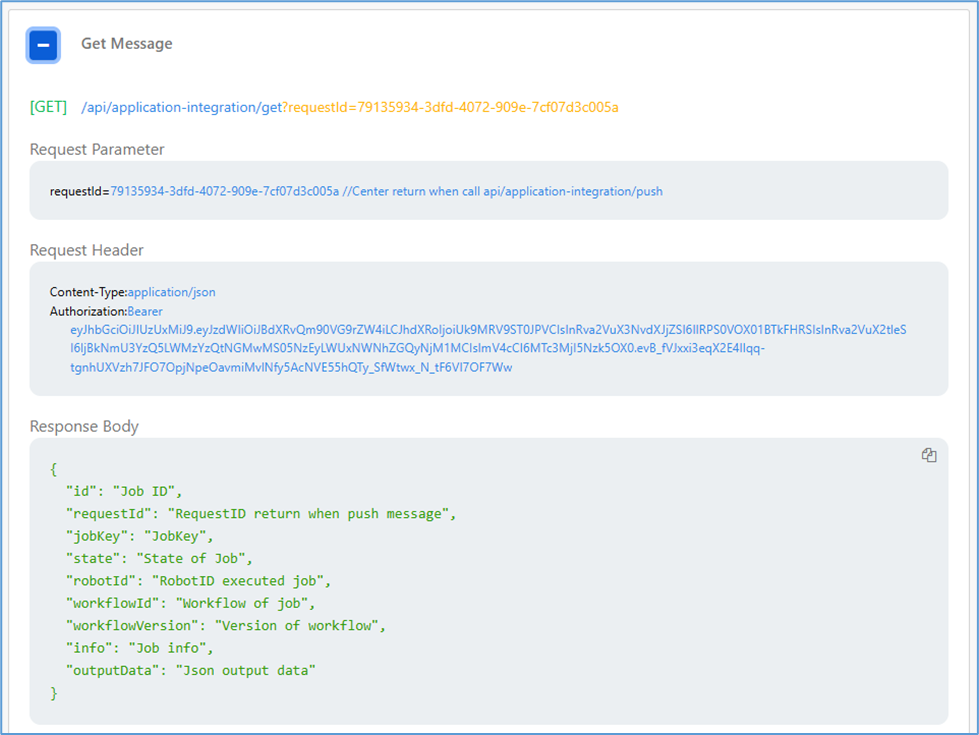
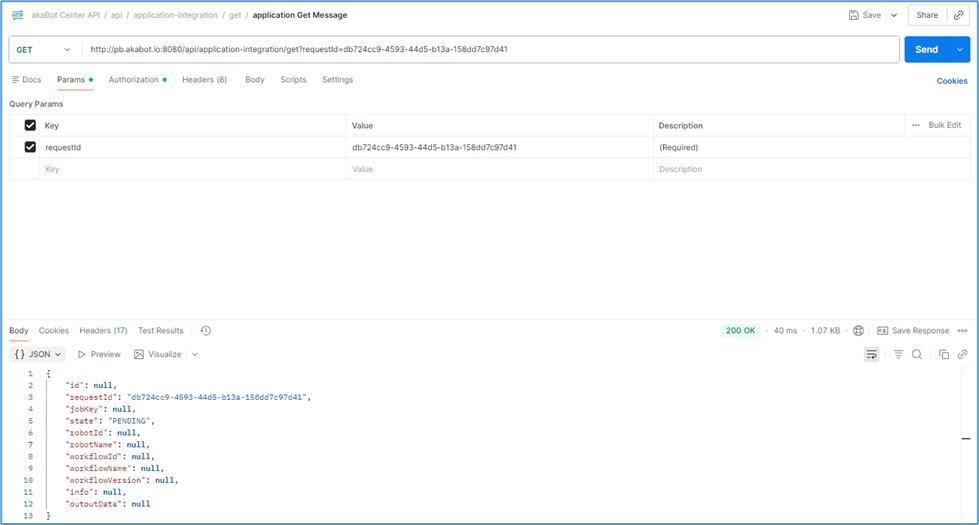
Querying Request Status
The response from the server includes a property named requestId. This value can be used later to query the status of the request message.