Management
⚠️ Admin only: The Management module controls platform-wide infrastructure, AI models, governance, system logs, and security controls. Access is restricted to Platform Administrators with platform scope (
platform.manage). Non-admin users (Business Users, Knowledge Editors, Channel Builders/Publishers) will not see this module.
If you are a Channel builder or business user, see Channels or Chat instead.
Management setup order
For a new environment, use this order:
- Create and test at least one AI provider connection.
- Enable at least one chat model.
- Enable at least one embedding model.
- Review and enable the required default tools.
- Review governance defaults and limits.
- Install and manually activate the system Channel pack only when approved.
- Configure access and run acceptance tests.
The Management module may hide dependent functions until the required AI setup steps are complete.
Add an AI connection
Prerequisites
- Platform Administrator permission (
platform.manage). - Approved endpoint and credential stored through the customer secret process.
Procedure
- Open Management → Connections.
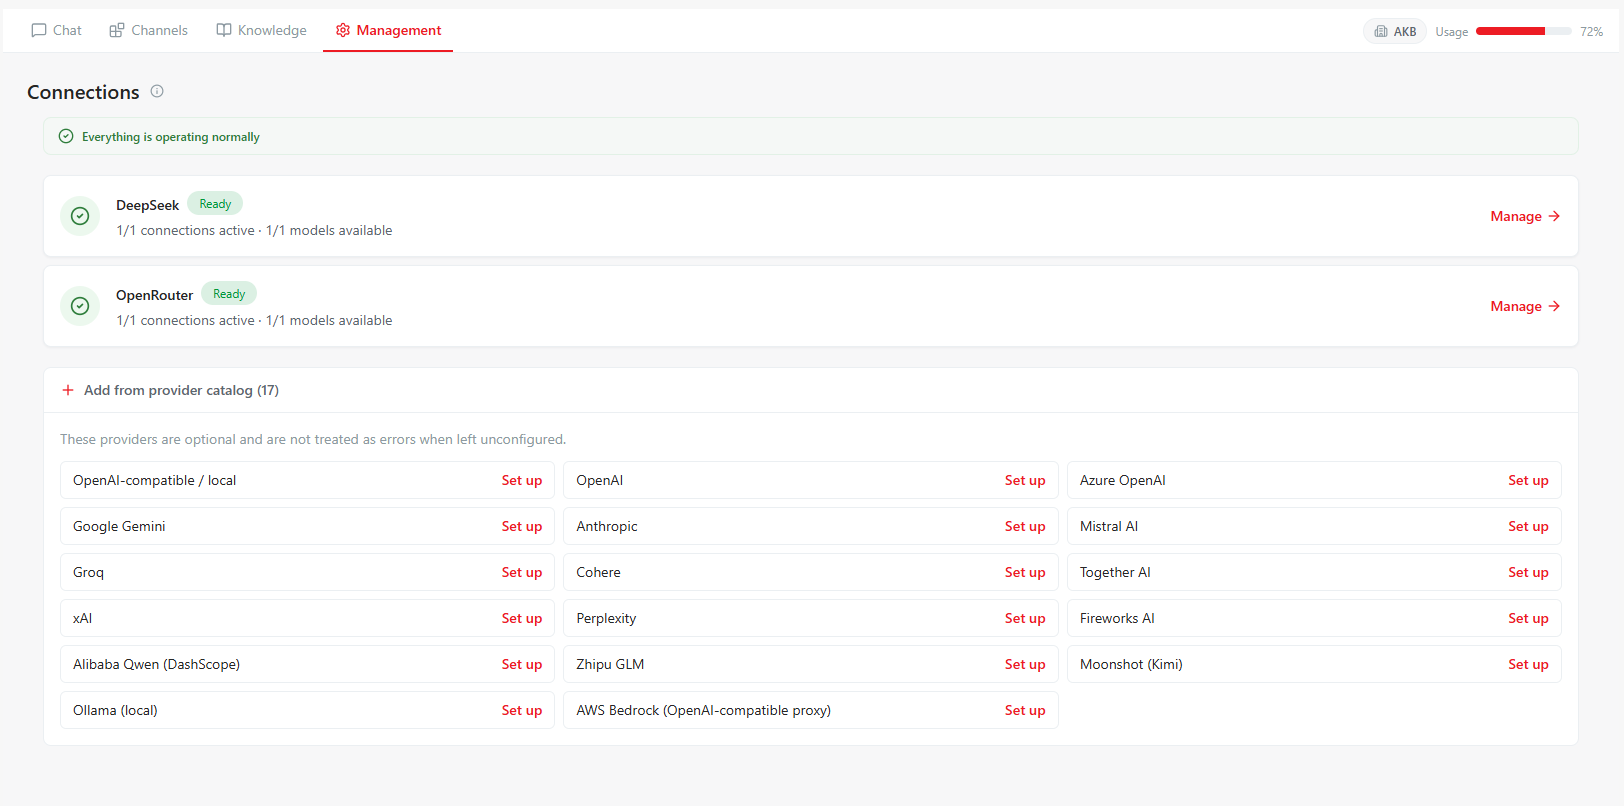
- Select a provider from the catalog.
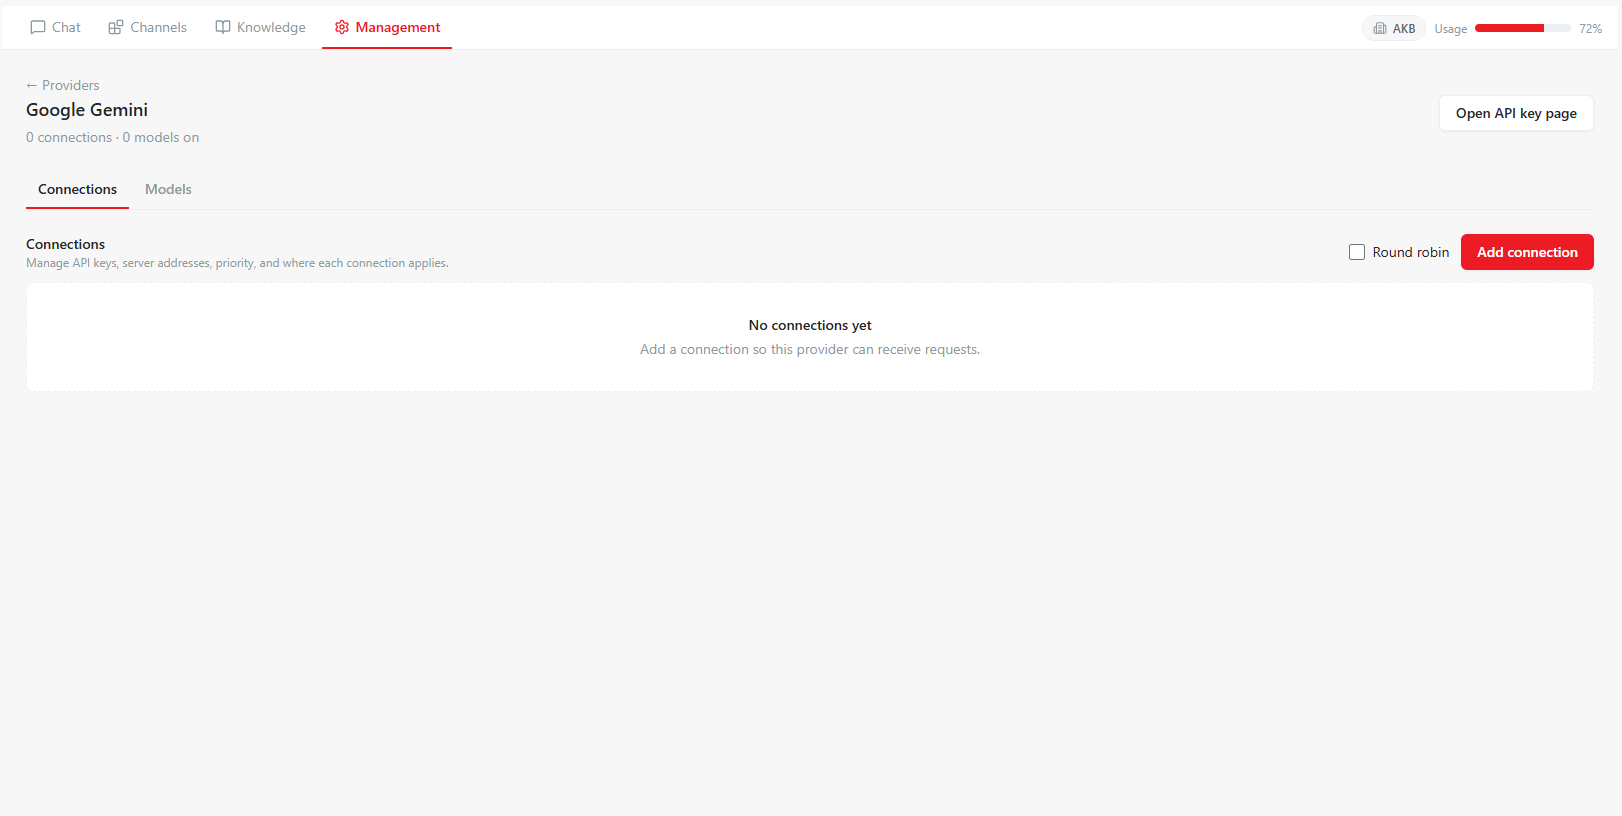
- Select Add connection.
- Enter a descriptive label, API endpoint if required, credential, and priority. Connections are system-scoped by default.
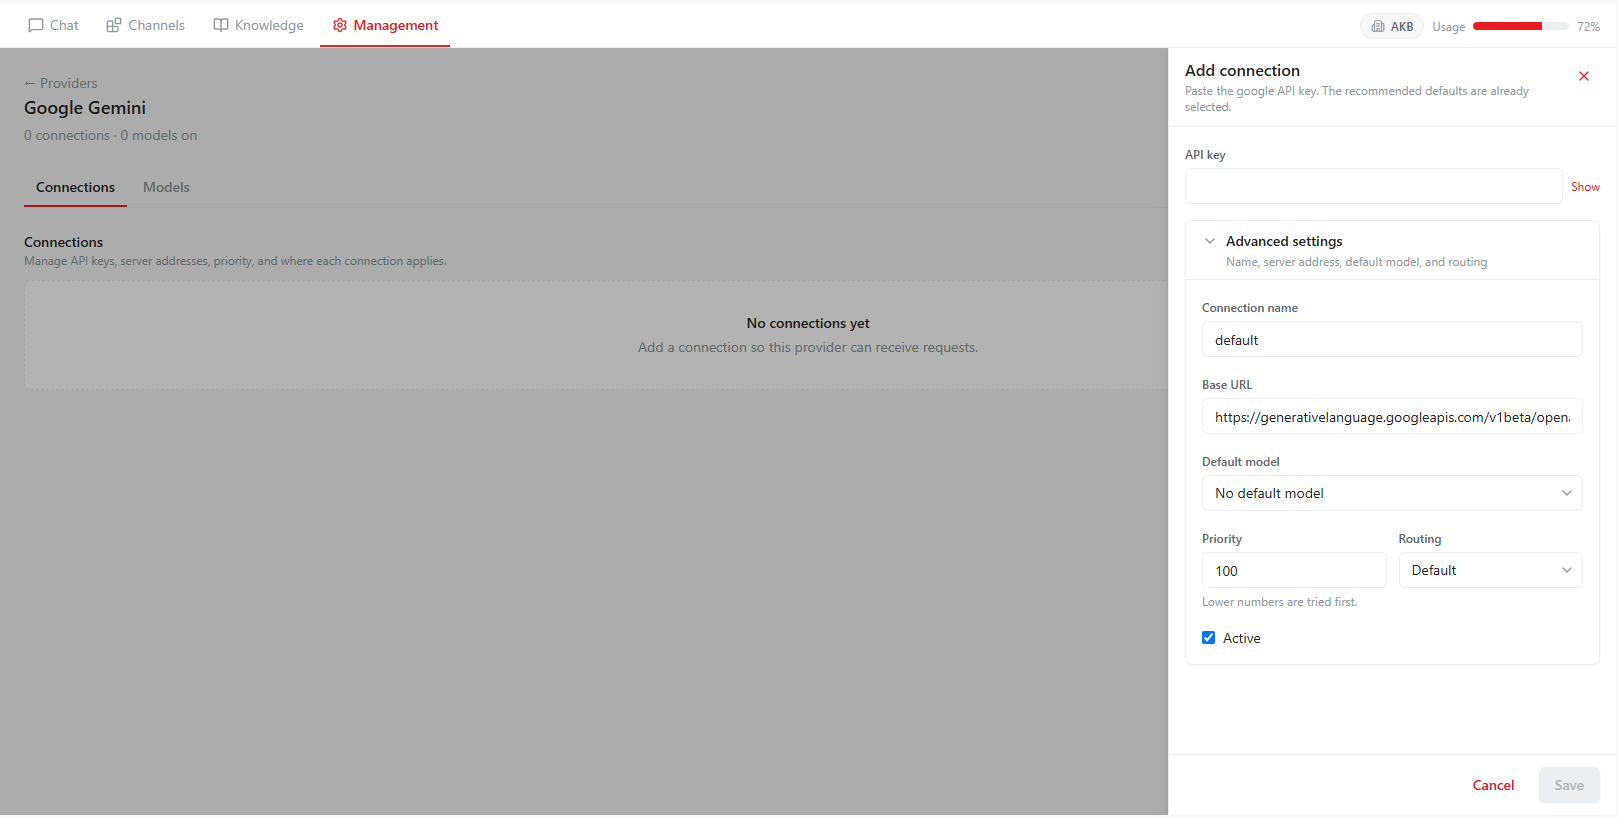
- Save.
- Select Test.
- Confirm the connection shows Active.
Do not create every provider merely because it appears in the catalog. Configure only approved providers needed by the environment.
Add or enable models
Procedure
- Open the configured provider.
- Select Add model.
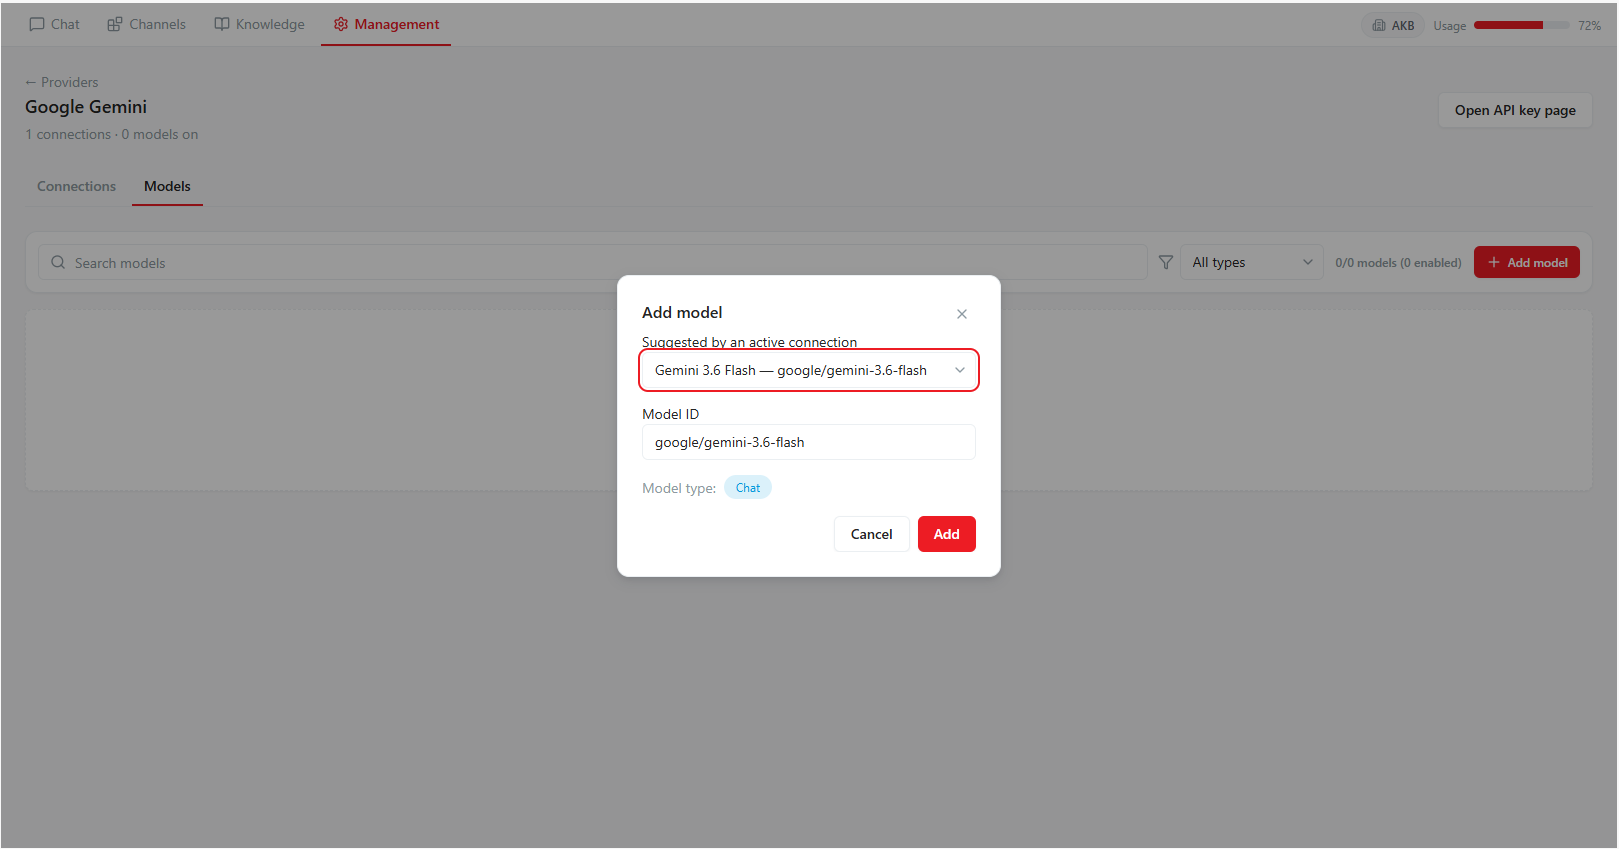
- Use model suggestions when discovery succeeds, or enter the exact model ID manually.
- Review the model capability (Chat, Embedding, or Vision) inferred from the model ID.
- Save and enable the model.
- Verify the model status is Ready.
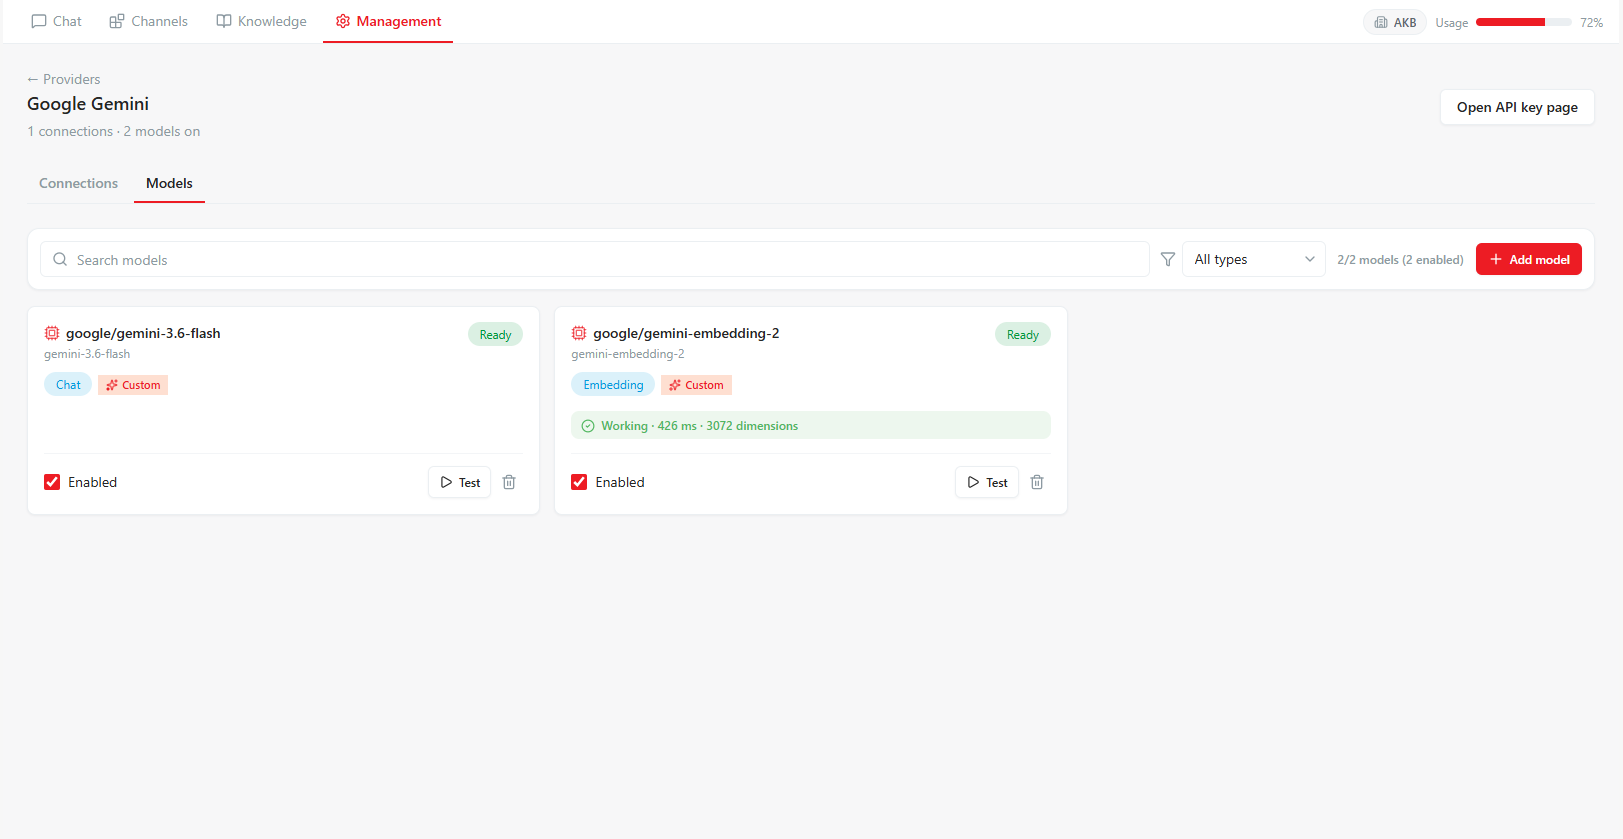
A suggested model is not automatically approved for production. Verify provider entitlement, capability, data policy, context limit, and cost.
Rotate a provider credential
Procedure
- Obtain the new credential through the approved process.
- Open the connection and select Edit.
- Replace the credential without exposing it in notes or screenshots.
- Save and test.
- Run a controlled model request.
- Revoke the old provider credential after validation.
- Confirm the audit entry.
Coordinate rotation when a connection serves multiple Channels.
Manage default tools
This release provides only the default tools built into Akabot Center.
Prerequisites
- Platform Administrator permission (
platform.manage). - Approval to change tool availability or execution policy across the platform.
Procedure
- Open Management → Tools.
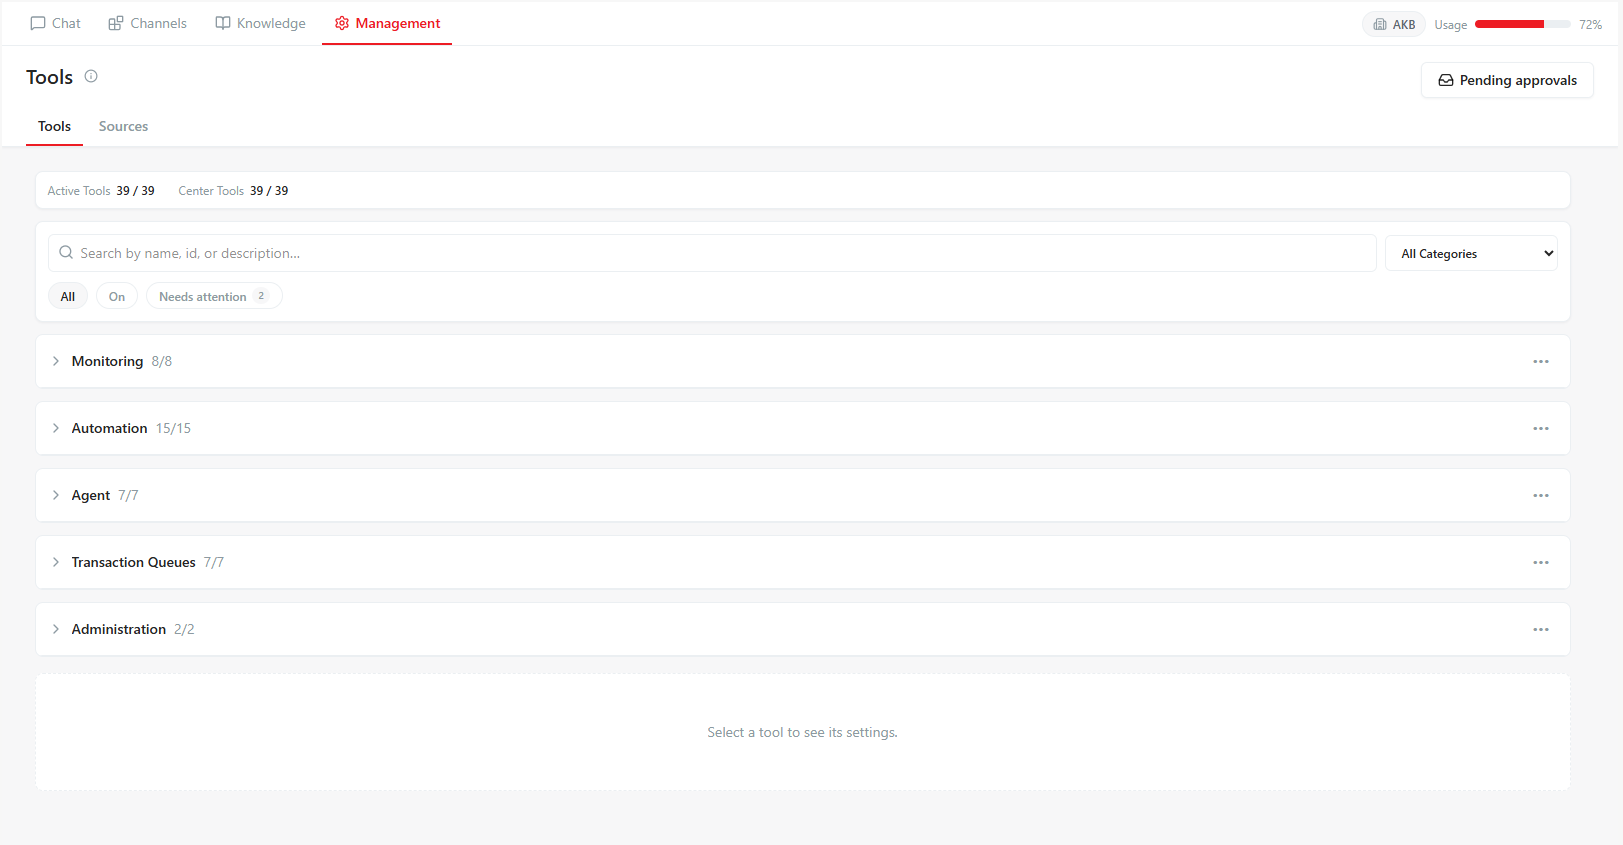
- Review the Active Tools and Center Tools totals.
- Search for a tool or filter the list by category and status when required.
- Expand a category and select a tool to open its details.
- Turn the tool on or off. Disabling a tool prevents Channels from executing it.
- Under Configuration, review the approval rule and advanced timeout setting, then select Save settings if you make a change.
- Open Test, enter the required inputs, and select Run test.
- Confirm that the test status is Succeeded, or resolve any permission, configuration, timeout, or service error shown by the test result.
Use the category action menu to turn all eligible tools in that category on or off. Review the confirmation carefully because the change applies immediately across the system.
Write-capable tools may be locked while the governance tool mode is set to Safe. Change the governance policy only through the approved process; do not loosen it solely to bypass a blocked test.
Before disabling a tool, identify the Channel drafts and active versions that use it. A disabled tool remains referenced by those Channels but cannot be executed until it is enabled again.
Configure governance defaults
Governance may include:
- Allowed chat models
- Default embedding model
- Default tool permission mode
- Maximum file size and page count
- OCR service
- Explicit deny rules
- Retention and cleanup settings.
Procedure
- Open Management → Limits & Data → AI Policies.
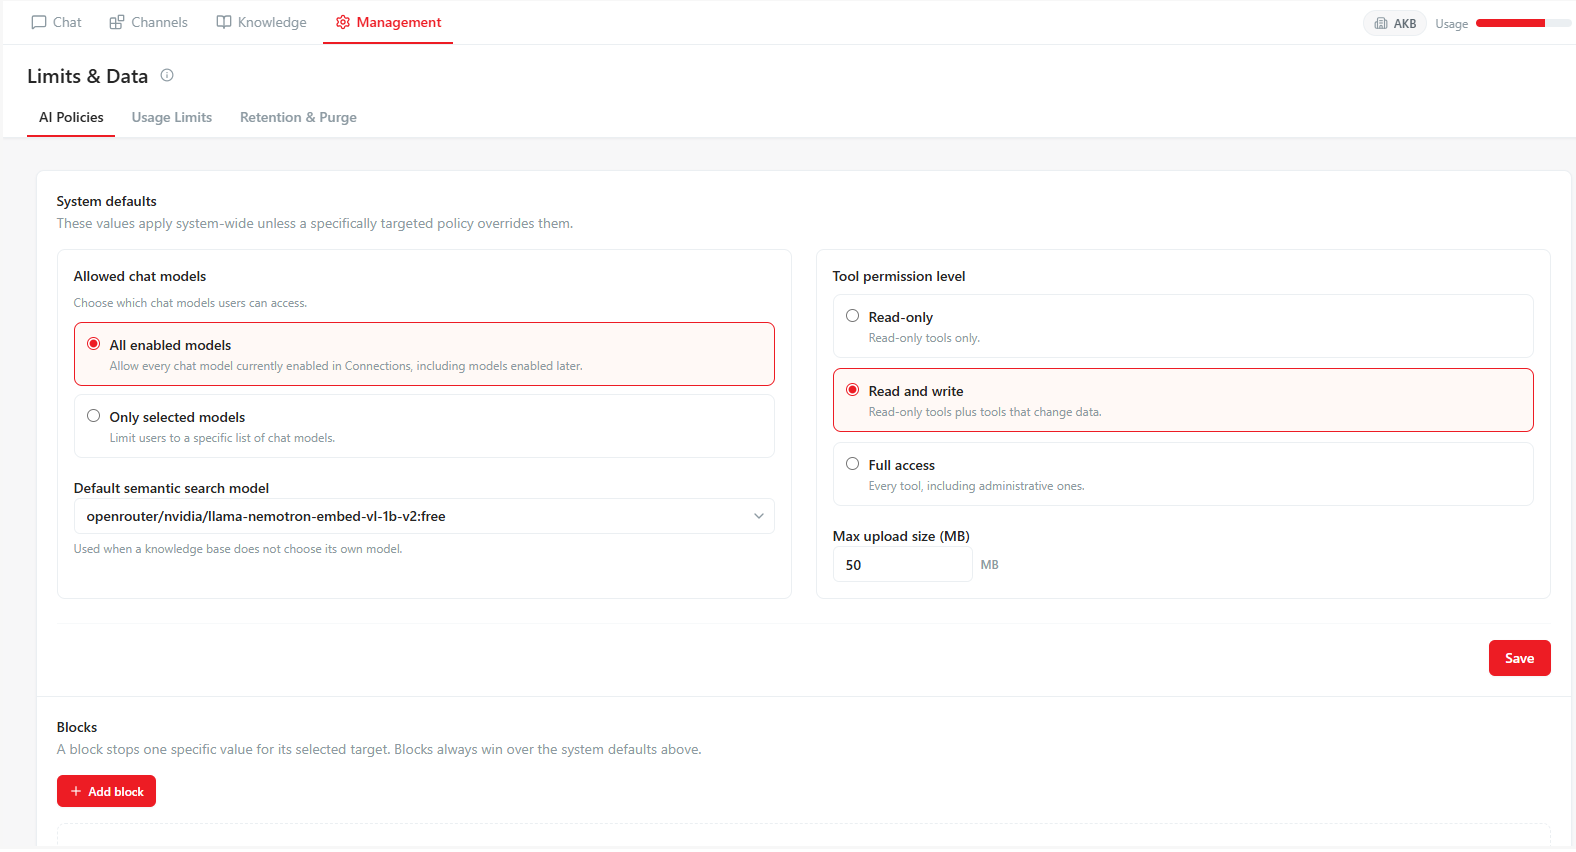
- Identify affected organizations, principals, Channels, and knowledge bases.
- Record the current value.
- Enter the approved new value.
- Save and confirm the audit event.
- Test at least one affected and one unaffected target.
- Monitor denial/error rates.
An explicit deny rule takes precedence over a general default. Removing a deny rule may immediately make the blocked capability available again.
Configure usage limits
Limits may apply to an organization, principal, or Channel.
Procedure
- Open Management → Limits & Data → Usage Limits.
- Select the subject type.
- Select the exact subject.
- Enter the approved monthly token/call limit.
- Save and verify the displayed period and remaining value.
Removing a limit may mean the target becomes unlimited unless a broader limit still applies. Confirm policy before clearing a value.
Install the system Channel pack
The system Channel pack (v1) delivers pre-configured, platform-managed Channels with built-in knowledge bases that are ready to use immediately upon installation and activation:
- Akabot Center Assistant (
aka-center-assistant): Primary active platform Channel in the Chat UI, grounded in Center and Support documentation and integrated with the built-in read-only Akabot Center tool catalog. - Akabot Expression Generator (
generate-expression-code): Pre-configured assistant that generates akaBot developer expressions and schema code via machine endpoints. - AkaNinja (
akaninja): Comprehensive AI assistant pre-loaded with official akaBot knowledge bases (covering akaBot Activities, Agent, Center, Studio, Support, and developer guides).
These pre-packaged assets include pre-processed RAG knowledge documents, localized metadata, and ready-to-use API endpoints — enabling immediate deployment without building custom Channels or Knowledge Bases from scratch.
Procedure
- Complete AI setup with a ready chat model and embedding model.
- Open Management → System Channel pack.
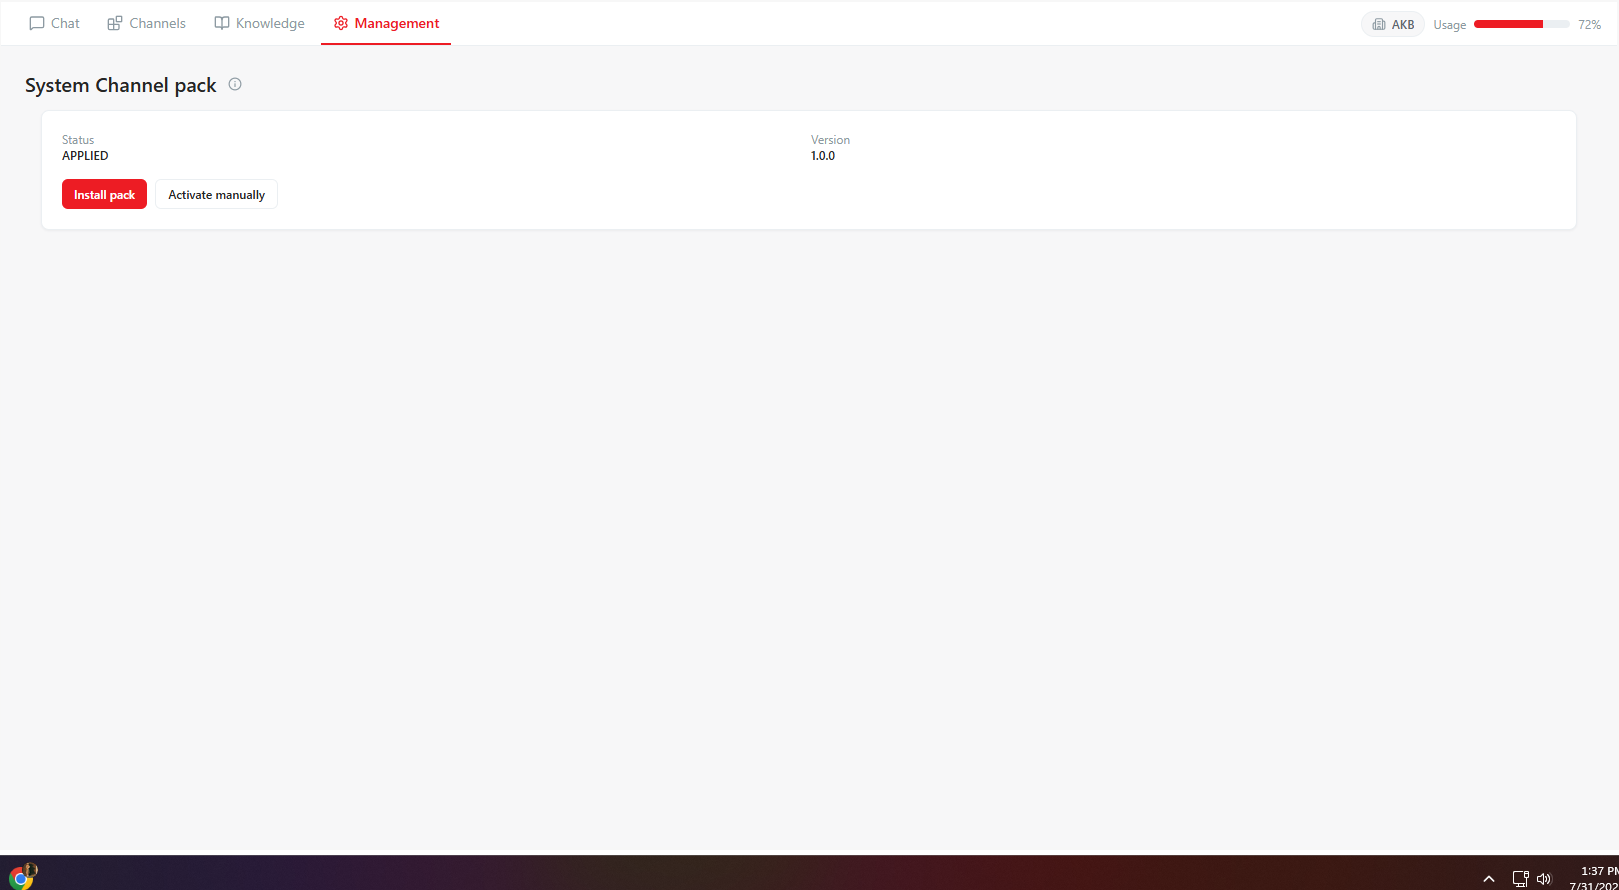
- Review package status and version (
v1.0.0). - Select Install pack and confirm.
- Review the installed platform Channel drafts.
- Select the target chat and embedding models for activation.
- Type the required confirmation phrase exactly when prompted.
- Activate the pack manually.
- Grant access to approved principals or user groups.
- Verify immediate availability via Chat UI or REST API endpoint (
POST /api/v1/agent-endpoints/<endpoint-key>/invocations).
Audit directory and effective access
Use Directory & Access Audit to search users, Agents, and Agent Groups synchronized from Akabot Center and to understand Channel assignments.
Procedure
- Open Directory & Access Audit.
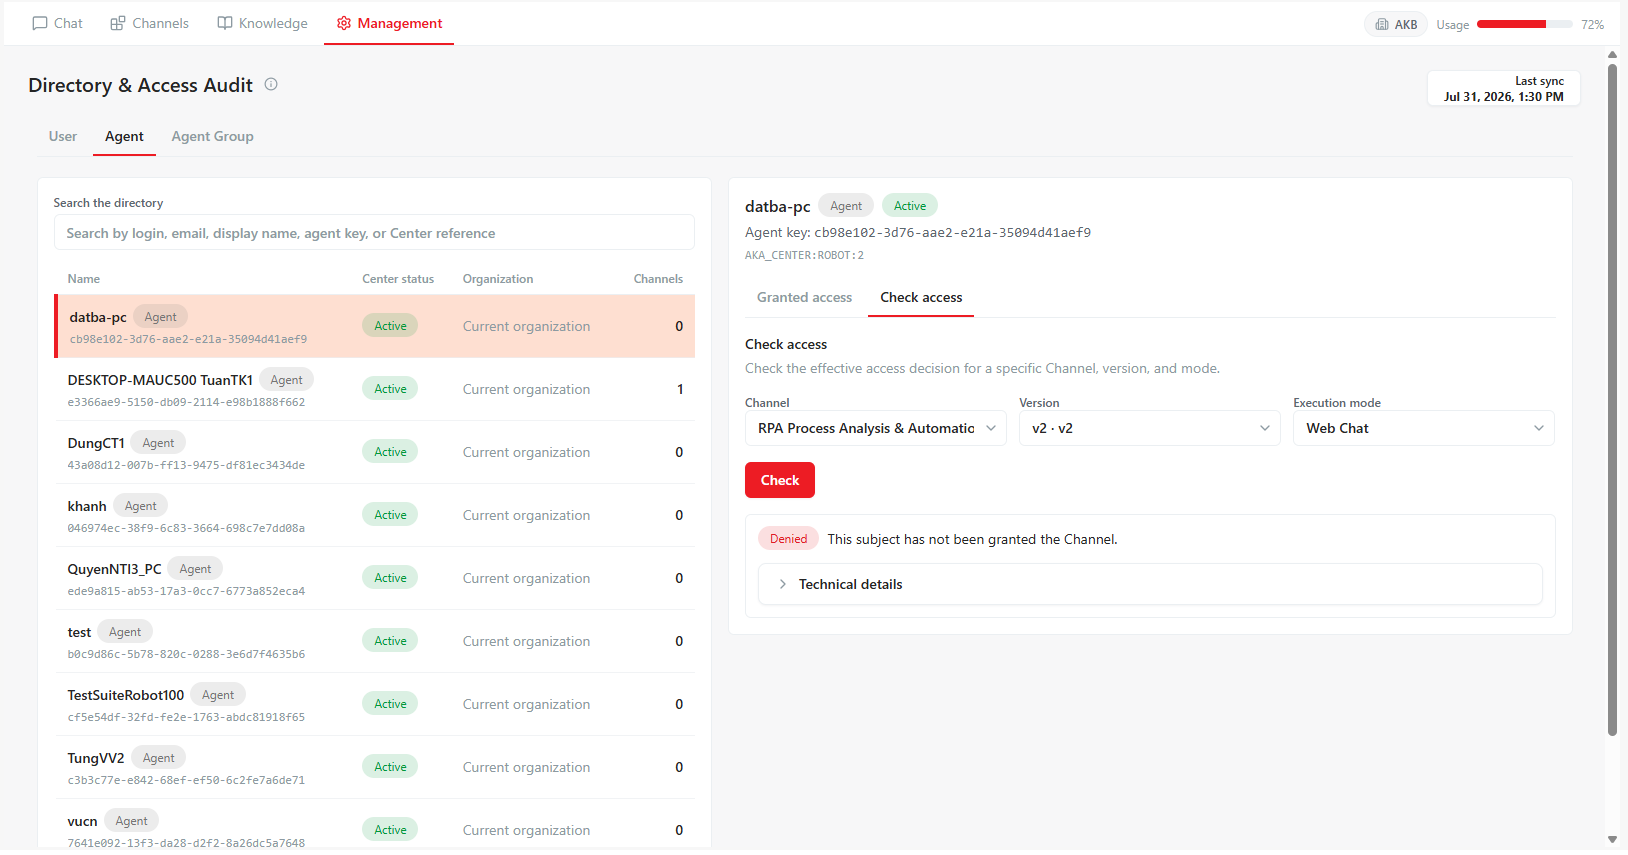
- Select the principal you want to check.
- Select the Channel or resource.
- Review direct and inherited assignments.
- Review the displayed reason when access is denied.
- Change the grant at its actual source.
- Recheck effective access after synchronization.
During Center synchronization, some administrative actions may be temporarily unavailable. Wait for synchronization rather than creating duplicate grants.
Monitor run history
Run history may include Web Chat, API/AkaNinja, draft test, Pipeline, and scheduled execution.
Filter by mode, status, Channel, or time. Common states:
| State | Meaning |
|---|---|
| Accepted | Request was accepted by the service |
| Queued | Waiting for a worker or capacity |
| Running | Execution is active |
| Waiting | Waiting for approval or an external event |
| Success | Execution completed successfully |
| Error | Execution failed |
| Cancelled | Execution was cancelled |
| Timed out | Allowed execution time expired |
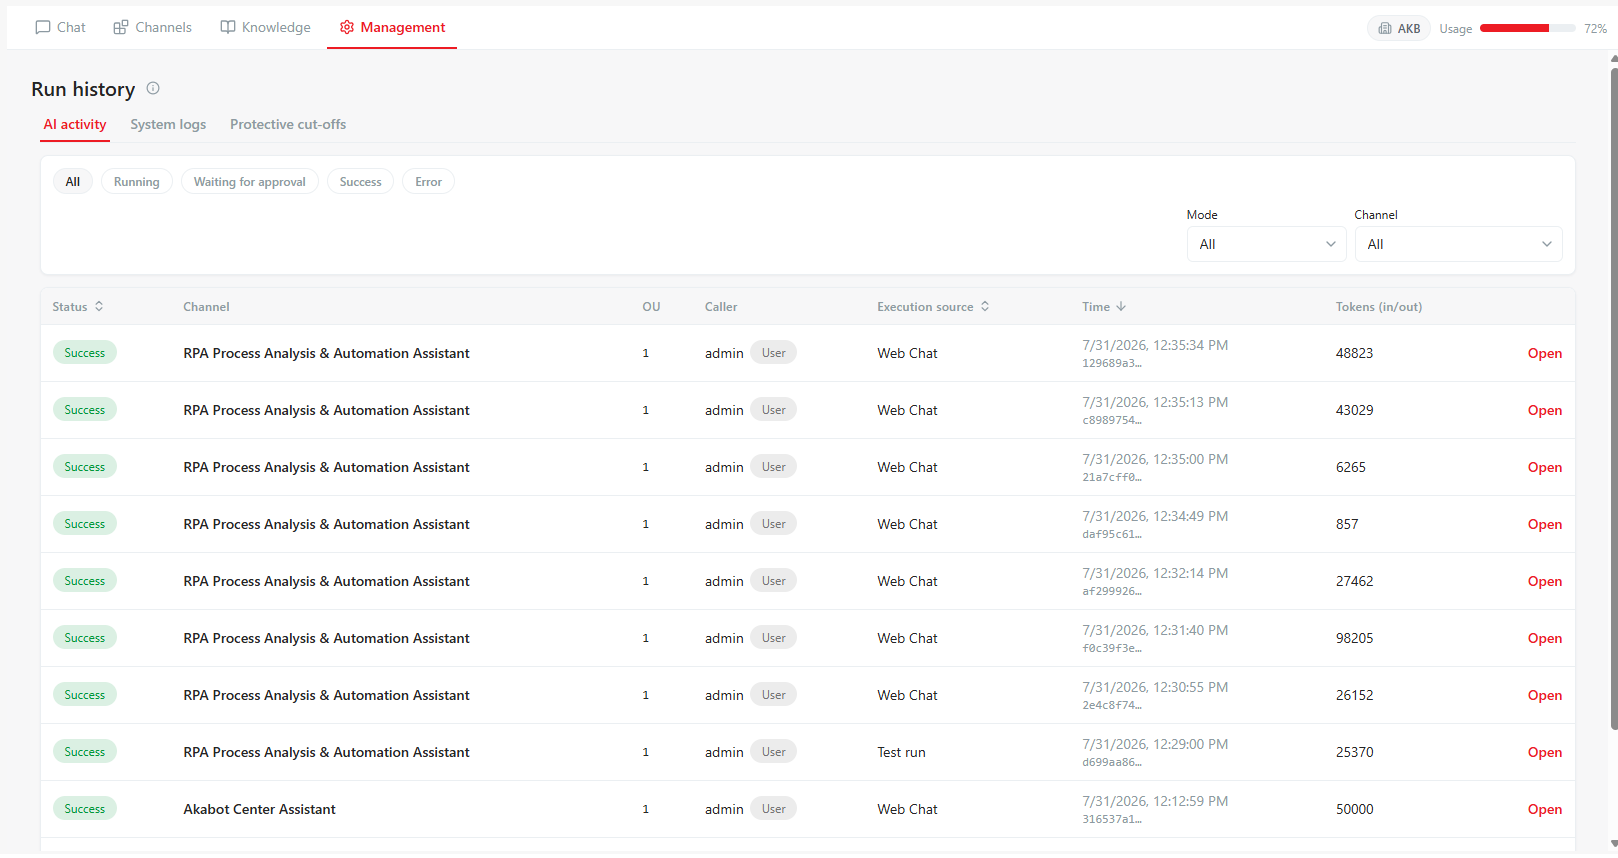
Open a run to review caller, Channel/version, duration, token use, result/failure, and timeline. Historical trace data may be unavailable when tracing was disabled or retention expired.
Review audit logs
Audit logs record administrative changes such as provider-key changes, quota updates, access/deployment changes, principal suspension, knowledge-base deletion, and governance changes.
Procedure
- Open Management → Run history → System logs.
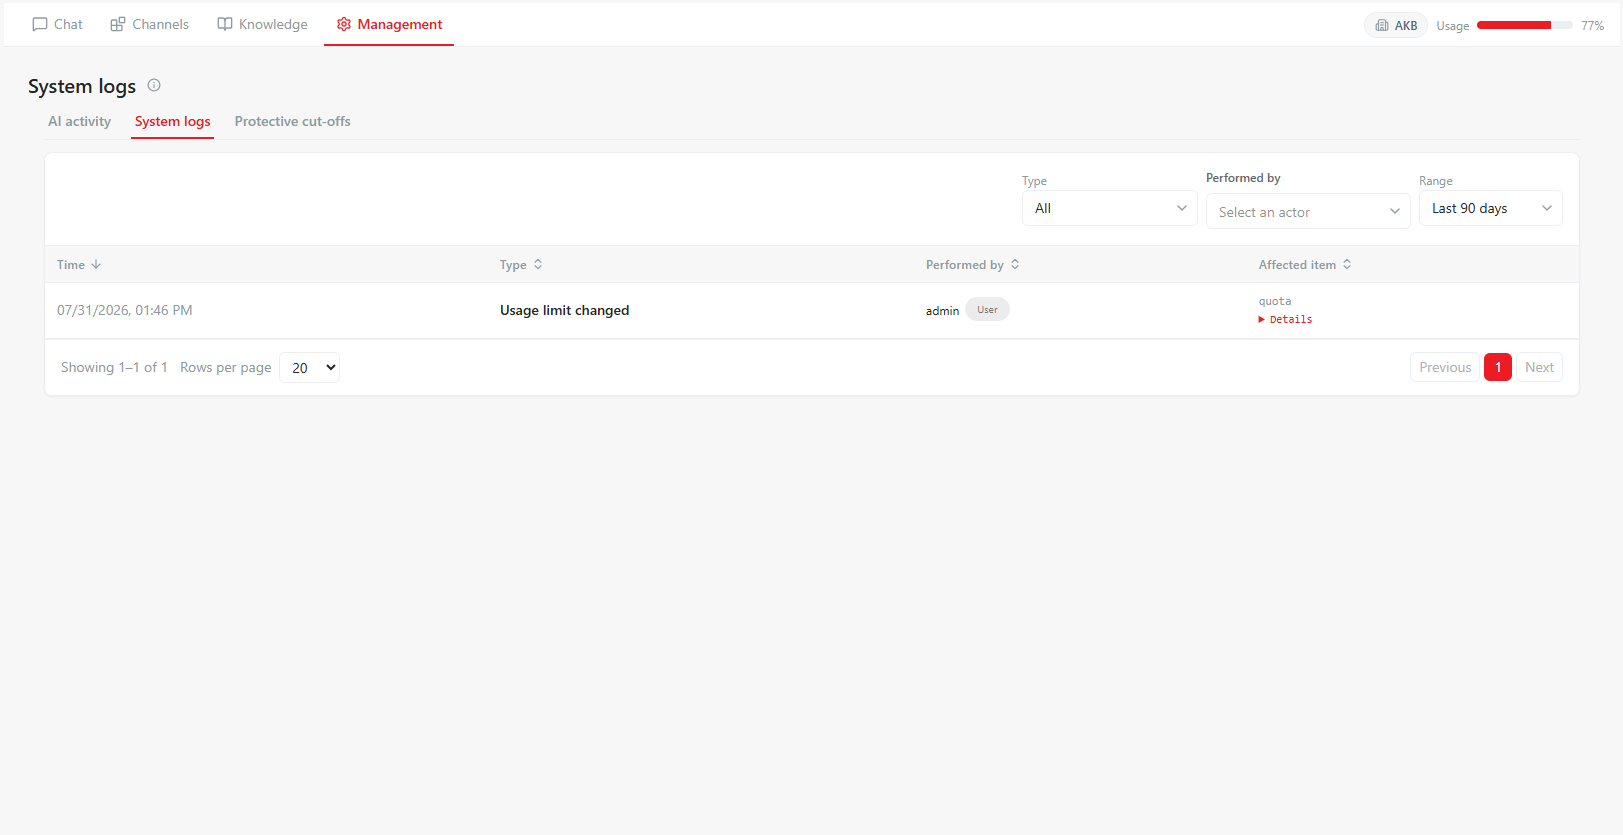
- Select a date range.
- Filter by type or actor.
- Open the event details.
- Compare actor, target, time, and payload with the approved change or incident record.
Audit data helps establish what changed; it does not replace business approval records.
Use emergency controls
Emergency controls are restricted to authorized incident commanders and must follow the established incident-response process.
To suspend an organization or principal, follow the incident-response process:
Procedure
- Confirm the incident commander/authorizer.
- Select the exact target.
- Enter a meaningful reason.
- Type the required confirmation phrase.
- Submit and verify that traffic is blocked.
- Record the action in the incident timeline.
To restore activity, confirm remediation and authorization, use Restore activity, then monitor new runs. Do not leave a suspension without an owner and review time.
Where to go next
- New environment? Follow the setup order above, then hand off to Channel builders — see Channels.
- Reviewing who can access what? See Getting Started: Roles and permissions.