Browser Automation
This guide walks you through the essentials you need before building your first automation with the Common Activities package: installing the akaBot Web Extension, understanding how akaBot locates elements on screen (selectors), and a hands-on example workflow.
1. Install the akaBot Web Extension
The akaBot Browser Extension is required to enable web automation capabilities within akaBot Studio. When the extension is installed and enabled in the user's web browser, akaBot Studio can natively detect and interact with web elements during automation recording and execution.
1.1 Prerequisites
Before installing the akaBot Browser Extension, ensure the following conditions are met:
System requirements
- Windows 10/11, Windows Server 2016/2019/2022.
- akaBot Studio installed (supported version).
- User has local installation permissions.
Browser requirements
- Google Chrome (any recent stable version), or
- Microsoft Edge, Chromium-based (any recent stable version), or
- Mozilla Firefox (any recent stable version)
1.2 Install akaBot Extension for Google Chrome
Launch installation from akaBot Studio
- Open akaBot Studio.
- In the Studio sidebar, navigate to Options > Extensions.
- In the Chrome section, click Install.
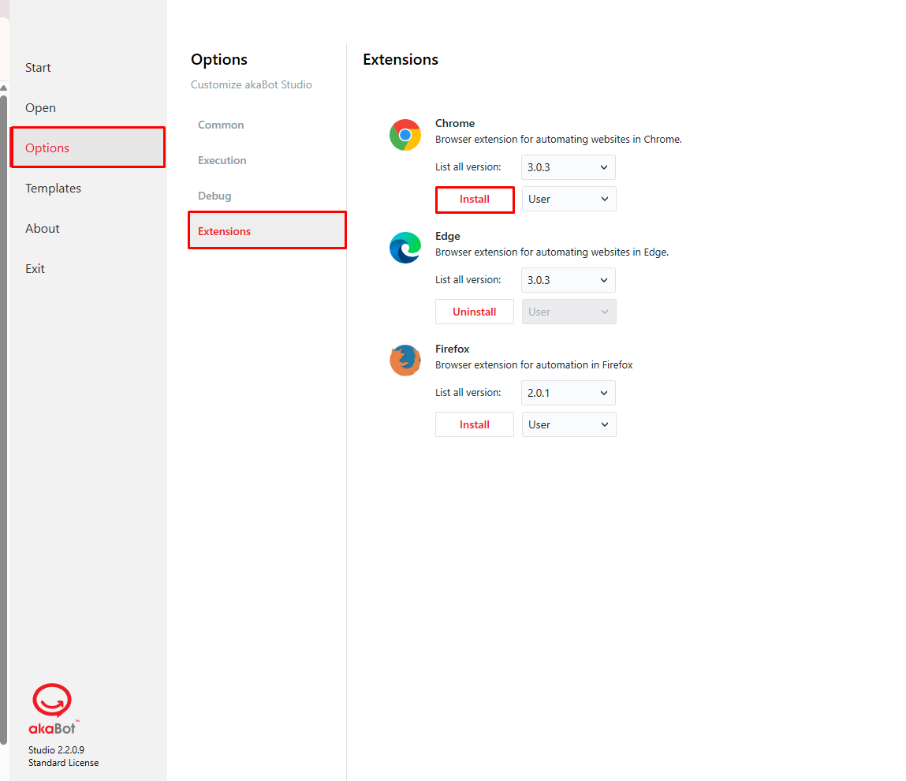
Once you click Install, the system will check for any running browser instances. If the browser is currently open, a confirmation dialog will appear prompting you to click OK to close all running browser instances before proceeding with the installation.

If no browser instances are running, the installation will proceed automatically and a success message will be displayed. Click OK to complete.
Enable the extension in Chrome
Reopen Chrome. A notification pop-up will appear prompting you to enable the extension. Click Enable extension to activate it.
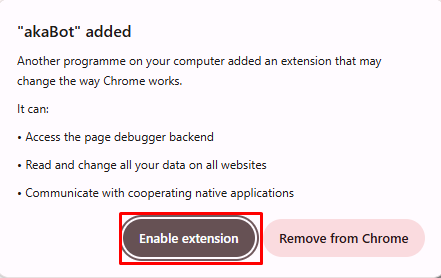
Alternatively, you can navigate to Extensions and turn on the extension using the toggle button.
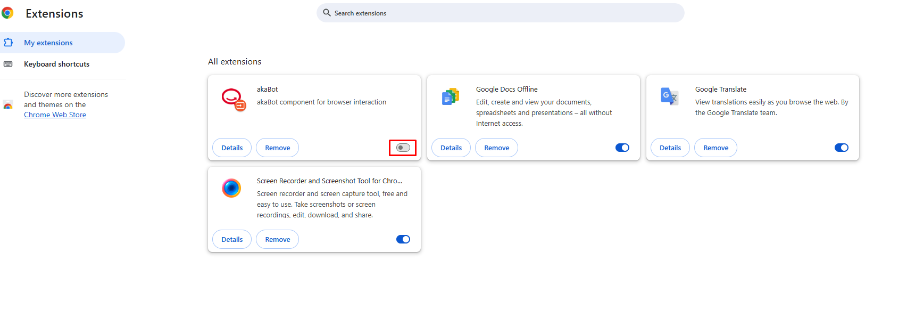
Once the toggle is enabled, akaBot can interact with the browser to perform automation activities.
1.3 Install akaBot Extension for Microsoft Edge
Launch installation from akaBot Studio
- Open akaBot Studio.
- In the Studio sidebar, navigate to Options > Extensions.
- In the Edge section, click Install.
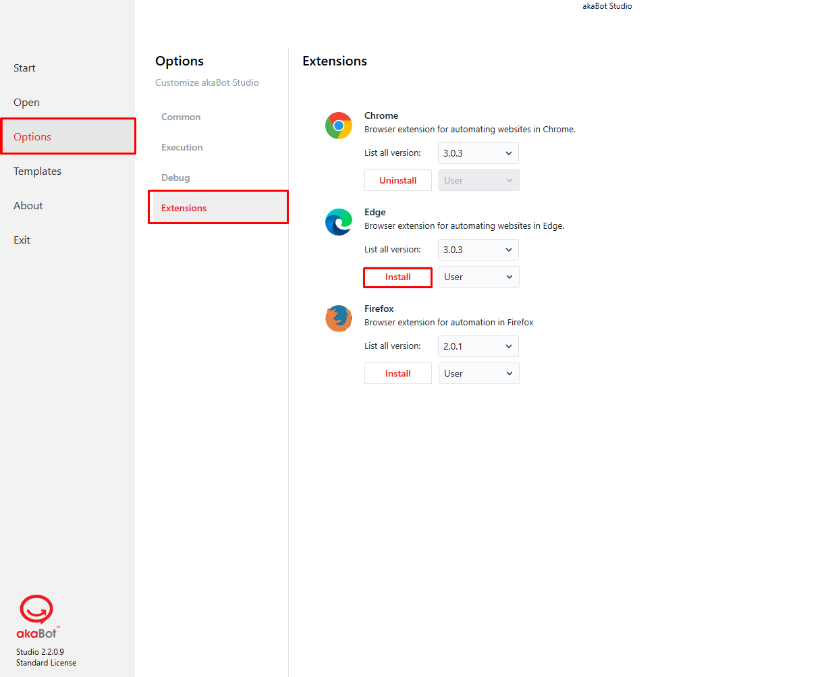
Once you click Install, the system will check for any running browser instances. If the browser is currently open, a confirmation dialog will appear prompting you to click OK to close all running browser instances before proceeding with the installation.

If no browser instances are running, the installation will proceed automatically and a success message will be displayed. Click OK to complete.
Enable the extension in Edge
Reopen Edge. A notification pop-up will appear prompting you to enable the extension. Click Turn on extension to activate it.
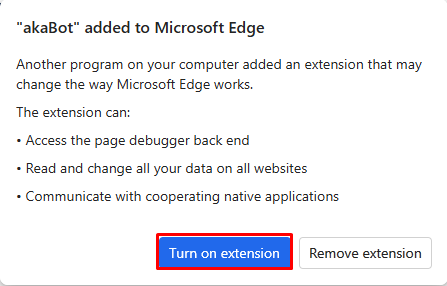
Alternatively, you can navigate to Extensions and turn on the extension using the toggle button.
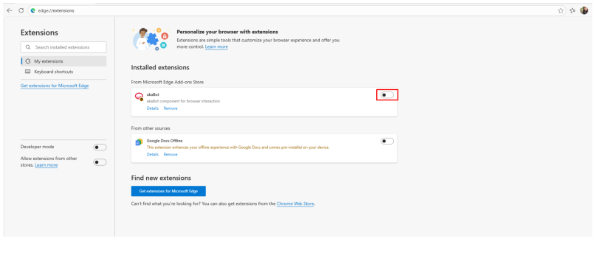
Once the toggle is enabled, akaBot can interact with the browser to perform automation activities.
1.4 Install akaBot Extension for Firefox
Launch installation from akaBot Studio
- Open akaBot Studio.
- In the Studio sidebar, navigate to Options > Extensions.
- In the Firefox section, click Install.
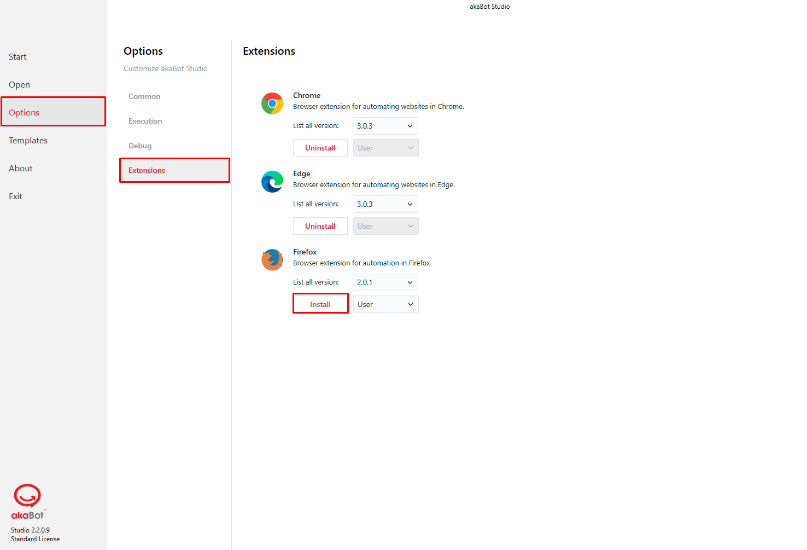
Once you click Install, the system will check for any running browser instances. If the browser is currently open, a confirmation dialog will appear prompting you to click OK to close all running browser instances before proceeding with the installation.
If no browser instances are running, the installation will proceed automatically and a success message will be displayed. Click OK to complete.
Enable the extension in Firefox
- Reopen Firefox. A notification pop-up will appear prompting you to enable the extension. Click Turn on extension to activate it.
- Alternatively, you can navigate to Extensions and turn on the extension using the toggle button.
- Once the toggle is enabled, akaBot can interact with the browser to perform automation activities.
2. Understanding Selectors
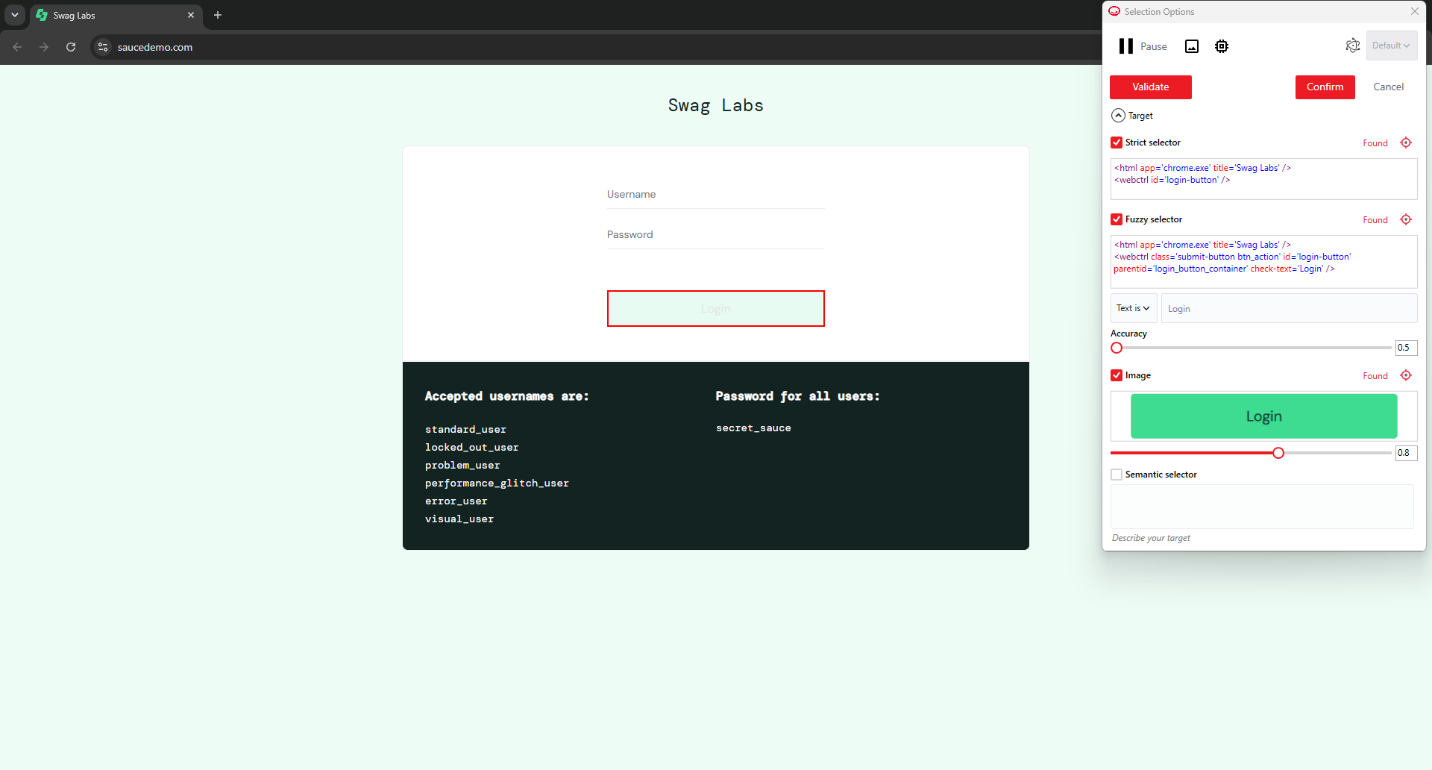
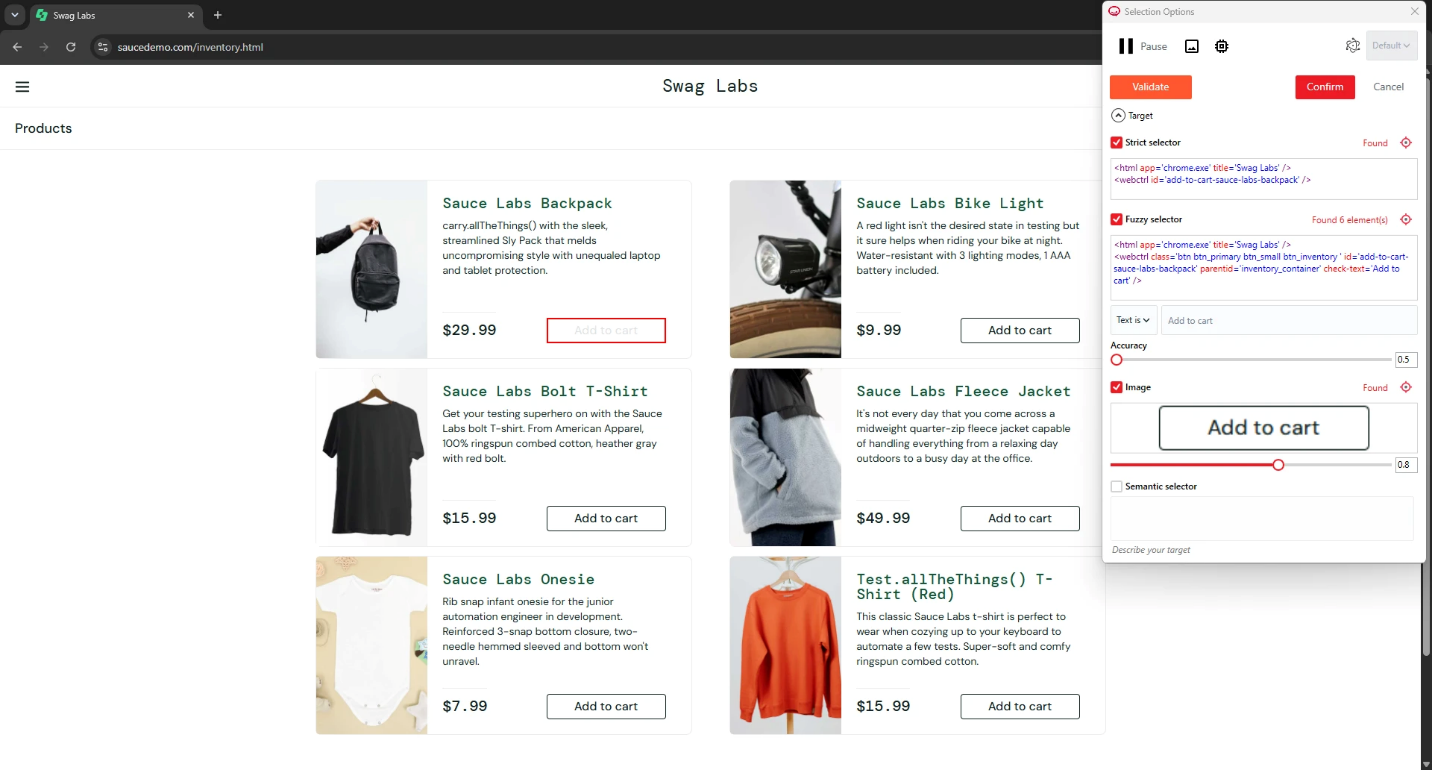
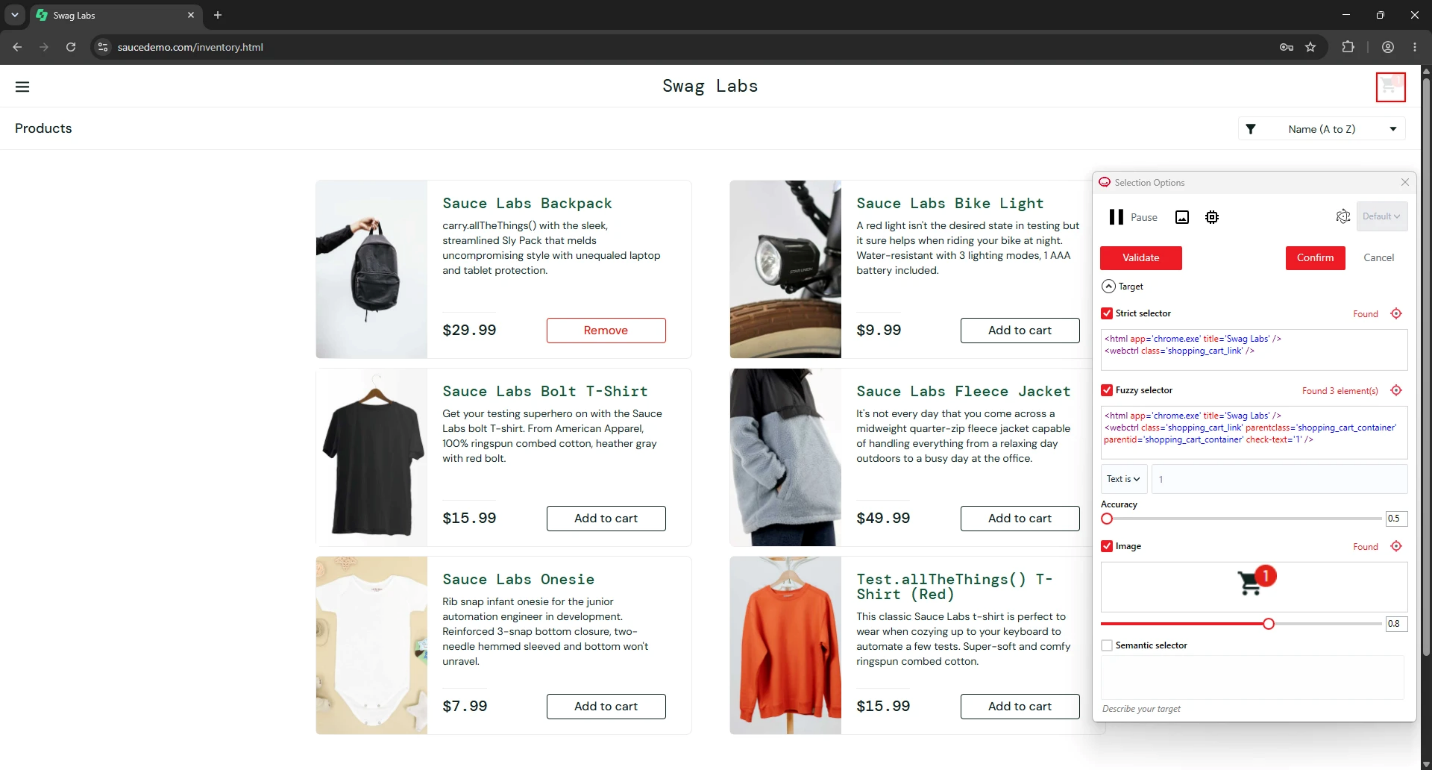
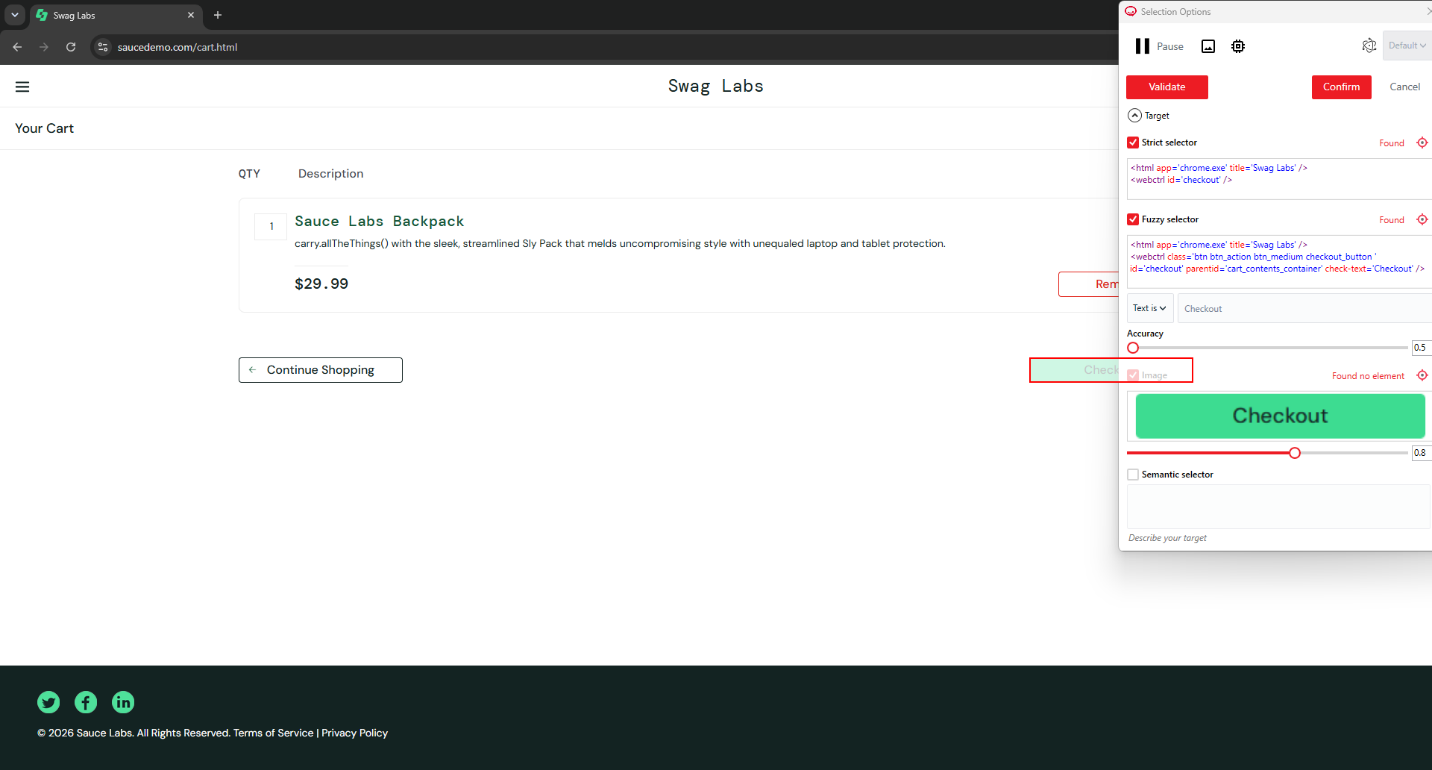
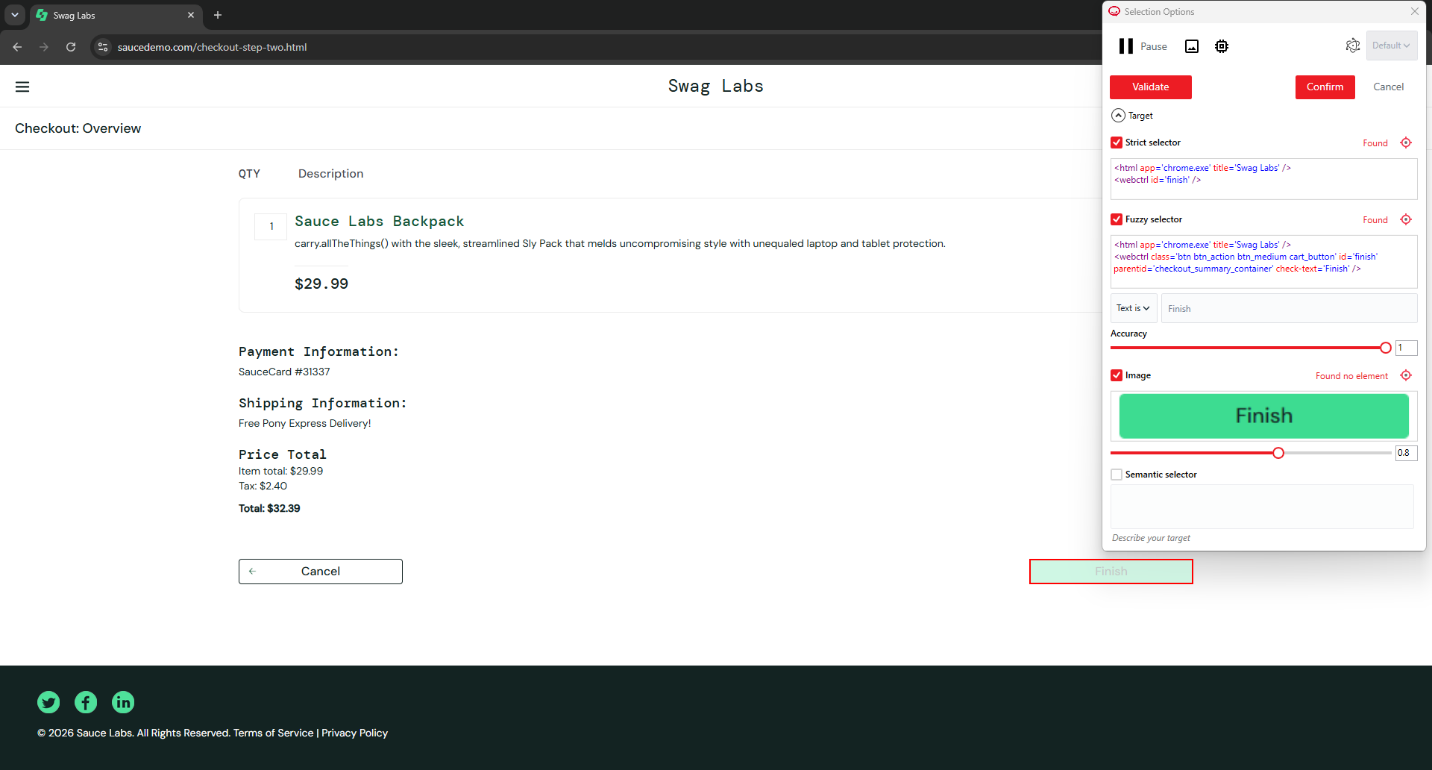
A selector tells akaBot how to find a specific element (a button, an input box, a link...) on the screen when the workflow runs. When you use Indicate on screen to pick a target element, the Selection Options window generates one or more of the following selector types for that element. Each type has an enable/disable checkbox and an Accuracy slider (0.0 → 1.0) that controls how closely the element must match.
| Selector Type | How it works | When to use |
|---|---|---|
| Strict Selector | Matches the element using its exact technical attributes (e.g., ID, class, tag). It is an XML fragment describing the element and some of its parents. | Best when the page structure is stable and the element has reliable, unique attributes. Fastest and most precise, but breaks if the underlying attributes change. |
| Fuzzy Selector | Matches the element using a similarity score against its attributes, allowing partial or wildcard matches instead of an exact match. | Best when attributes are partly dynamic (e.g., an ID that changes slightly between sessions). More resilient than Strict, but slightly less precise. |
| Image Selector | Matches the element visually, using a screenshot of the element (stored as base64) instead of its underlying attributes. | Best when the element has no reliable attributes to target, or lives inside an image/canvas/virtualized UI. Depends on the element looking the same on screen every time. |
[!TIP] If a generated Strict or Fuzzy selector contains a dynamic value (e.g., an ID that changes on every run), you can manually edit it in the Properties panel and replace the dynamic part with a wildcard (
*).
3. Example Workflow
This example builds a simple end-to-end workflow using the public demo site saucedemo.com: log in, add a product to the cart, and complete checkout.
3.1 Prerequisites
- akaBot Studio installed, with the akaBot Web Extension installed and enabled (see Section 1).
- Target URL:
https://www.saucedemo.com/ - Login credentials: use one of the demo usernames shown on the saucedemo.com login page (e.g.,
standard_user) with passwordsecret_sauce. When entering these values in akaBot activity properties, wrap them in double quotes ("standard_user","secret_sauce").
3.2 Step-by-Step Instructions
-
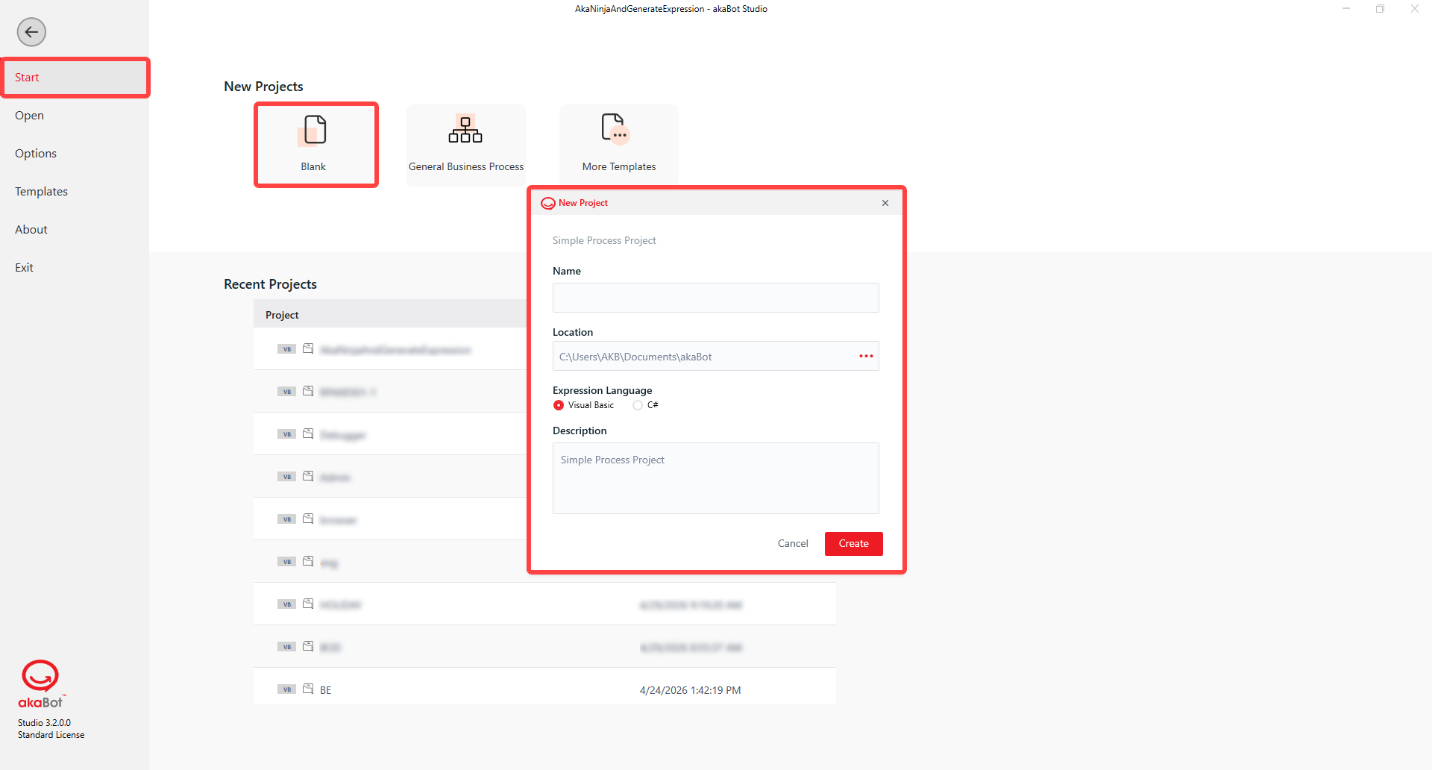
Open akaBot Studio and create a new Process.
-
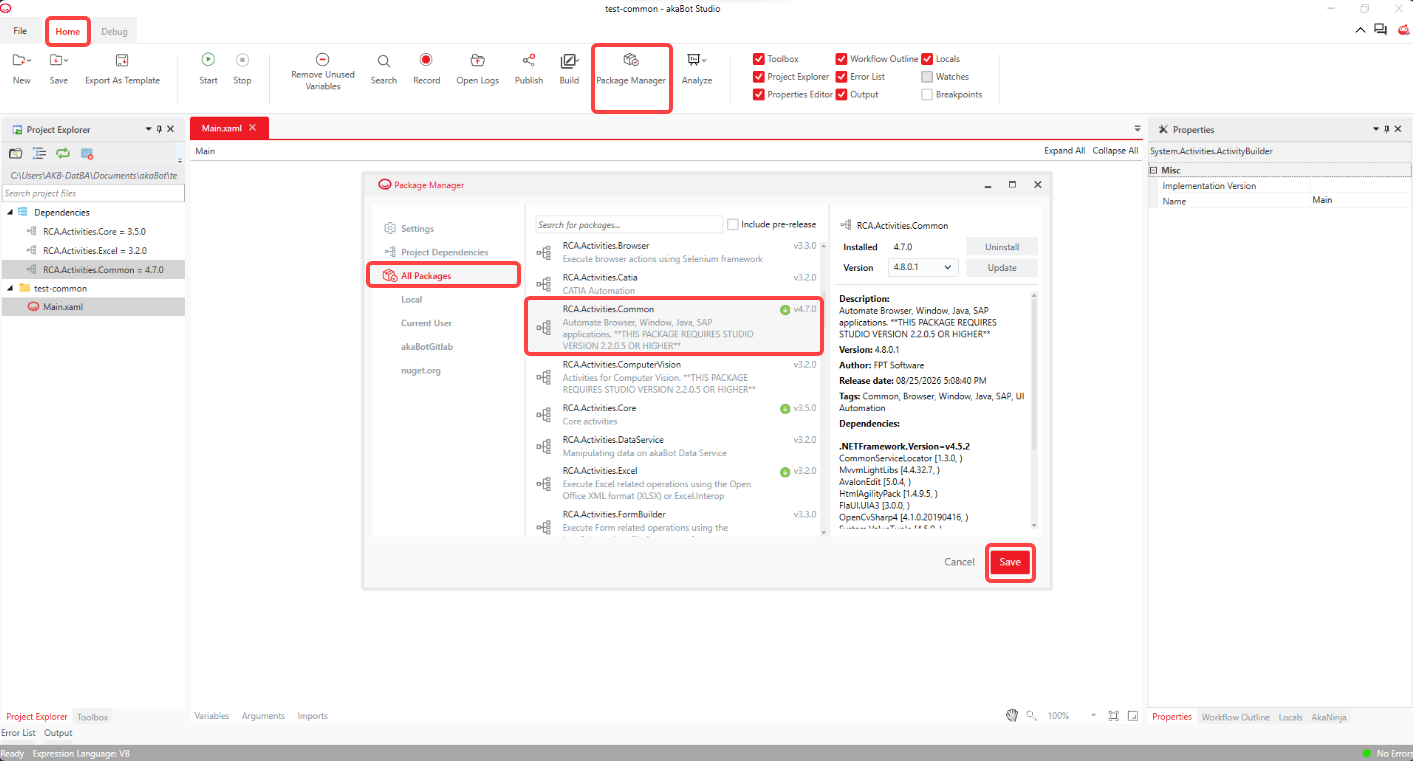
Install the akaBot Common activities package. In the workflow editor, click Package Manager on the Home tab. Select the All Packages tab, find RCA.Activities.Common in the list, choose the latest available version (4.8.0.1 or newer), and click Save. Once installed, the Common activities (Open Browser, Type Into, Click, and others) will appear in the Toolbox under Common > Browser.
-
Drag a Sequence container into the Workflow Designer.
-
Drag an Open Browser activity inside the Sequence container. In the Properties panel on the right, under the Input section, set the URL field to
"https://www.saucedemo.com/"(including the double quotes) and select Chrome from the Browser Type dropdown.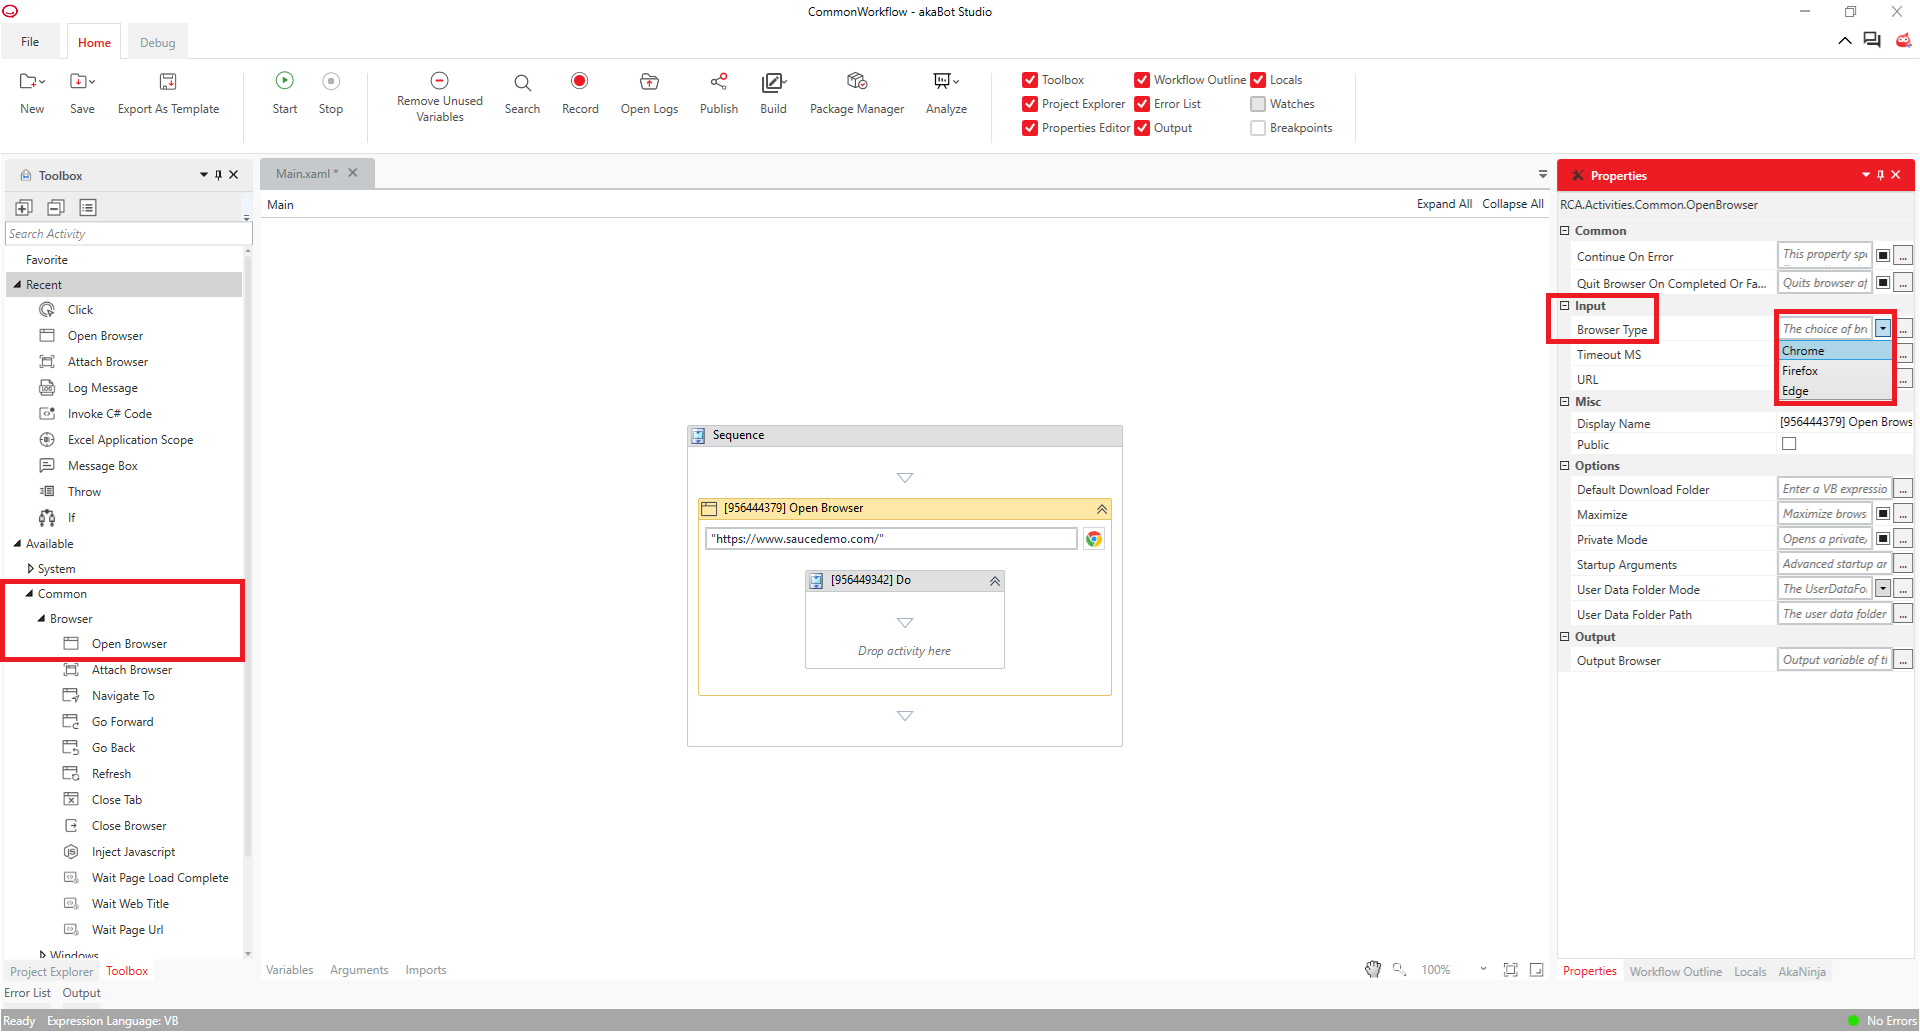
-
Drag a Type Into activity inside the Do container of the Open Browser activity. Click Indicate on screen; the akaBot Studio window will minimize and the browser will come to the foreground. Hover over the Username field until it is highlighted with a red border, then left-click to select it. In the Selection Options window that appears, keep the default settings (Strict, Fuzzy, and Image selectors are all enabled by default) and click Confirm. In the Properties panel, under the Input section, set the Text field to
"standard_user"(including the double quotes).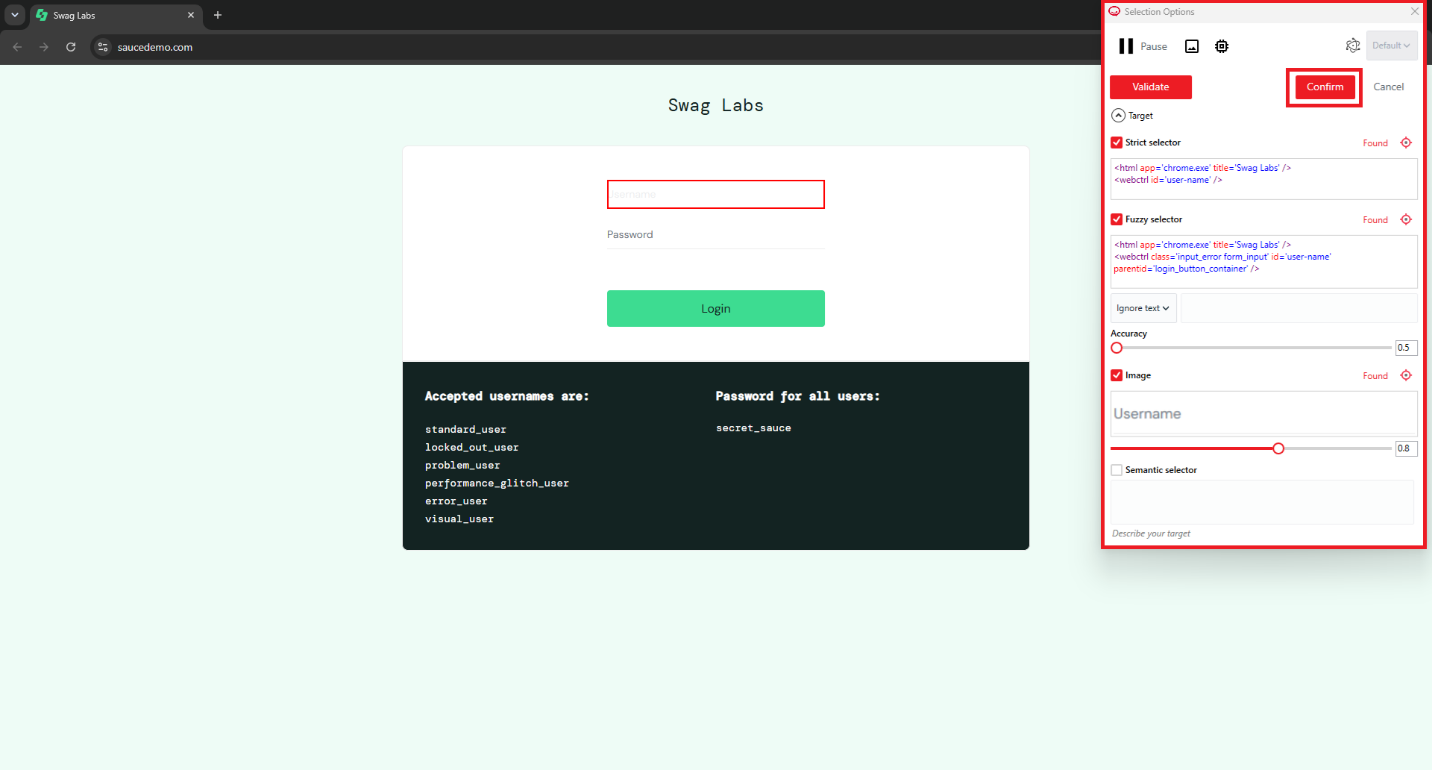
-
Drag another Type Into activity immediately below it, still inside the same Do block. Click Indicate on screen and select the Password field the same way. In the Properties panel, set the Text field to
"secret_sauce"(including the double quotes).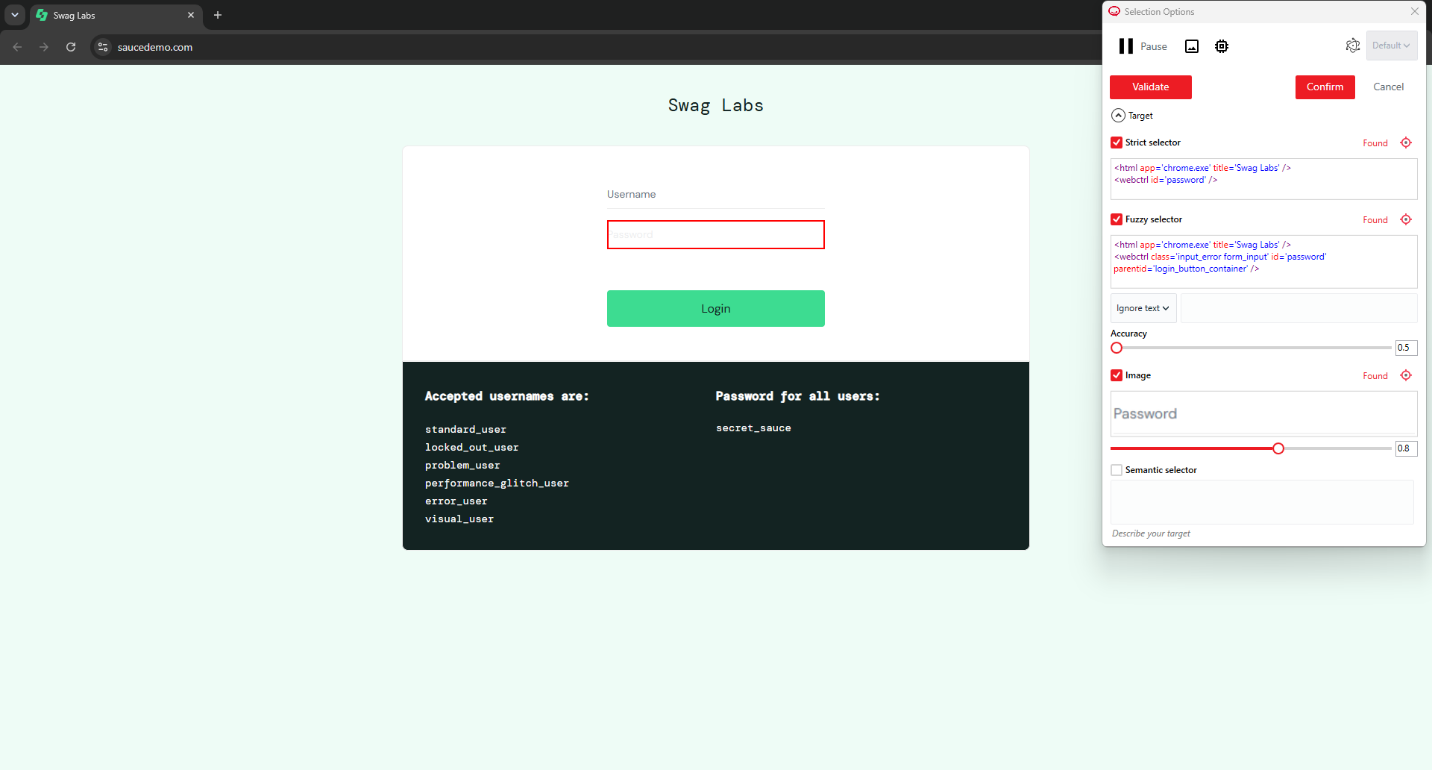
-
Drag a Click activity below it, still inside the Do block. Click Indicate on screen, then click the Login button.
-
Drag another Click activity below it to add a product to the cart. Click Indicate on screen, then click the Add to cart button on any product tile.
-
Drag another Click activity below it to open the cart. Click Indicate on screen, then click the cart icon in the top-right corner.
-
Drag another Click activity below it to proceed to checkout. Click Indicate on screen, then click the Checkout button.
-
Drag a Type Into activity below it. Click Indicate on screen, select the First Name field, and set the Text to
"Tom"(or any sample name, including the double quotes).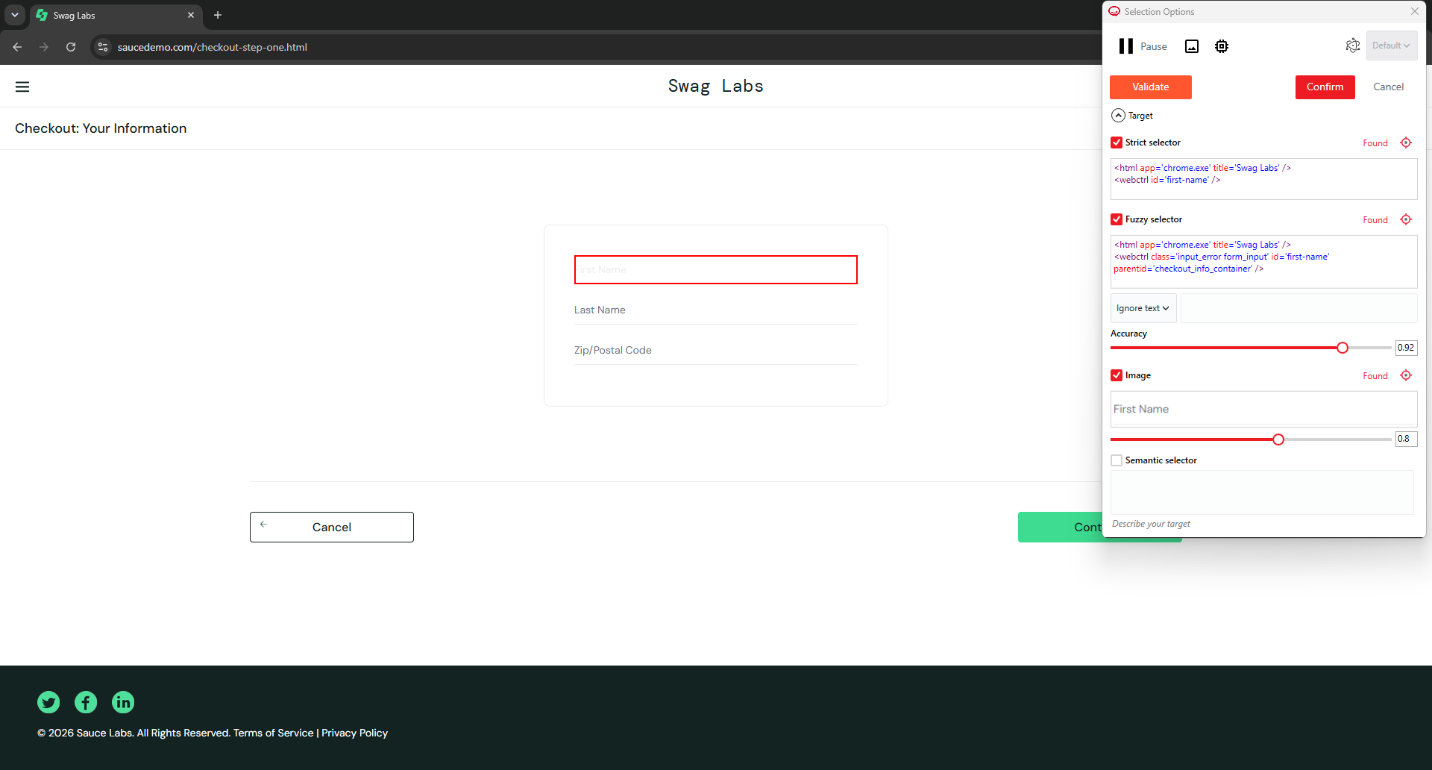
-
Drag another Type Into activity below it. Click Indicate on screen, select the Last Name field, and set the Text to
"Smith"(or any sample name, including the double quotes).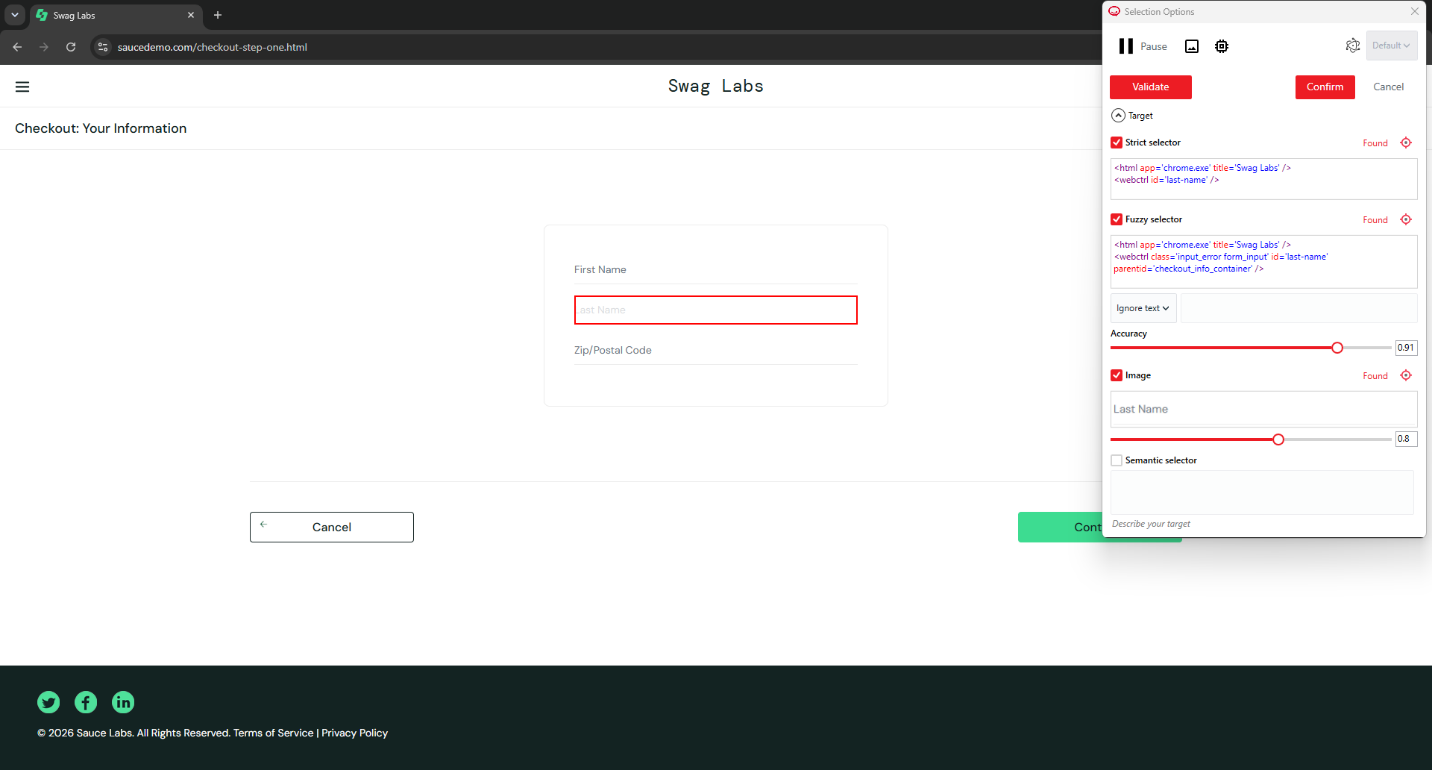
-
Drag a Type Into activity below it. Click Indicate on screen, select the Zip/Postal Code field, and set the Text to
"5000"(or any sample value, including the double quotes).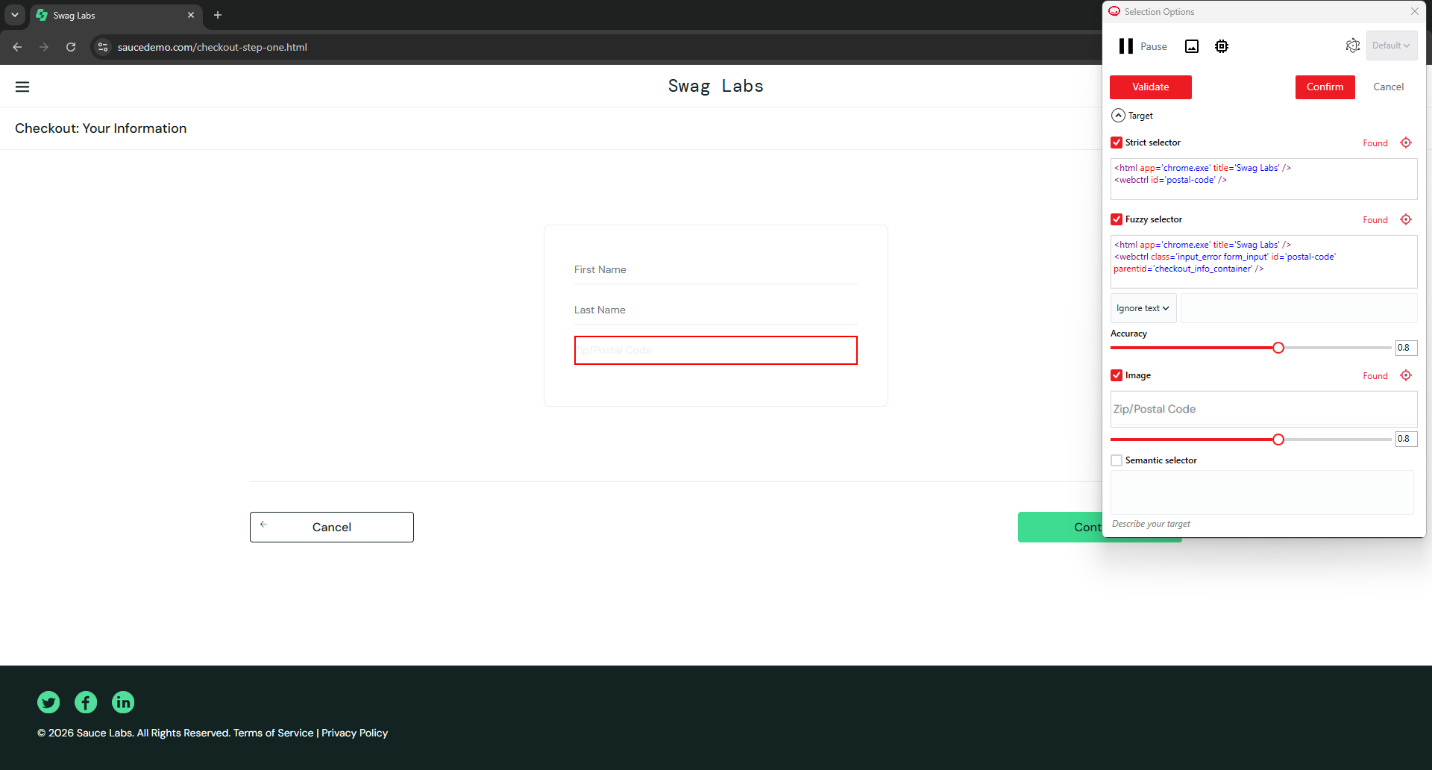
-
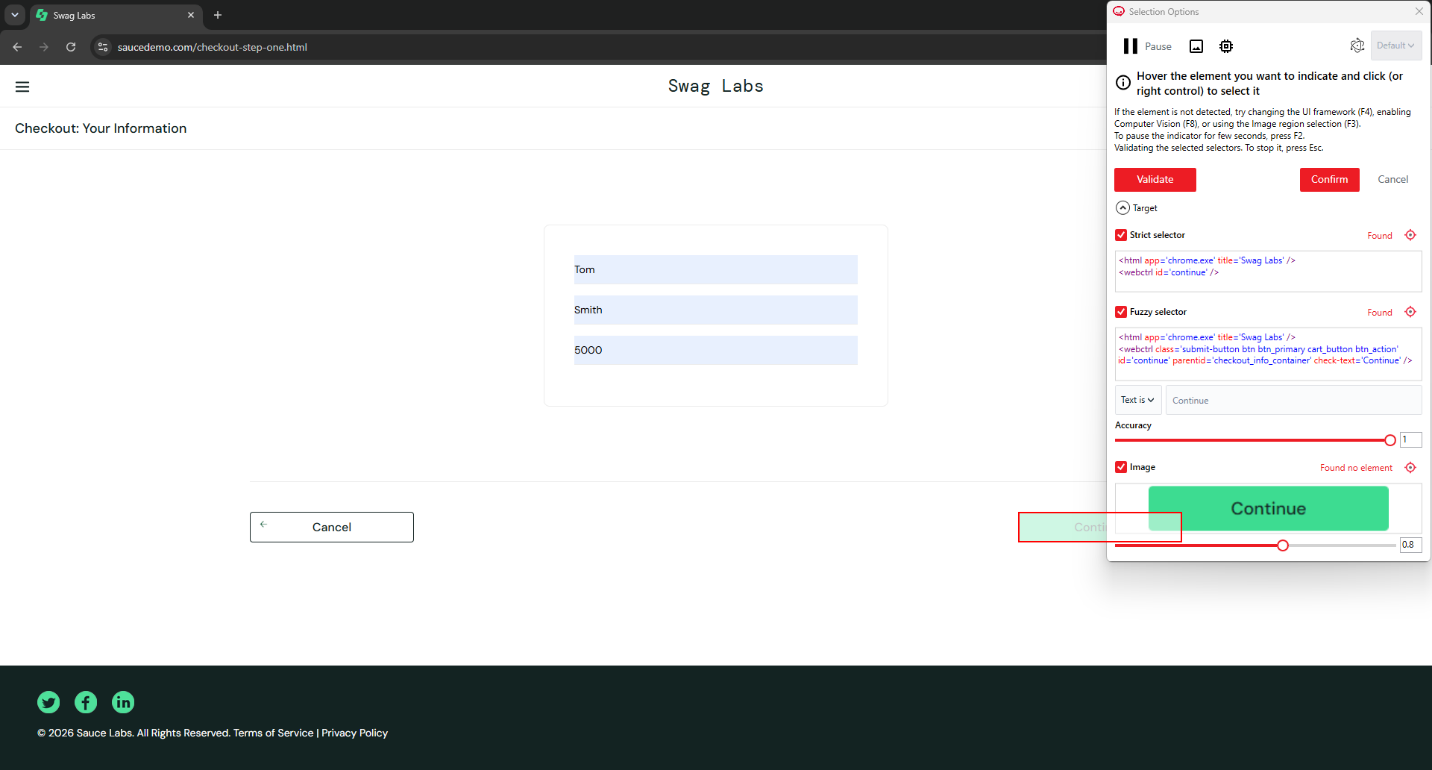
Drag a Click activity below it. Click Indicate on screen, select the Continue button, and click it.
-
Drag a Click activity below it. Click Indicate on screen, select the Finish button, and click it.
-
Save the process (File > Save, or
Ctrl + S). Then click Start on the Home tab to run it. Verify that the browser opens saucedemo.com, logs in with the demo credentials, adds a product to the cart, and completes checkout. The final page should display "Thank you for your order!". The complete workflow structure is shown below for reference.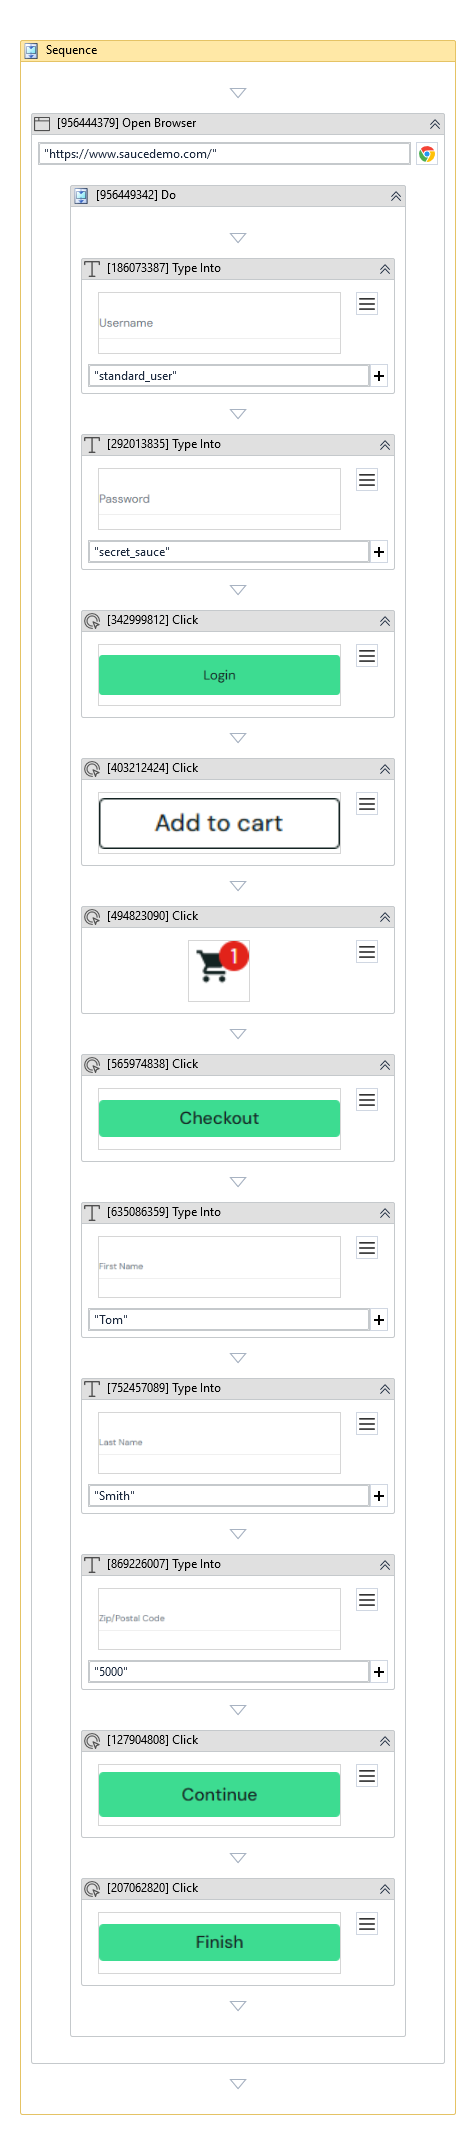
Next Steps
- Explore more Common activities in the Element activity group (Click, Type Into, Get Text, Hover, Select Item, and more).
- Learn how to extract structured data from tables with the Table Extraction activity.