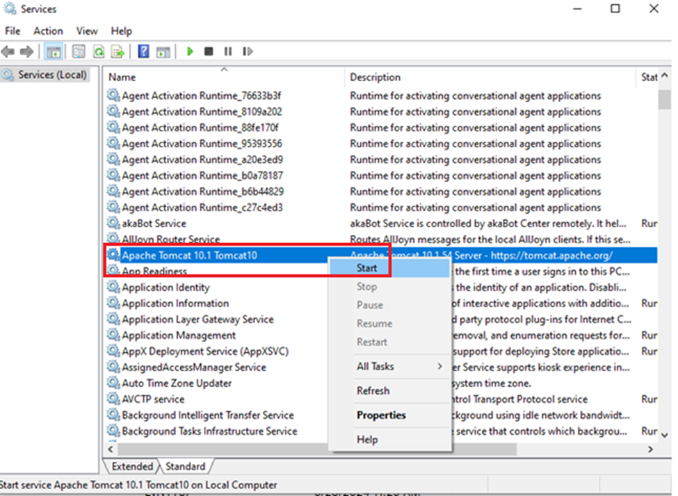
How to Upgrade Apache Tomcat 10
Upgrading Tomcat from 10 to the latest 10.1.x version (e.g., 10.1.54) is necessary to ensure system security, stability, and compatibility. Newer releases include critical security patches, bug fixes, performance improvements, and better support for modern Java versions and Jakarta EE standards, thereby reducing operational risks and improving system reliability.
Step 1: Stop Tomcat 10 & Back up Data
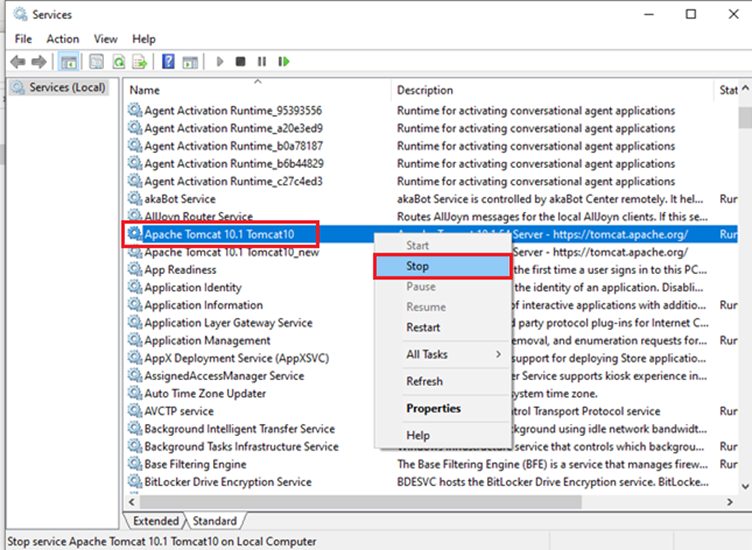
- Open C:\Program Files\Apache Software Foundation\Tomcat 10.1\bin\Tomcat10w.exe
+ Take a screenshot of the configuration before performing the backup.
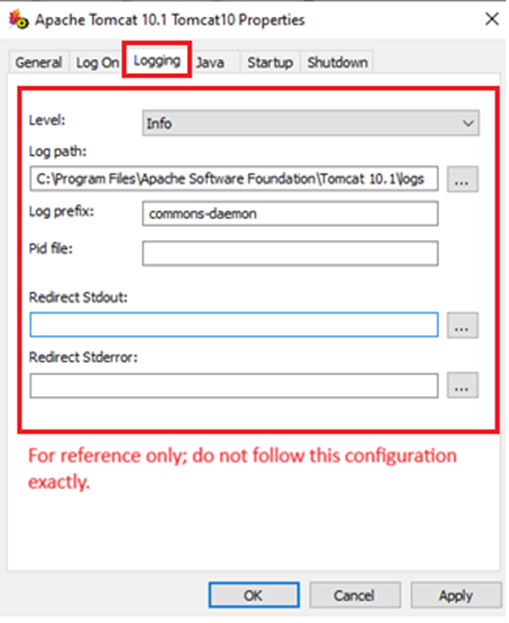
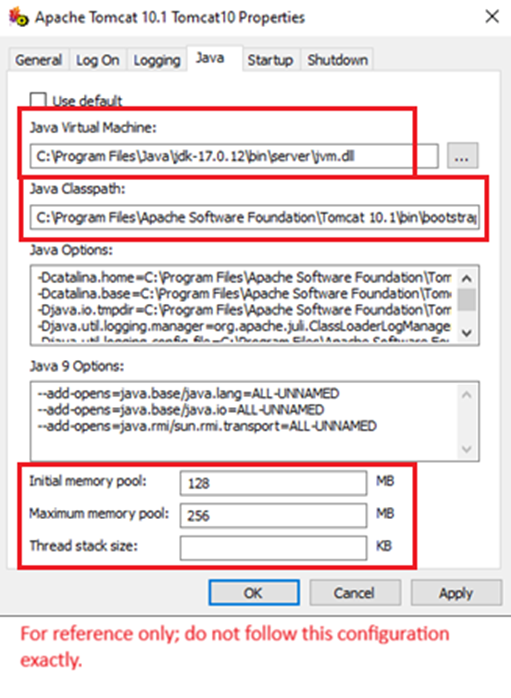
+ Save screenshots for later configuration.
+ Copy your current Tomcat folder to another location to create a backup before starting the upgrade.
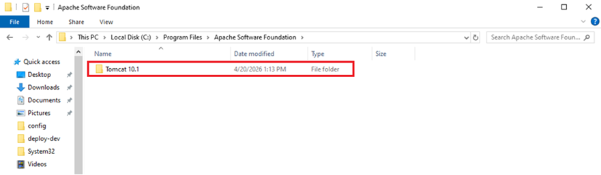
Example: D:\backup\Tomcat 10.1
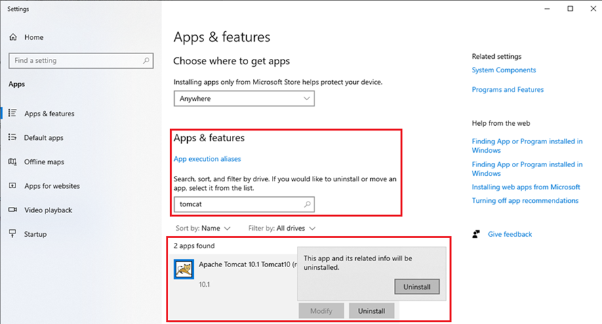
- In Apps & features, search for Tomcat, select the existing version, and click Uninstall.
Step 2: Download and install Tomcat 10.1.54
- Download Tomcat 10.1.54 (latest version 10.1.54) from the following link
https://dlcdn.apache.org/tomcat/tomcat-10/v10.1.54/bin/apache-tomcat-10.1.54.exe
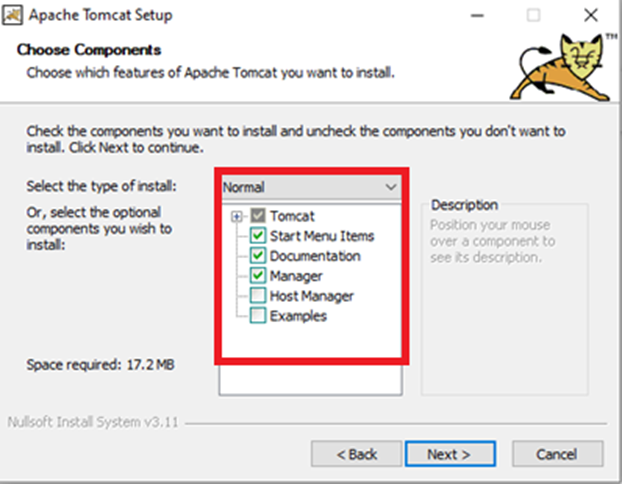
- Install Tomcat 10.1.54, selecting the options as shown below:
Step 3: Configure Windows Service Name
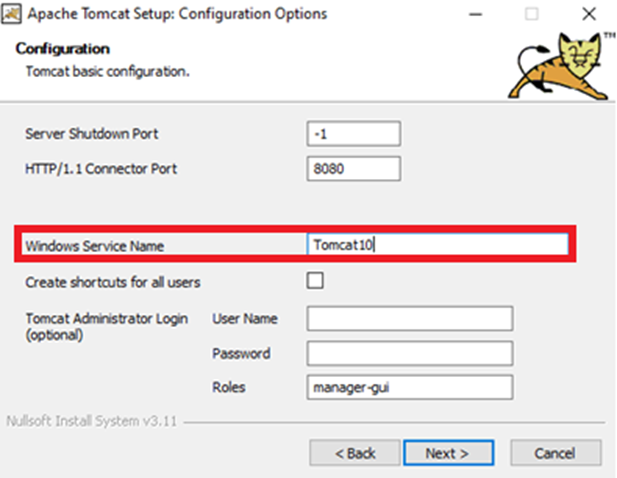
- In the Apache Tomcat Setup – Configuration Options screen:
- Locate the Windows Service Name field
- Enter a new service name for the Tomcat 10.1.54 instance: Tomcat10
Step 4: Configure Java Version (JDK 17)
In case the server has multiple versions of JRE/JDK installed, make sure to select the correct JRE/JDK 17 (Java 17).
If only one version is installed, you can SKIP this step, as the installer will automatically detect the path of the installed JRE/JDK.
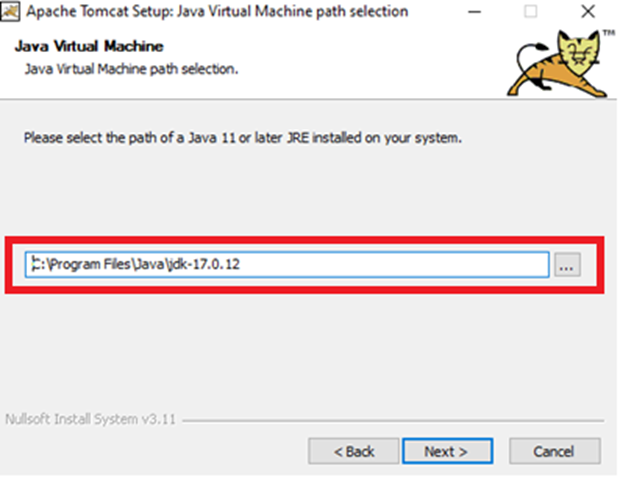
Step 5: Set Destination Folder
In the Destination Folder field, update the folder name to a new value.
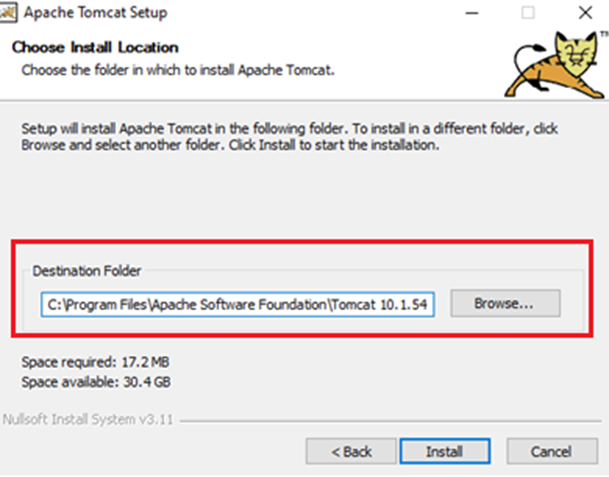
Step 6: Uncheck Run Apache Tomcat and Show Read Me
At the Completing Apache Tomcat Setupstep, uncheck Run Apache Tomcatand Show Read Me
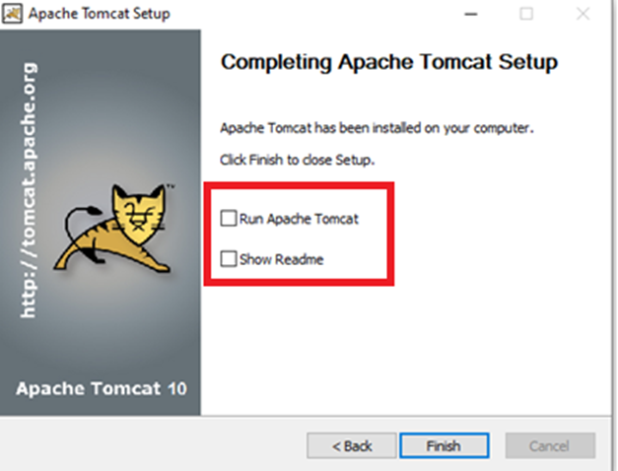
Step 7: Copy Required Data to New Tomcat
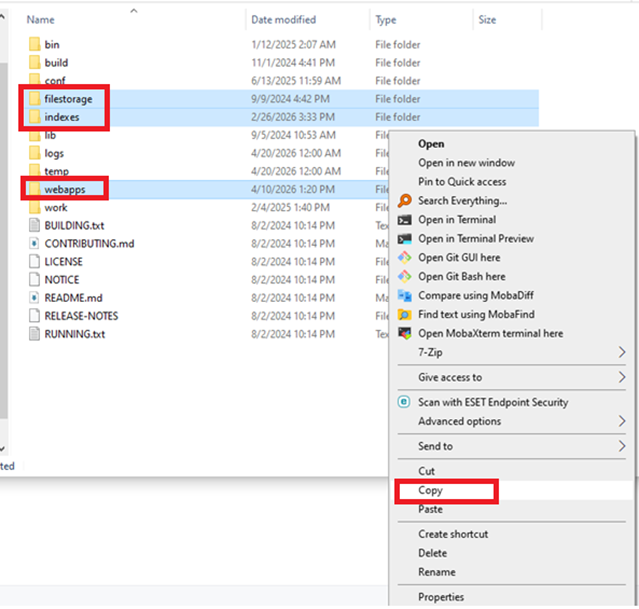
Navigate to the installation directory of the old Tomcat instance:
- Locate the following folders:
- filestorage
- webapps
- indexes
- Right-click and select Copy, then paste them into the corresponding directory of the new Tomcat 10.1.54
- Example installation paths for Tomcat 10.1.54:
- HOME_TOMCAT_10.1.54: C:\Program Files\Apache Software Foundation\Tomcat 10.1.54
Step 8: Configure Tomcat 10.1.54
Open HOME_TOMCAT_10.1.54\BACKUP_TOMCAT_10\bin\Tomcat10w.exe
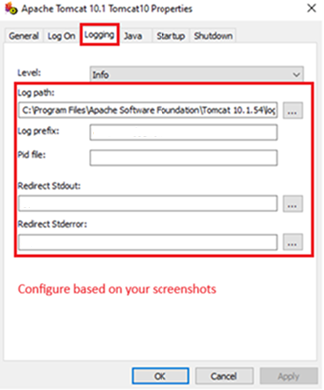
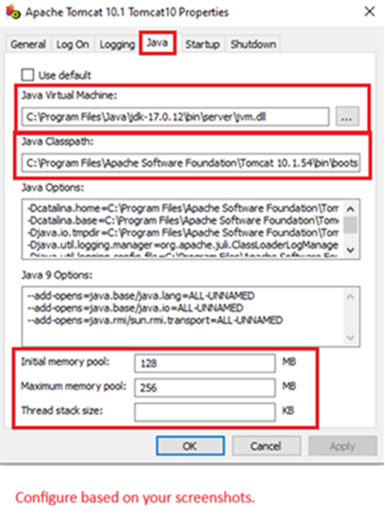
- Configure the new Tomcat instance using the saved screenshots from Step 1 as reference.
+ Tab Logging
+ Tab Java
-
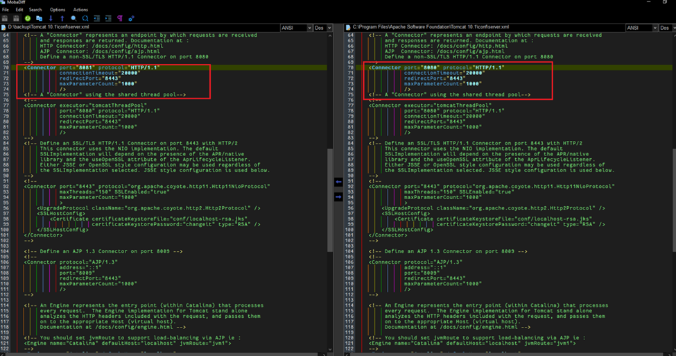
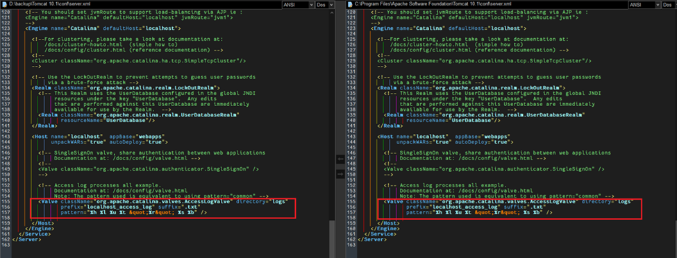
Use a file comparison tool (e.g., MobaDiff, WinMerge) to compare configuration files between the old and new Tomcat instances.
-
Ensure key configurations (e.g., port values in Connector) are consistent between the old and new files, especially the highlighted sections.
Step 9: Start Tomcat 10