Browser Environment Setup
Step-by-step instructions to configure ChromeDriver / EdgeDriver for akaBot Studio to match your current browser version.
Note: To automate web browsers (Chrome, Edge, Firefox) using akaBot Studio, you need to configure two main components:
- WebDriver (e.g. ChromeDriver, EdgeDriver): Enables the robot to launch and control the browser (configured in this guide).
- akaBot Web Extension: Enables the robot to detect and interact with web elements. See the akaBot Web Extension Installation Guide to set this up.
When automating web-based flows in akaBot Studio using Chrome or Edge, your automation might throw WebDriver mismatch errors (e.g., SessionNotCreatedException) if your installed web browser has updated automatically.
To solve this, follow these steps to manually update and configure the browser driver matching your browser version.
Step-by-Step Instructions
For Google Chrome
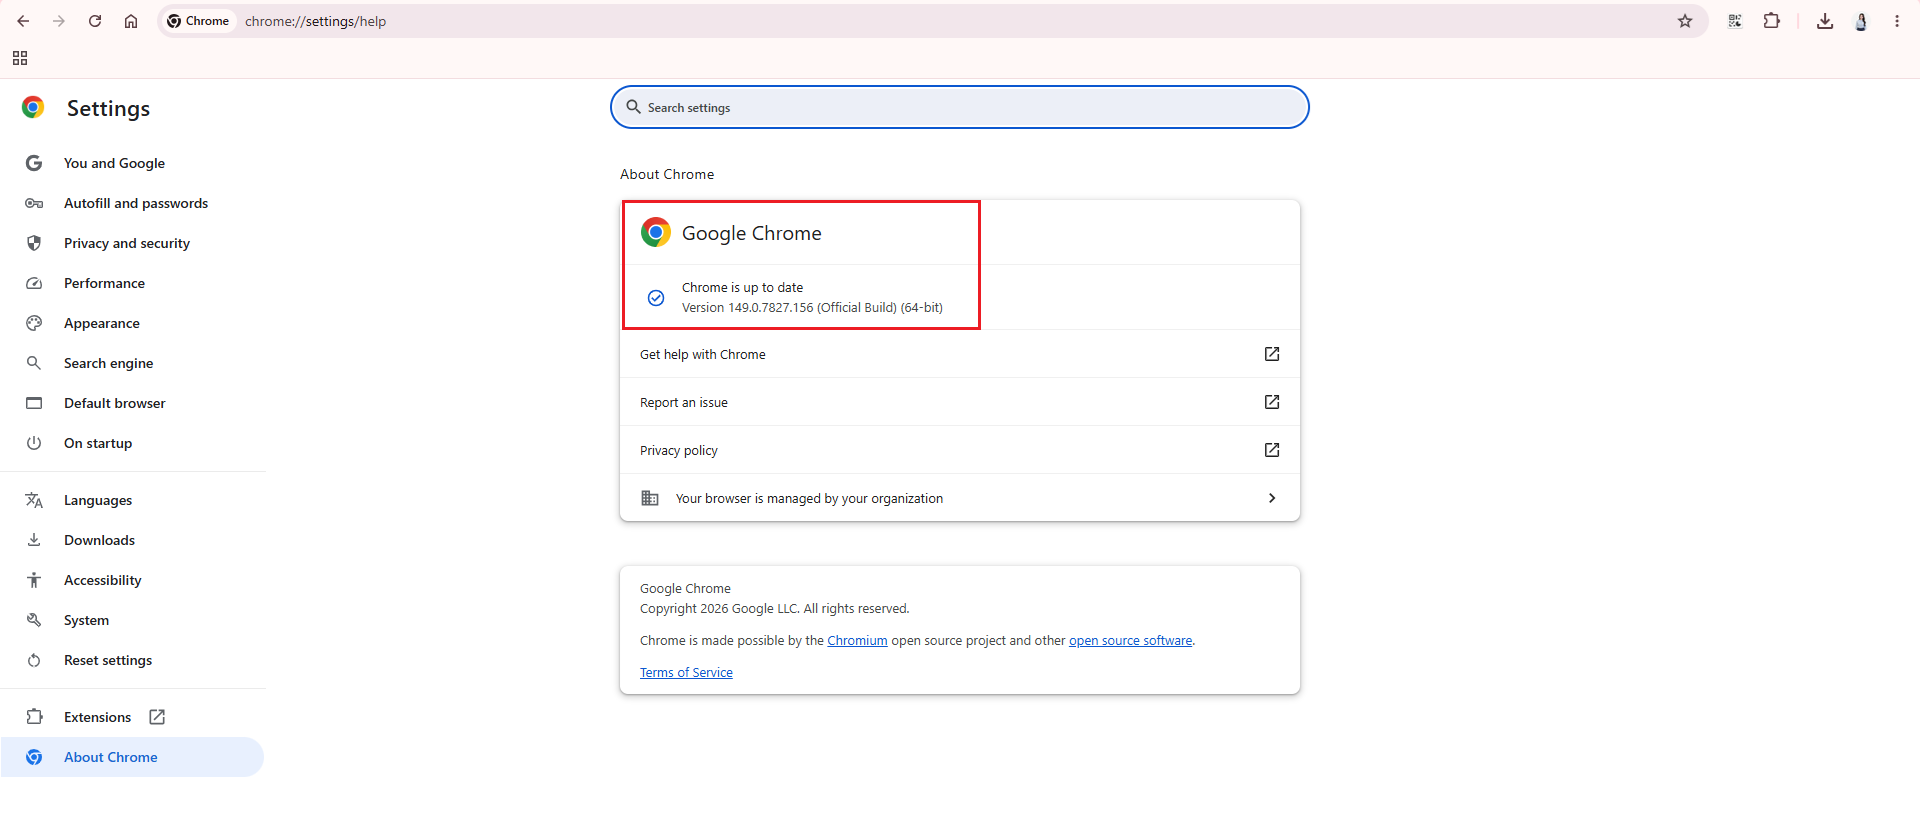
Step 1: Check your Google Chrome version
- Open Google Chrome.
- Navigate to
chrome://settings/helpin the address bar (or click the three dots menu on the top-right -> select Help -> select About Google Chrome). - Note the major version of your Chrome browser (for example: if your version is
149.0.7827.155, the major version is149).
Step 2: Access Chrome for Testing page
- Open a browser tab and go to the official Chrome WebDriver portal:
https://googlechromelabs.github.io/chrome-for-testing/
Step 3: Copy download link and download the driver package
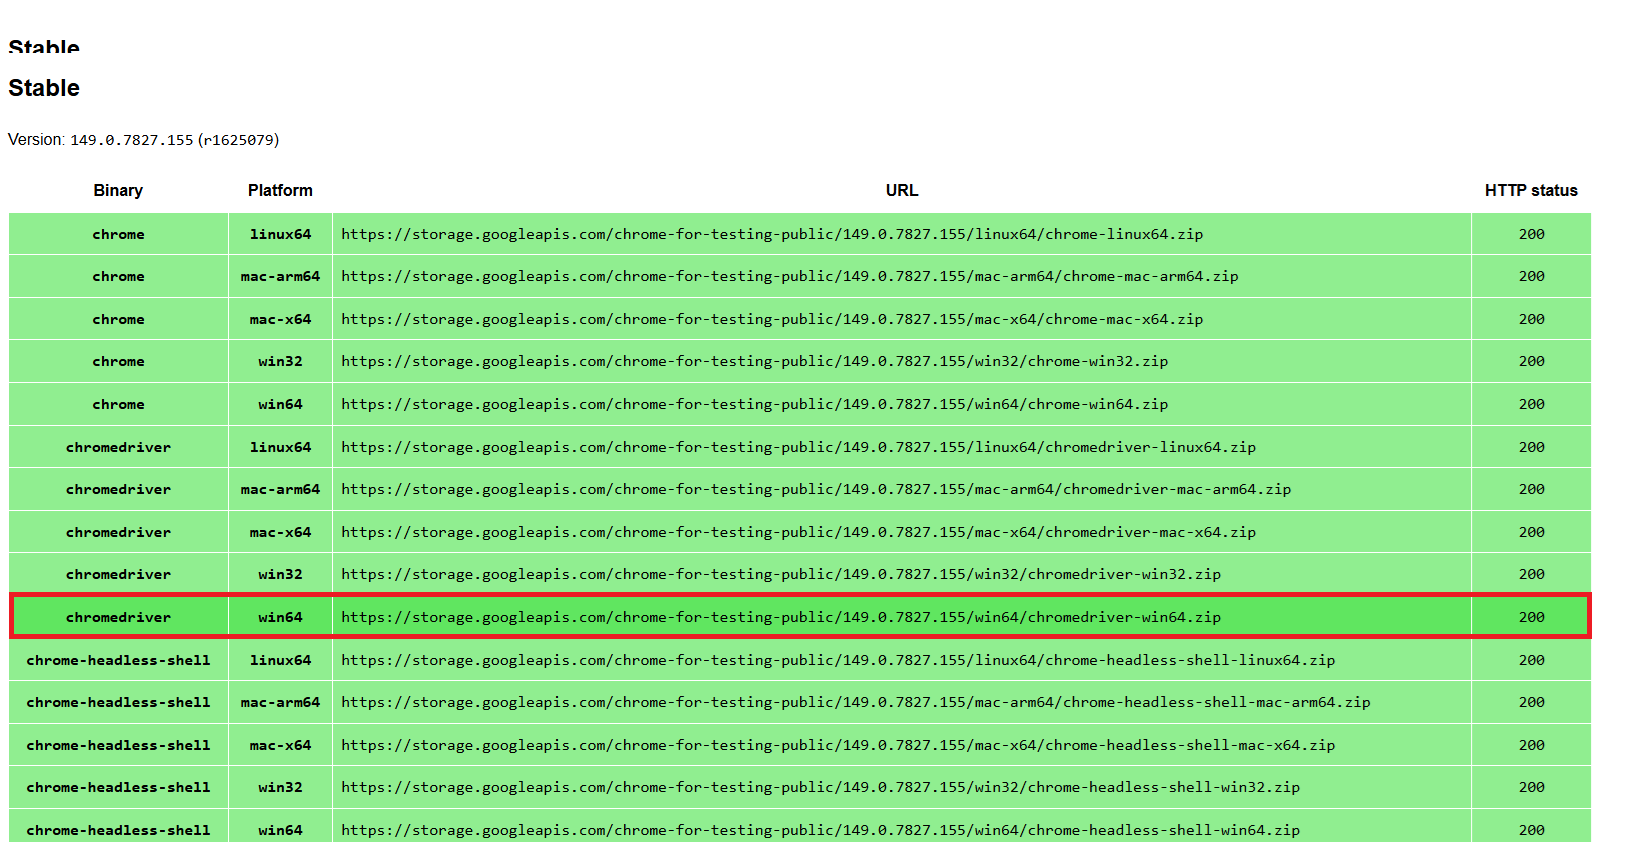
- Locate the channel table (e.g., Stable).
- Find the row for
chromedrivermatching your operating system and CPU architecture (e.g., win64 for 64-bit Windows). - Copy the URL, open a new browser tab, paste it, and press Enter to download the
.zipfile.
Step 4: Navigate to the akaBot ChromeDriver folder
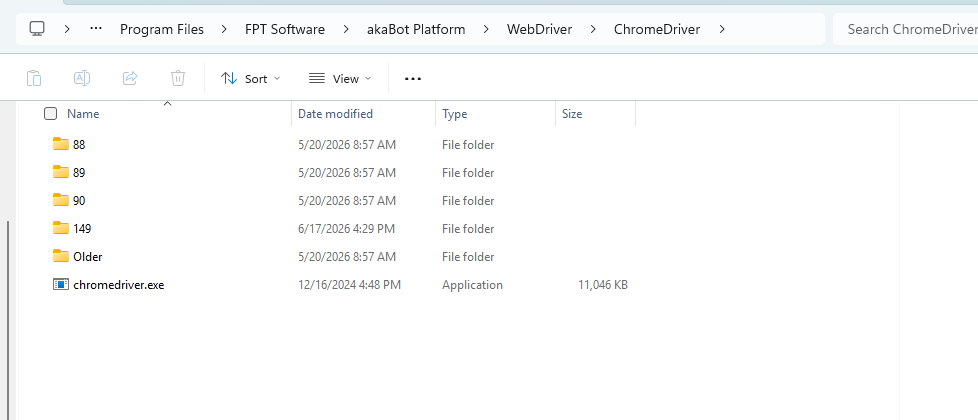
- Open File Explorer on your PC and navigate to the following installation path:
C:\Program Files\FPT Software\akaBot Platform\WebDriver\ChromeDriver
Step 5: Create a new version folder
- Inside the
ChromeDriverdirectory, create a new folder. - Name this folder exactly after the major version you noted in Step 1 (e.g.,
149).
Step 6: Extract the downloaded package
- Locate your downloaded
.zipfile and extract its contents.
Step 7: Copy chromedriver.exe to the version folder
- Copy the
chromedriver.exeexecutable file from the extracted folder. - Paste it directly into the new version folder you created in Step 5 (e.g.,
C:\Program Files\FPT Software\akaBot Platform\WebDriver\ChromeDriver\149).
For Microsoft Edge
Step 1: Check your Microsoft Edge version
- Open Microsoft Edge.
- Navigate to
edge://settings/helpin the address bar (or click the three dots menu on the top-right -> select Help and feedback -> select About Microsoft Edge). - Note the major version of your Edge browser (for example: if your version is
128.0.2739.79, the major version is128).
Step 2: Access the Microsoft Edge WebDriver page
-
Open a browser tab and go to the official Microsoft Edge WebDriver page:
https://developer.microsoft.com/microsoft-edge/tools/webdriverSee the Microsoft Edge WebDriver documentation for more details on this page.
Step 3: Copy download link and download the driver package
- In the Downloads section of the page, find the version number whose first three parts match your Edge version (the fourth part can differ).
- Click the platform button matching your OS and CPU architecture (e.g., x64 for 64-bit Windows) to download the
.zipfile.
Step 4: Navigate to the akaBot EdgeDriver folder
- Open File Explorer on your PC and navigate to the following installation path:
C:\Program Files\FPT Software\akaBot Platform\WebDriver\EdgeDriver
Step 5: Create a new version folder
- Inside the
EdgeDriverdirectory, create a new folder. - Name this folder exactly after the major version you noted in Step 1 (e.g.,
128).
Step 6: Extract the downloaded package
- Locate your downloaded
.zipfile and extract its contents.
Step 7: Copy msedgedriver.exe to the version folder
- Copy the
msedgedriver.exeexecutable file from the extracted folder. - Paste it directly into the new version folder you created in Step 5 (e.g.,
C:\Program Files\FPT Software\akaBot Platform\WebDriver\EdgeDriver\128).
Final Step: Enable Auto Detect in akaBot Studio
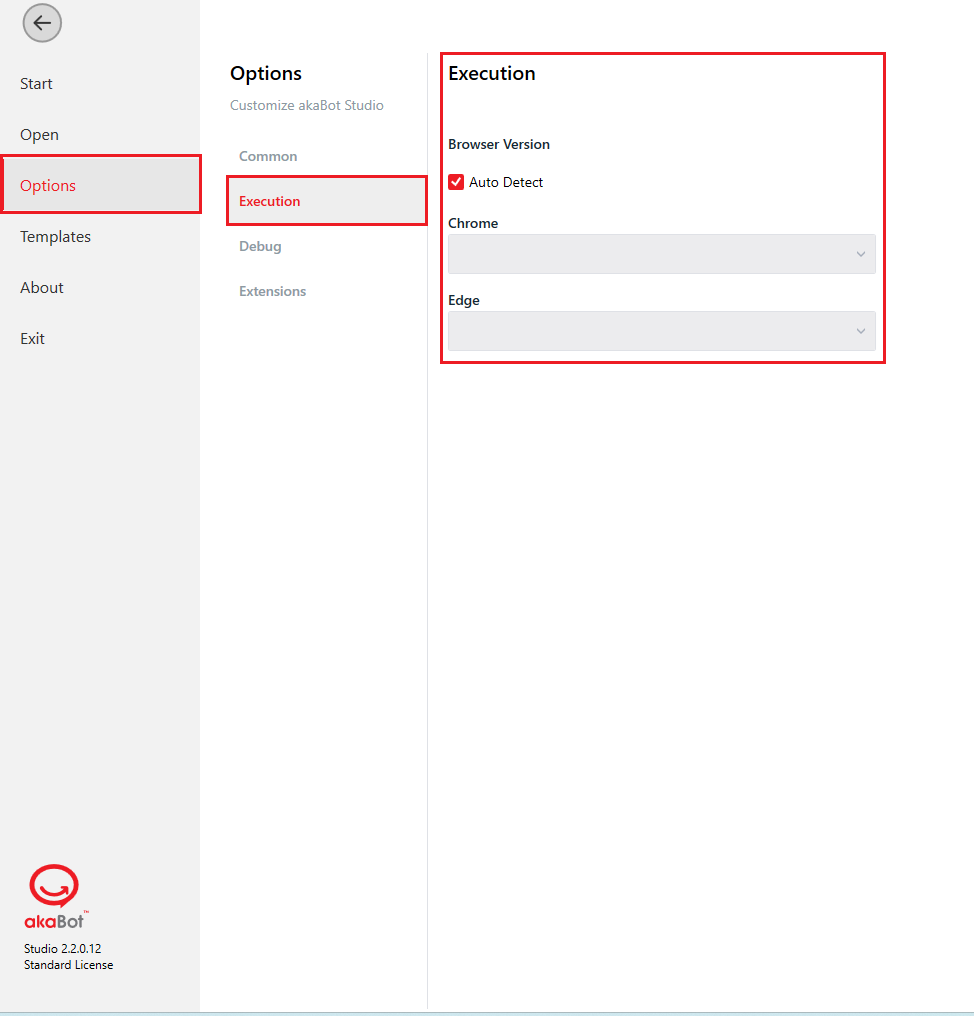
- Launch akaBot Studio.
- Go to Options from the sidebar home screen.
- Select Execution.
- Check the Auto Detect checkbox under the Browser Version section.
- Save or click OK.
Next Steps: Install Web Extension
After setting up the WebDriver, you must install the akaBot Web Extension to enable element detection and interaction on web pages. Without the extension, akaBot Studio cannot highlight or capture elements during design time.
For step-by-step instructions on installing and enabling the extension for your browser, see the akaBot Web Extension Installation Guide.