API Integration
Use the API to send documents to a Pipeline from your own system and to read the extracted data. The API Integration page in the application is the API reference. It lists every endpoint with its request, its response, and a cURL example that you can copy. This page covers API keys and shows how the calls fit together.
Create an API Key
This task needs permission to manage API keys.
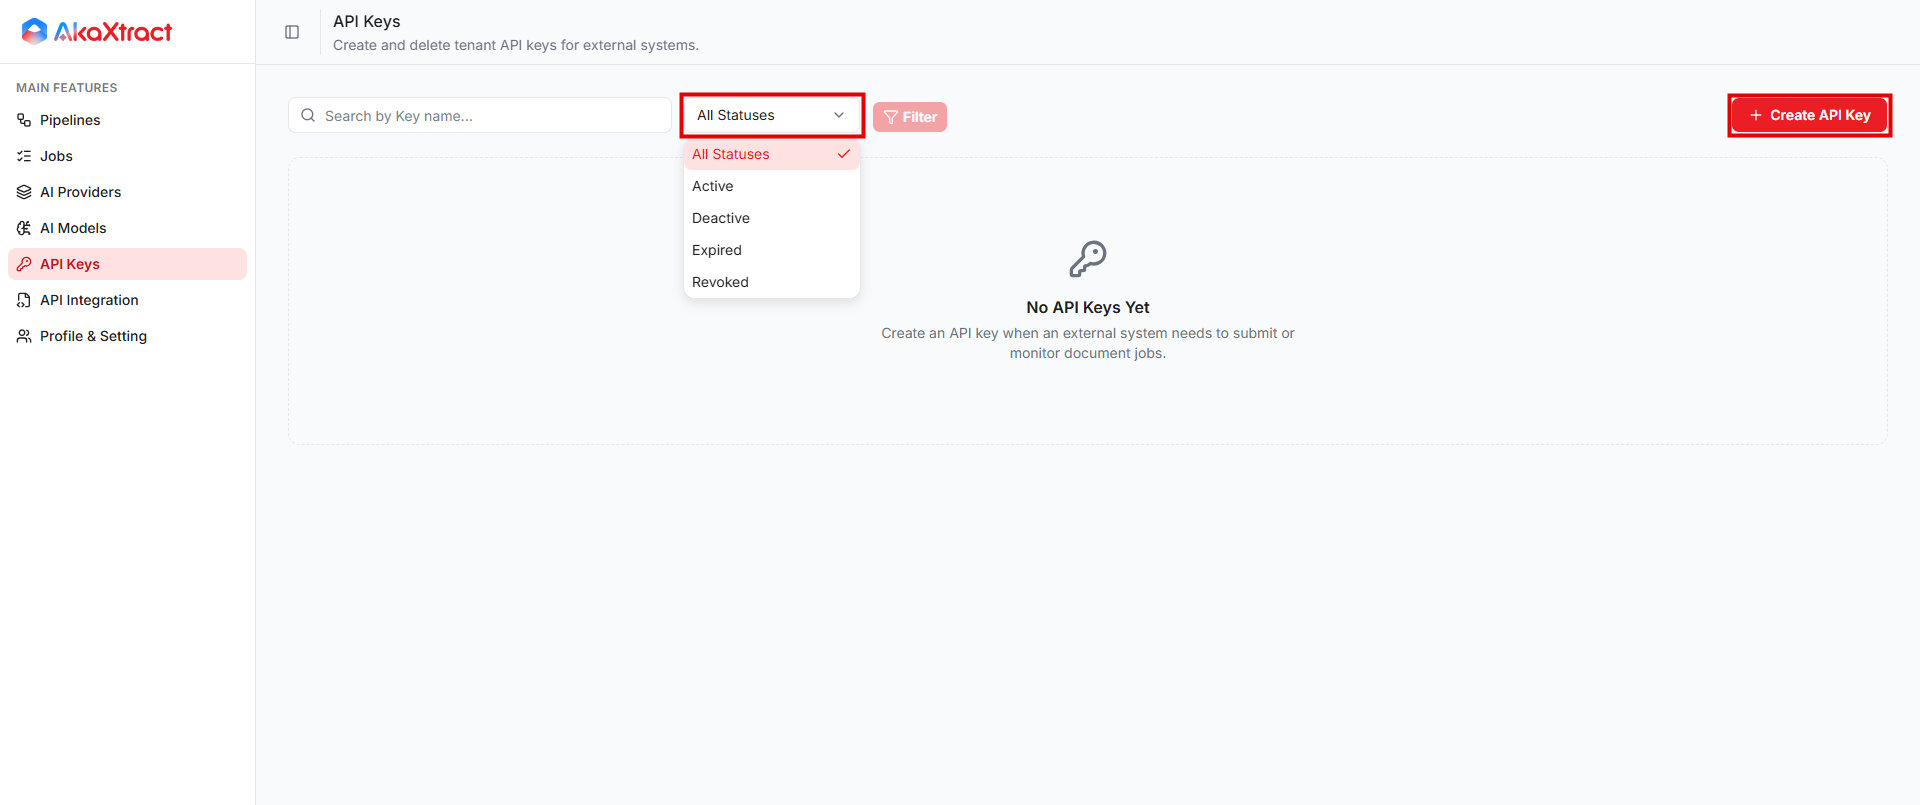
- Open
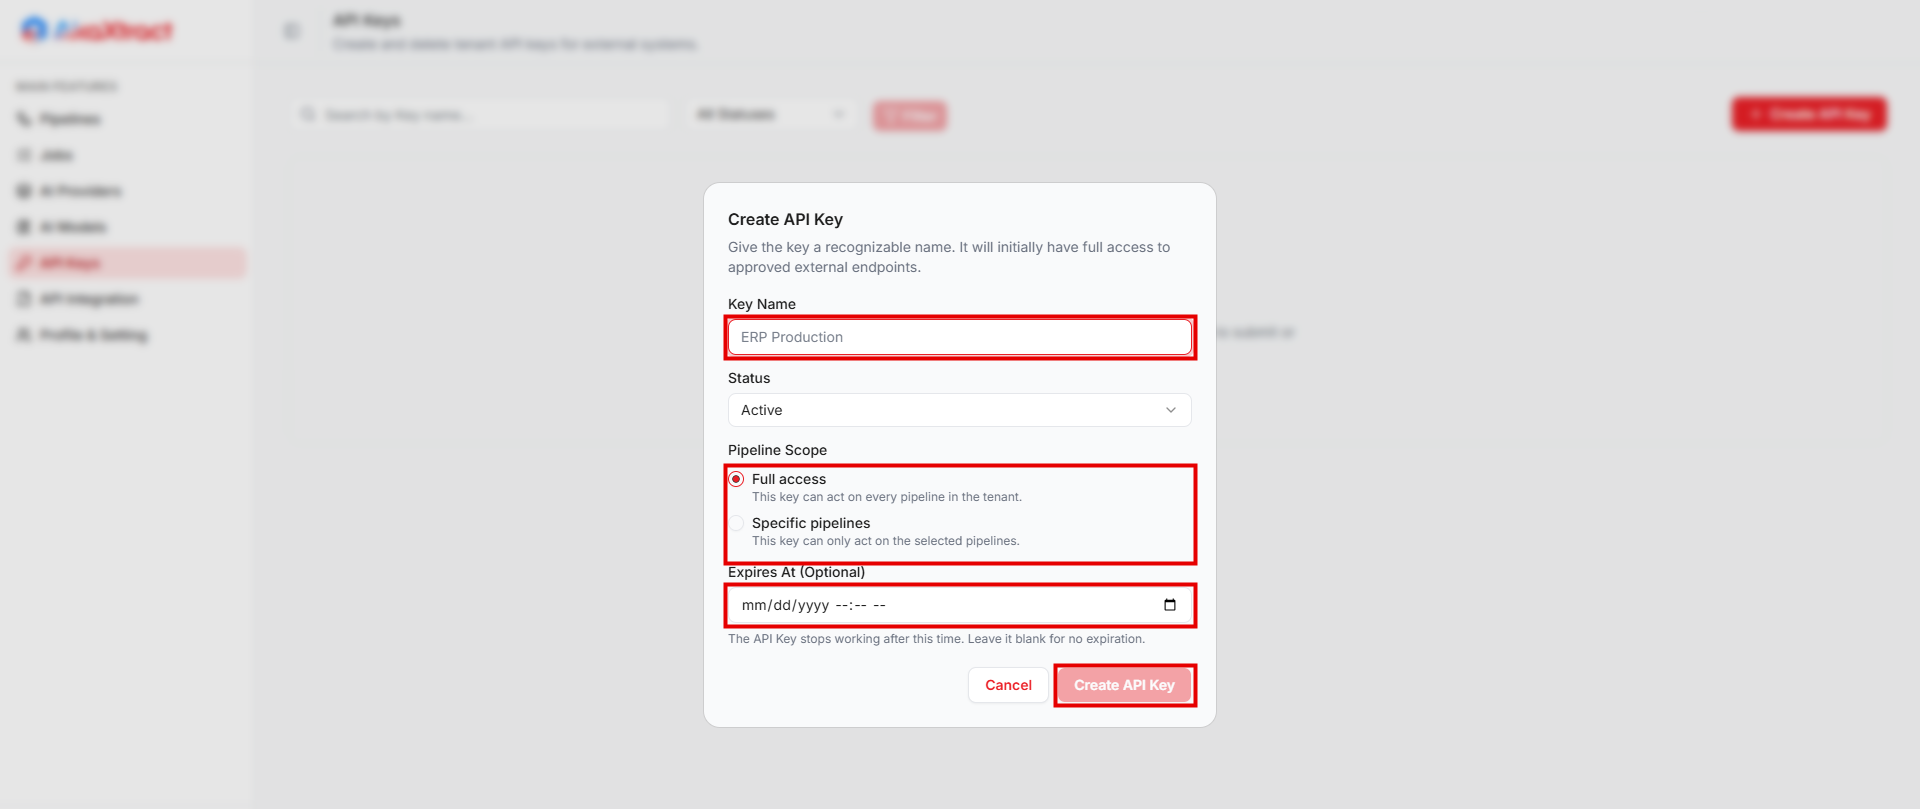
API Keysand selectCreate API Key. - Enter
Key Name(up to 100 characters) and chooseActiveorDeactive. ADeactivekey cannot call the service. - In
Pipeline Scope, chooseSpecific pipelinesand select the Pipelines the key needs.Full access, which the dialog selects by default, covers every Pipeline in the company, so use it only when necessary. - Optional: set
Expires At. Leave it blank for a key that does not expire. - Select
Create API Key. InAPI Key Created, copy the key and store it in your organization's secrets manager, then selectI Have Copied the Key.
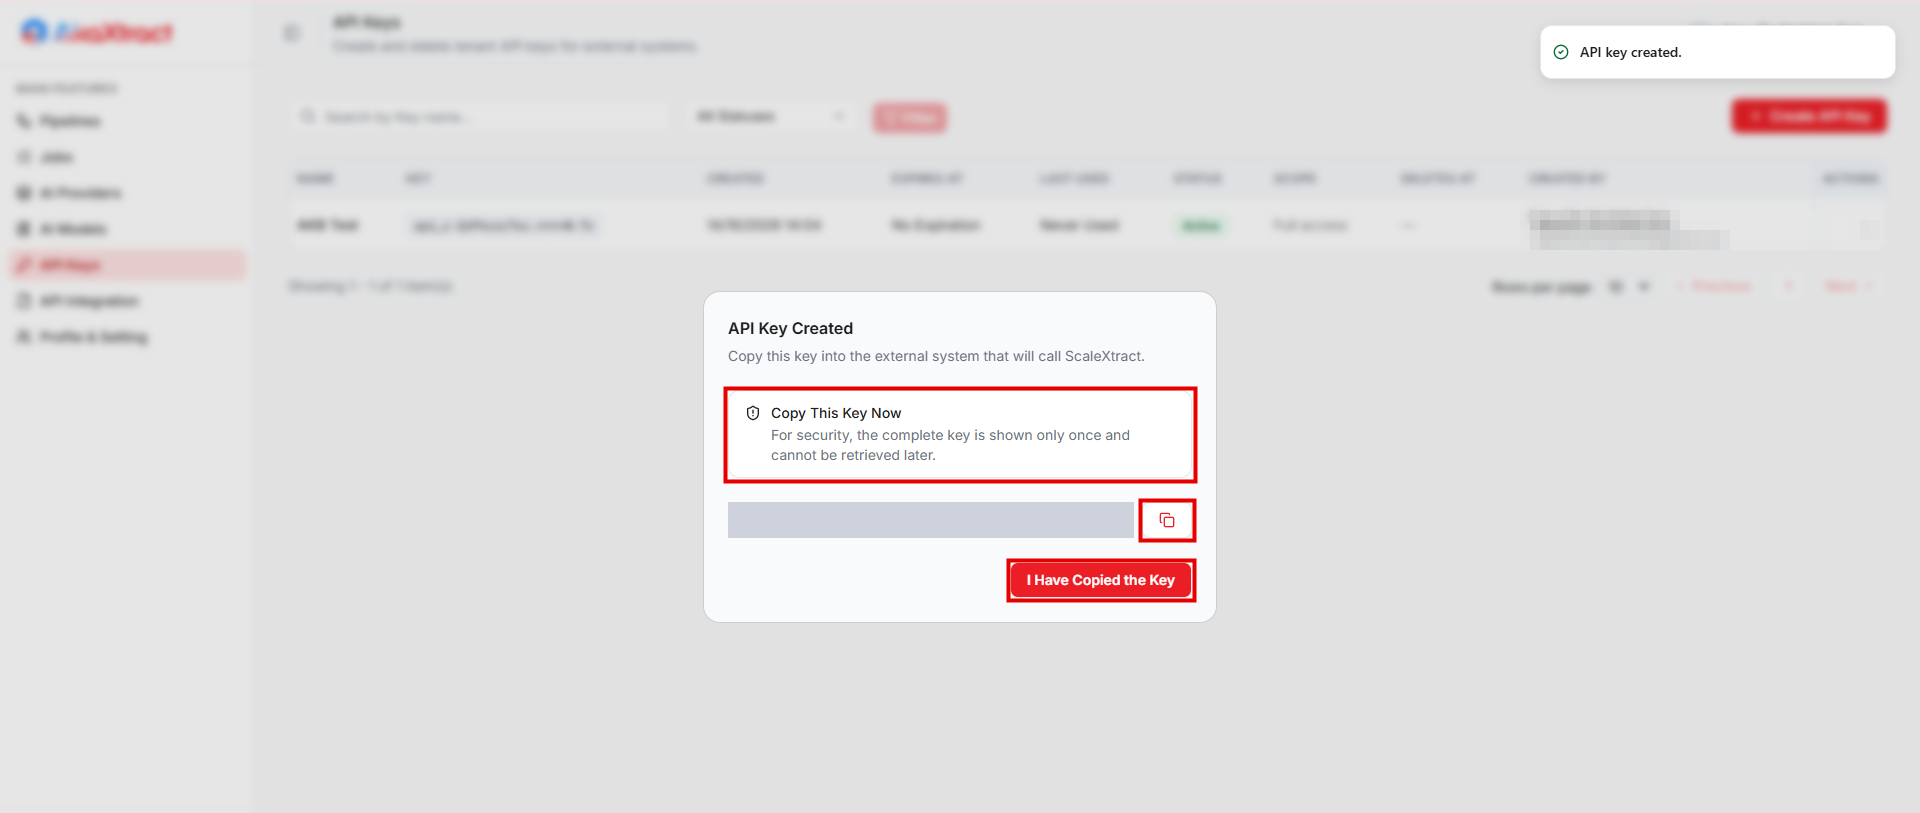
The full key is shown only once and cannot be retrieved later. Do not send a full key in a support request.
To change a key, select Edit. If a key is exposed or no longer needed, select Revoke. A revoked key cannot be restored, so issue a new one. An overdue key shows Expired.
Authenticate
Requests to the AkaXtract API carry the header x-api-key: <your API key>. The base URL is https://api.xtract.akanext.com.
Send a Document and Receive the Result
- Create a presigned upload URL with
POST /core/api/v1/jobs/presigned-url. The response contains the upload policy. - Upload the file to cloud storage with a
multipart/form-dataPOST topolicy.url. Send all thepolicy.fieldsfrom step 1, and put thefilefield last. This request goes directly to the storage provider, not to AkaXtract. - Confirm the upload with Confirm Upload and Start Processing. This creates the Job and starts processing.
- Follow the Job. Use Stream Job Status Events (Server-Sent Events). This is the recommended method. Polling is also supported.
- Read the result with Get Job Processing Result.
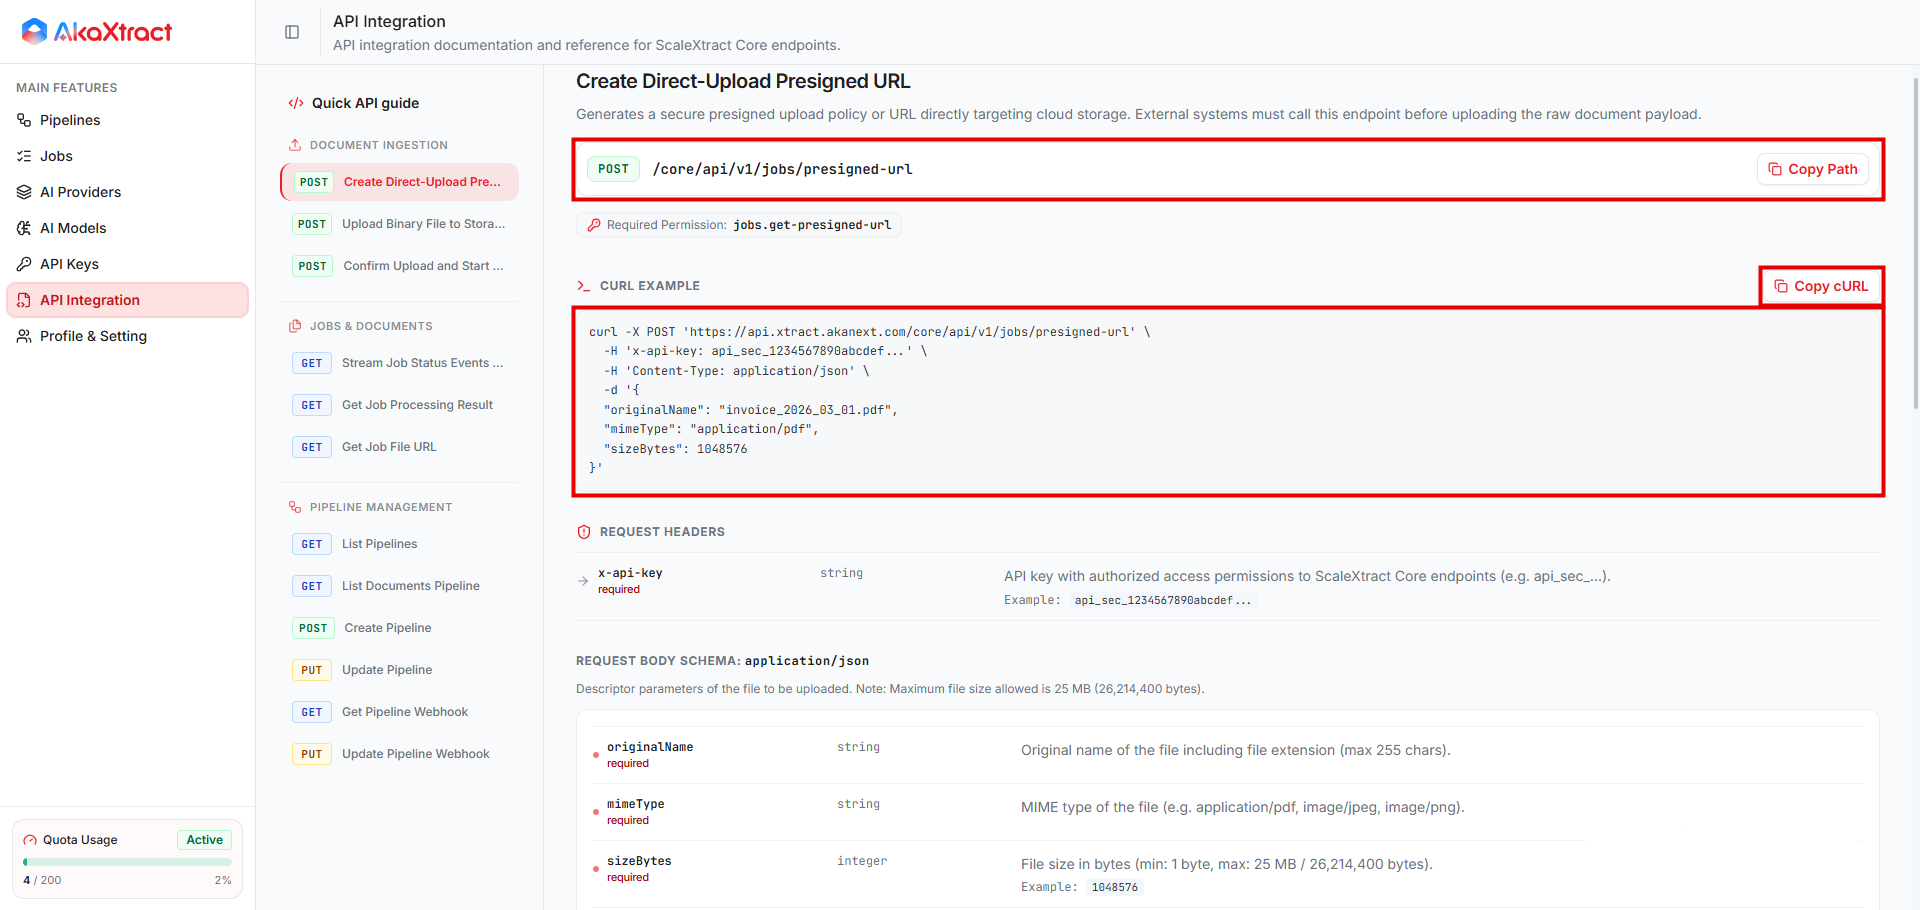
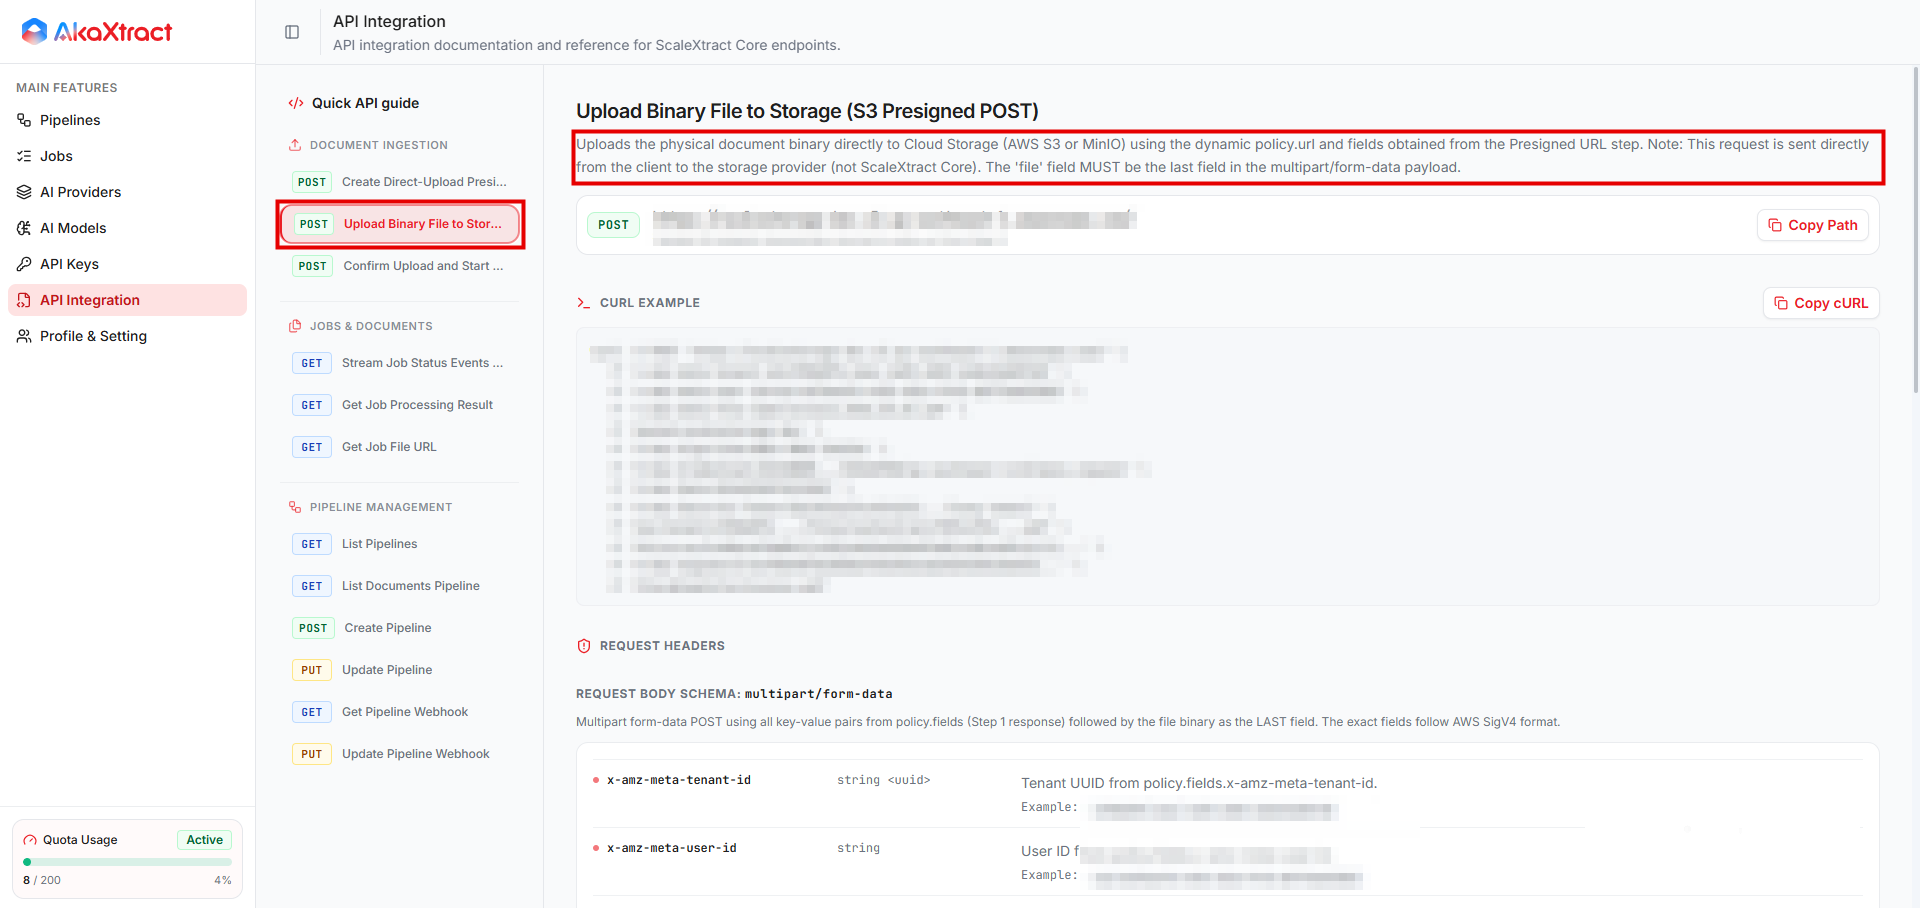
Open API Integration in the application for the path, request, and response of each endpoint, and use Copy Path and Copy cURL to copy the examples.
To see the same flow without code, upload a document in the Pipeline's Documents tab, then open it and select View JSON.
If the Pipeline needs Human Review, the Job waits for a reviewer. The confirmed result is available after Confirm.
Limits
- Maximum file size: 25 MB.
- Pages per file depend on the model.
- One file can contain several documents.
To receive results without calling the API, use a Webhook.