Migrate akaBot Center to a New Server and Upgrade to 5.x
Follow this guide to move akaBot Center to a new Windows server and upgrade to Center 5.x.x.x. It covers a standalone setup, where Tomcat and ActiveMQ run on the same server. Your IT team handles the database backup and move separately.
1. Prerequisites
1.1. Software Packages
The installation must be performed using an account with Administrator privileges on the new server.
| # | Name | Required version / fixed package | Download Link | Other versions |
| 1 | akaBot Center | 5.x.x.x (WAR) | akaBot provides through email. | |
| 2 | Java Developer Kit (OpenLogic) | 17–25 (LTS: 17, 21, 25); package: 17.0.20+8 | Download | OpenLogic downloads |
| 3 | Apache Tomcat | 10.1.x or 11.0.x, according to the Center package; package: 10.1.61 | Download | Tomcat 10.1 / Tomcat 11 |
| 4 | ActiveMQ Classic | 5.15.x–6.3.x; package: 6.3.3 | Download | ActiveMQ downloads |
Note:
- This guide uses JDK 17, Tomcat 10.1.61, and ActiveMQ 6.3.3. If the supplied Center package requires Tomcat 11, use the Tomcat 11 link instead. Match the JDK to the selected Center and ActiveMQ versions.
- Center 5.x works with ActiveMQ 5.15.x–6.3.x. Apache lists 6.3.x as Active and 5.15.x as Inactive, rather than assigning an LTS label. Prefer an active line; ActiveMQ 6.3.x supports Java 17, 21, and 25.
- Allow the ports used by the old server:
8080(or443) for Center,61616and8161for ActiveMQ, and the configured database port.
2. Install Software on the New Server
2.1. Java JDK 17 Installation
Run the installer -openlogic-openjdk-17.0.20 you have downloaded. After that, click "Next" to proceed.
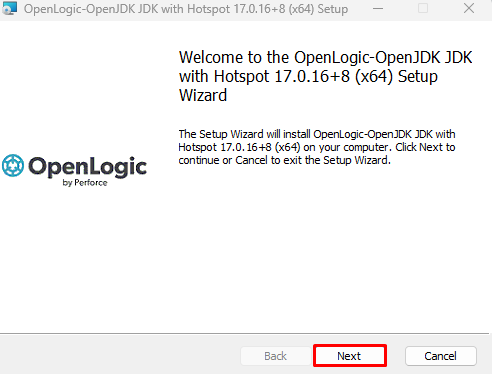
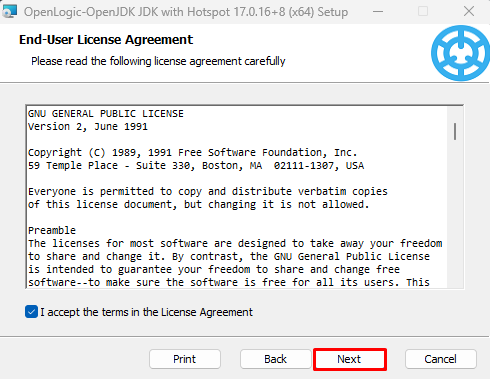
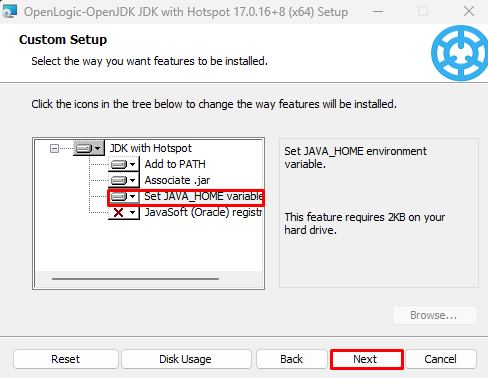
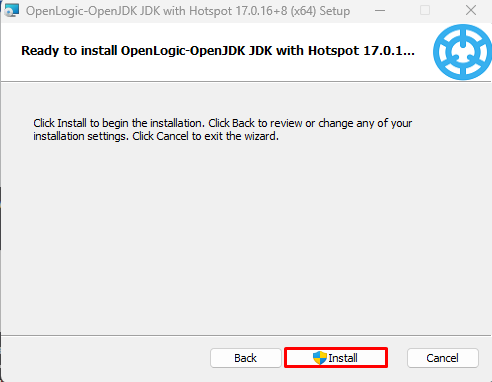
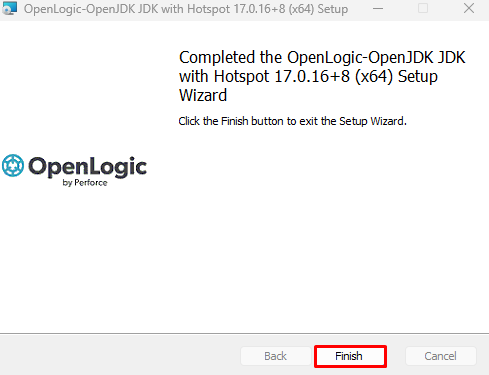
- After Installation is complete, you will see the Complete Notification below. Simply click Finish. You have successfully installed JDK.
Note on JAVA_HOME Environment Variable:
- Verify
JAVA_HOMEby running the following command in Command Prompt:The output should point to your JDK 17 installation directory (e.g.,echo %JAVA_HOME%C:\Program Files\OpenLogic\jdk-17.0.20.8-hotspot). - If
JAVA_HOMEis not set or empty, configure it manually:- Open Windows Search, type
env, and select Edit the system environment variables. - Click Environment Variables....
- Under System variables, click New..., set Variable name to
JAVA_HOMEand Variable value to your JDK installation path. - Find the
Pathvariable under System variables, select it, click Edit..., click New, and add%JAVA_HOME%\bin. - Click OK to save and apply changes, then open a new Command Prompt to verify with
echo %JAVA_HOME%andjava -version.
- Open Windows Search, type
2.2. Apache Tomcat Installation
2.2.1. Install Apache Tomcat
Apache Tomcat installation:
- Uncheck "Run Apache Tomcat"
- Uncheck "Show Readme"
- Click the "Finish" button to complete the installation.
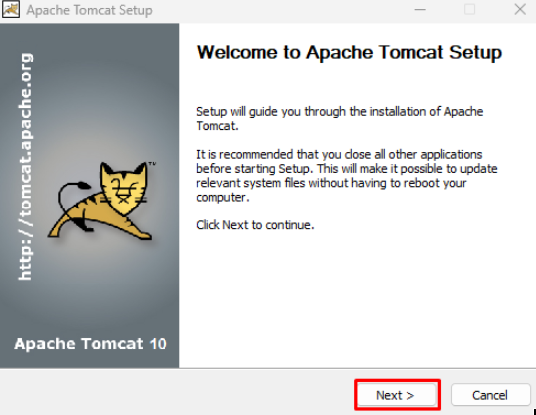
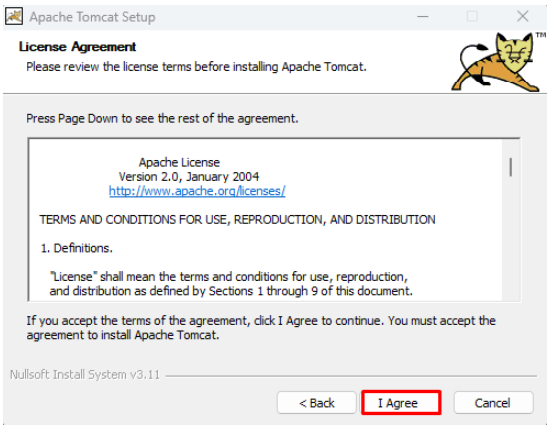
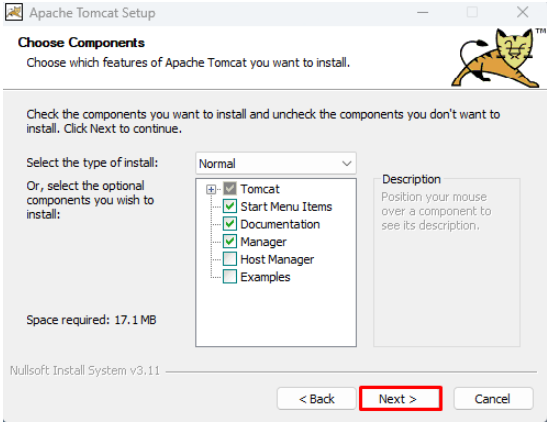
The installation path for Apache Tomcat: %TOMCAT_PATH% = C:\Program Files\Apache Software Foundation\Tomcat 10.1
2.2.2. Configure log settings
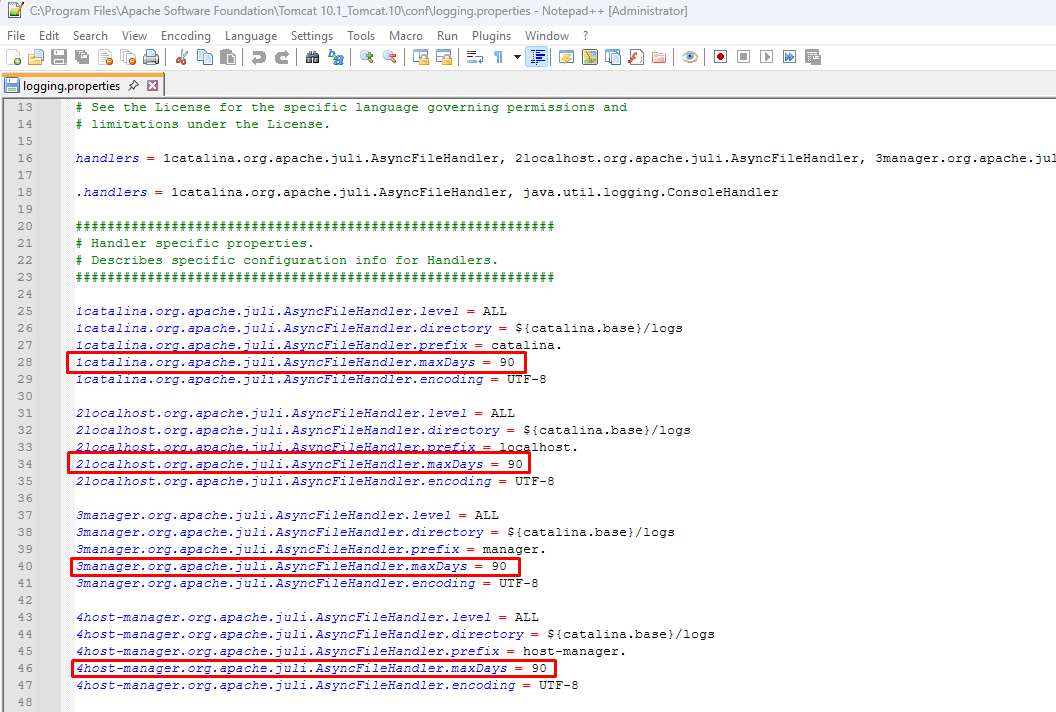
Step 1: Open the file %TOMCAT_PATH%\conf\logging.properties
Step 2: Set maxDays for the catalina, localhost, manager, and host-manager logs. Example: keep 90 days:
1catalina.org.apache.juli.AsyncFileHandler.maxDays = 90
2localhost.org.apache.juli.AsyncFileHandler.maxDays = 90
3manager.org.apache.juli.AsyncFileHandler.maxDays = 90
4host-manager.org.apache.juli.AsyncFileHandler.maxDays = 90
Find these settings in the file and change their values to 90. Keep the setting names already used in your file.
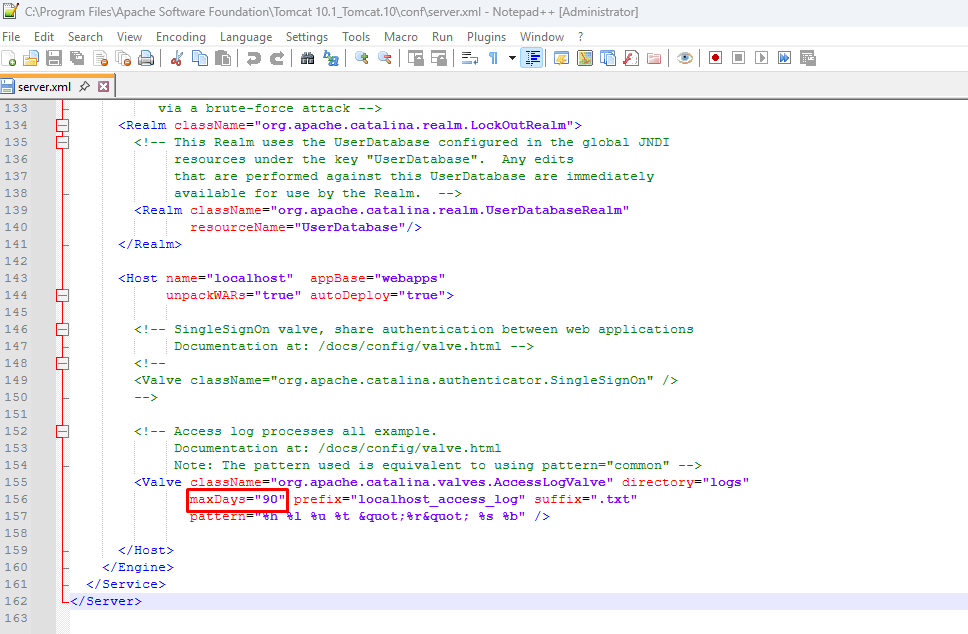
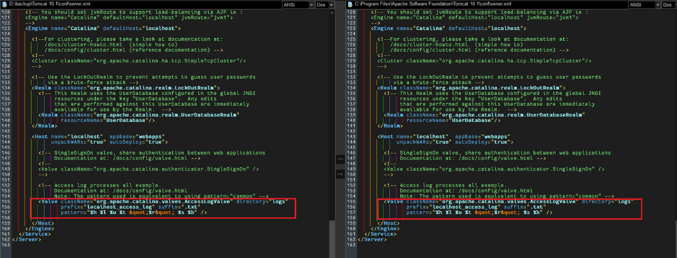
Step 3: Open the file %TOMCAT_PATH%\conf\server.xml, un-comment the access log setting and add attribute maxDays as below:
2.2.3. Other settings
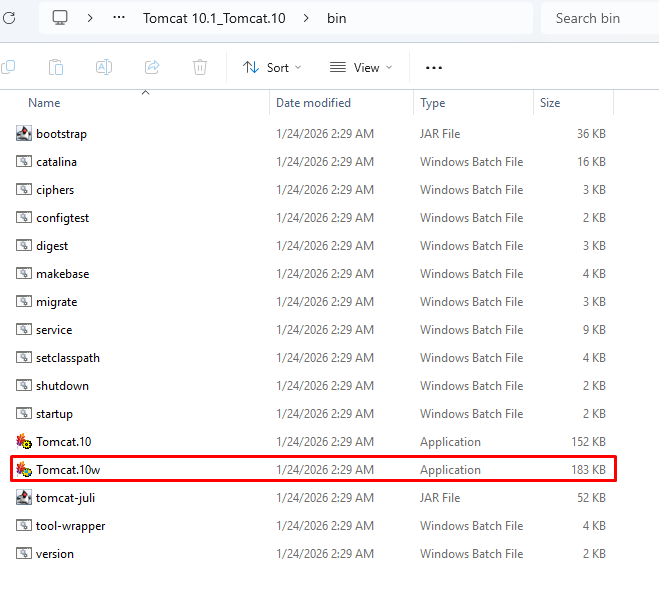
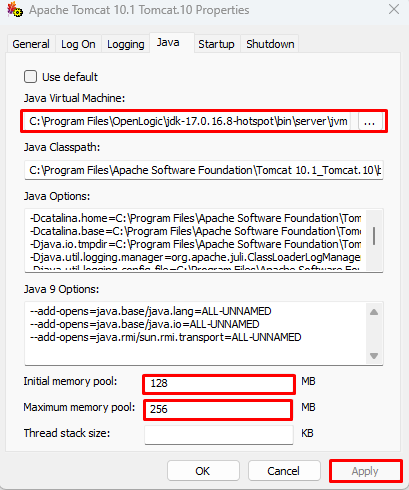
Step 1: Open Tomcat10w.exe in %TOMCAT_PATH%\bin (Tomcat11w.exe for Tomcat 11). On the Java tab, set Java Virtual Machine to the newly installed JDK's bin\server\jvm.dll.
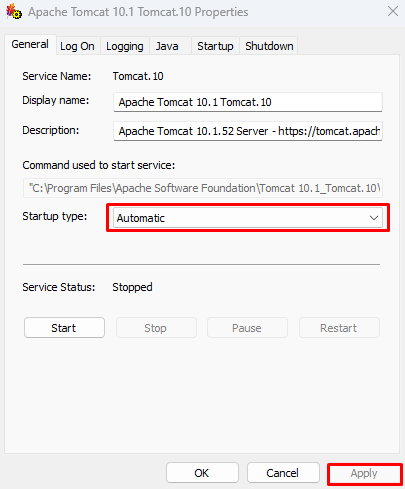
Step 2: On the General tab, select Startup type: Automatic, then choose Apply.
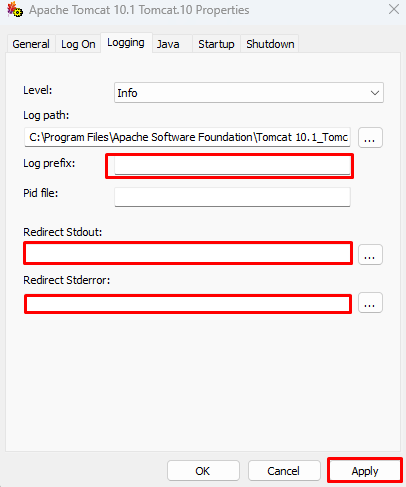
Step 3: On the Logging tab
(1) Log prefix: Remove "commons-daemon"
(2) Redirect Stdout: Remove "auto"
(3) Redirect Stderror: Remove "auto"
(4) Choose Apply to apply the configuration changes.
Step 4: On the Java tab, set how much RAM Tomcat can use, then click Apply:
- Initial memory pool: approx. 1/4 of the server's RAM (minimum 2048 MB).
- Maximum memory pool: approx. 1/2 of the server's RAM (e.g., 16384 MB for 32 GB RAM).
2.2.4. Carry over the old Tomcat configuration
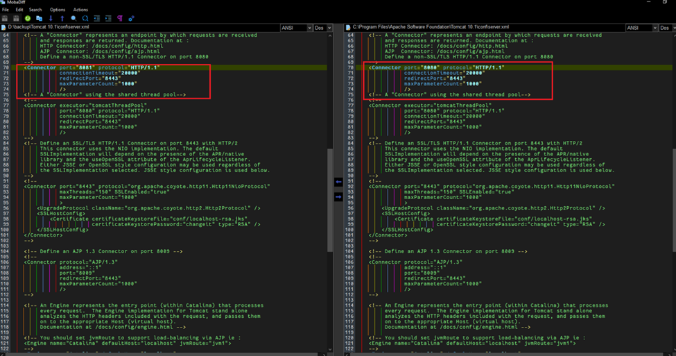
The new Tomcat must keep the custom settings of the old server. On the old server, take screenshots or copies of the following, then apply them on the new server:
| Old server | What to check |
|---|---|
bin\Tomcat*w.exe → General, Logging, Java tabs | Service name, startup type, memory pool, and Java Options (custom -D... lines such as -Dspring.profiles.active, -Dfile.encoding). Point the JVM and any server-specific paths to the new installation. |
conf\server.xml | Connector port, HTTPS connector and keystore (certificateKeystoreFile, password), maxPostSize, maxHttpHeaderSize, AccessLogValve |
conf\logging.properties | maxDays and log levels |
bin\setenv.bat (if exists) | JVM options set outside the service |
| Keystore / certificate files | Copy to the same path on the new server |
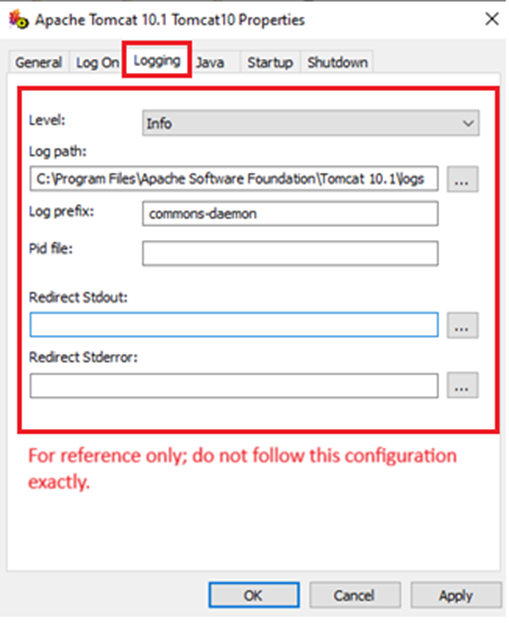
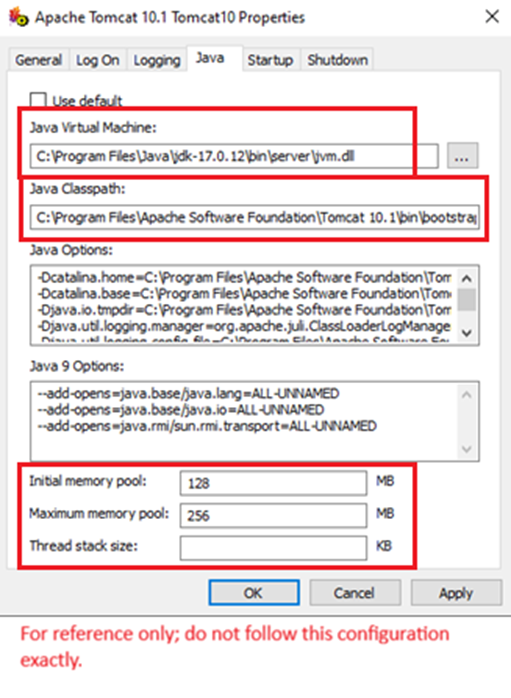
Note: Do not overwrite the new conf files with the old ones. Use a file comparison tool (e.g., WinMerge, MobaDiff) and copy only the custom values, especially the Connector sections.
2.2.5. Check Apache Tomcat Installation
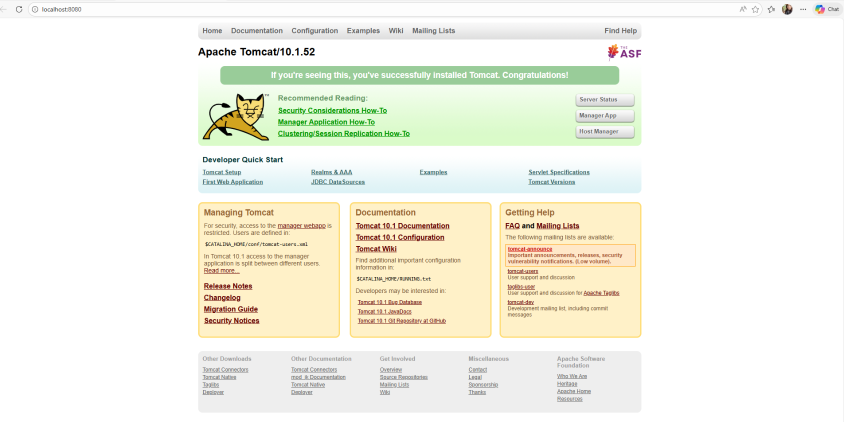
Start the Apache Tomcat service and access http://localhost:8080 (or your configured port) to verify the installation. Then stop Tomcat and keep it stopped until Section 10.
2.3. ActiveMQ Installation
2.3.1. Install ActiveMQ
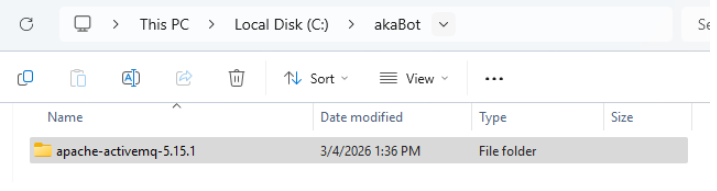
Step 1: Extract the file "apache-activemq-6.3.3-bin.zip" to the desired installation path.
For example: ACTIVEMQ_PATH = C:\akaBot\apache-activemq-6.3.3
The existing installation is usually under C:\akaBot\apache-activemq-<version>. On the old server, open Services → ActiveMQ → Properties and check Path to executable to find its installation directory (ACTIVEMQ_PATH_OLD). In this guide, ACTIVEMQ_PATH refers to the new installation above.
Note: The installation path should not contain any spaces.
Step 2: Open Command Prompt with Administrator privileges and run %ACTIVEMQ_PATH%\bin\win64\InstallService.bat to install the ActiveMQ service.

2.3.2. ActiveMQ Configuration
Step 1: Stop service ActiveMQ (if running).
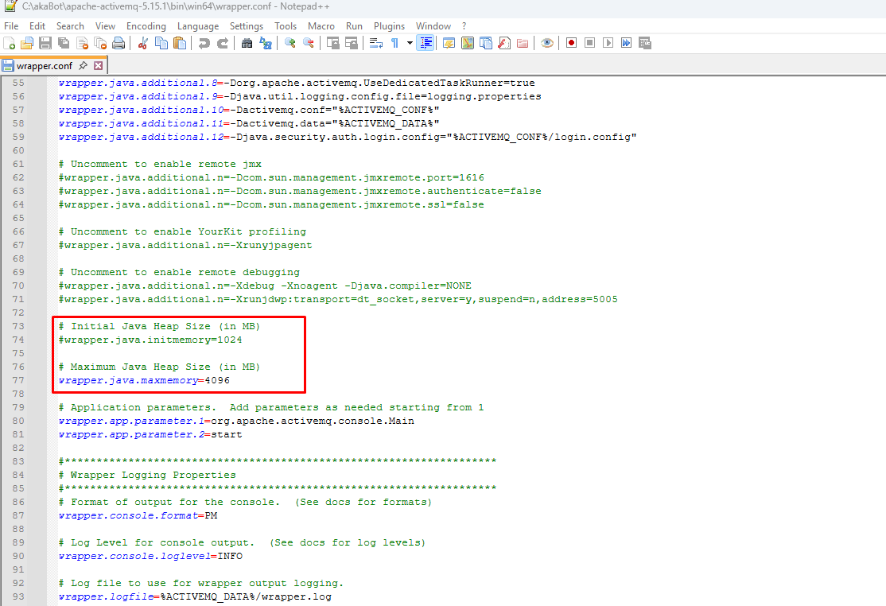
Step 2: Open the file %ACTIVEMQ_PATH%\bin\win64\wrapper.conf and configure the parameters:
wrapper.java.command=%JAVA_HOME%/bin/java.exe
wrapper.java.initmemory=1024
wrapper.java.maxmemory=4096
Step 3: Open %ACTIVEMQ_PATH%\conf\jetty-realm.properties and replace the default password in admin: admin, admin. If the old server used custom broker settings (users, ports) in conf\activemq.xml, compare and copy only those values into the new file.
If ActiveMQ uses conf\login.config, conf\users.properties, and conf\groups.properties to manage user accounts, bring their required settings and any referenced password files to the new server. The username and password used by Center must match an account in ActiveMQ. The web console has its own password setting.
Step 4: Start ActiveMQ Service and access http://localhost:8161 to verify.
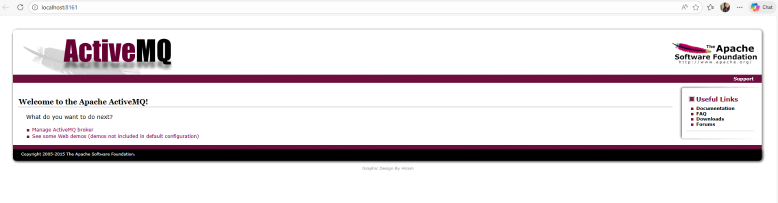
Stop the new ActiveMQ service after this check. Copy the backed-up data into it in Section 7 before switching to the new server.
3. Back up License and Configuration
In this guide, OLD_TOMCAT and NEW_TOMCAT are the old and new Tomcat installation directories. Create a backup folder outside Tomcat, such as D:\backup-center-data.
Copy the following from the old server before deactivating the license:
Source under OLD_TOMCAT | Back up |
|---|---|
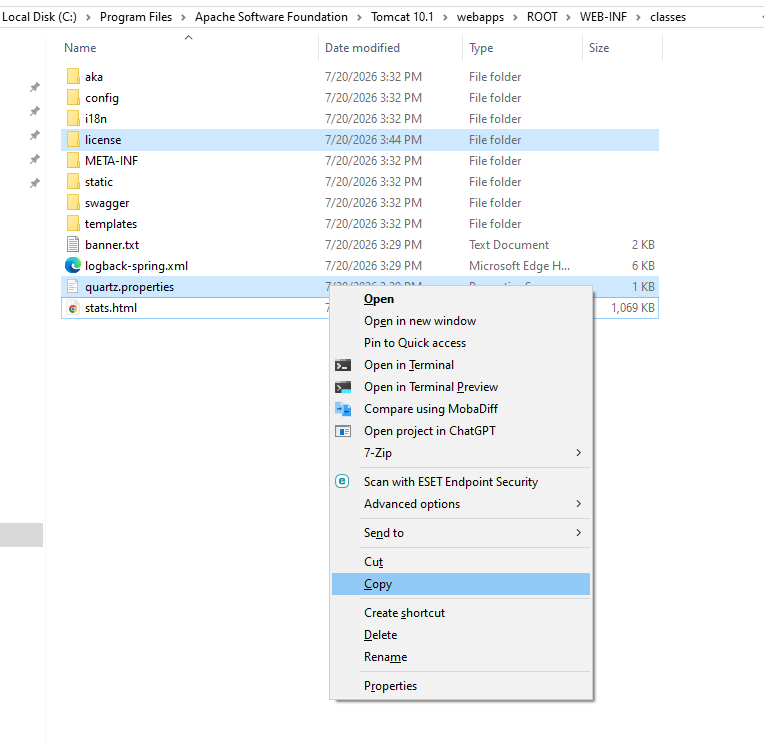
webapps\ROOT\WEB-INF\classes\license | Entire license folder |
webapps\ROOT\WEB-INF\classes\quartz.properties | quartz.properties |
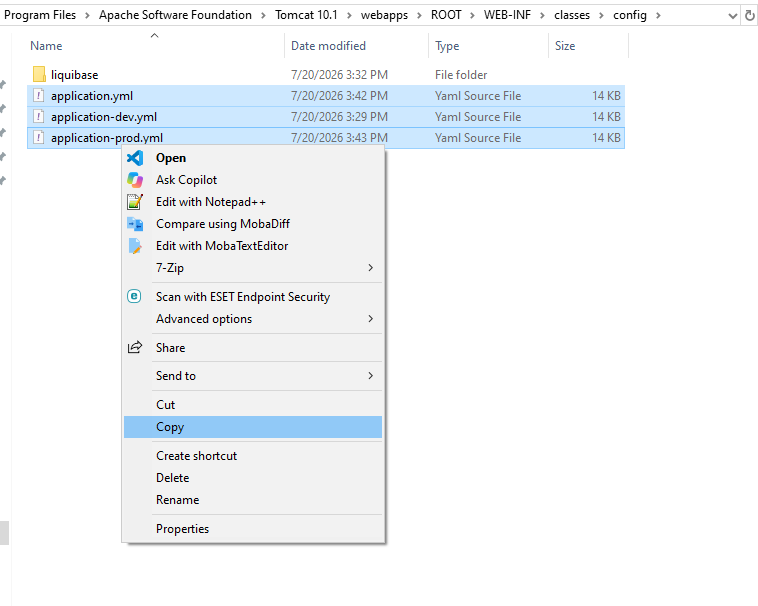
webapps\ROOT\WEB-INF\classes\config | application.yml, application-dev.yml, and application-prod.yml |
4. Save the License Key, then Deactivate
While the old Center is still running:
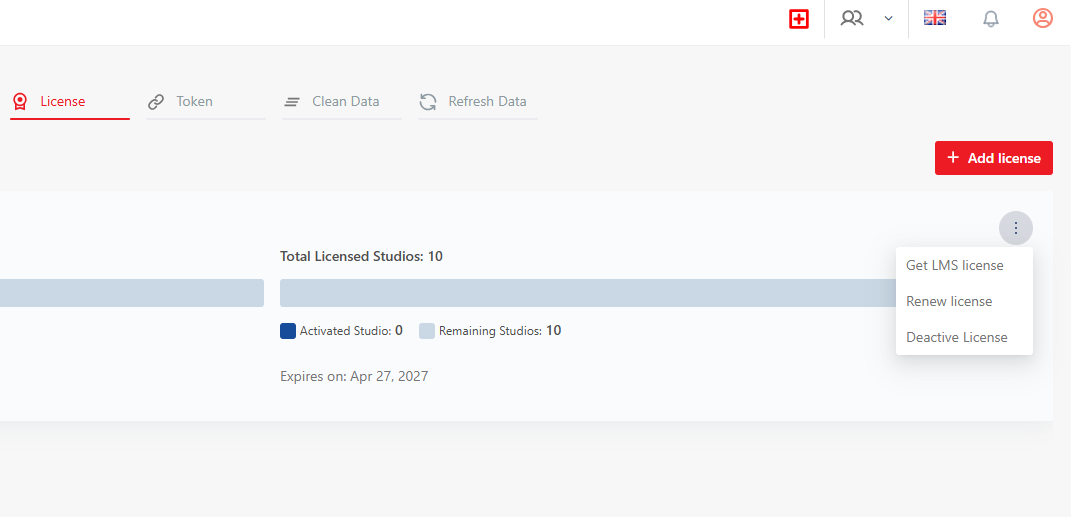
Step 1: Open Administration → License, open the license menu, and select Get LMS license.
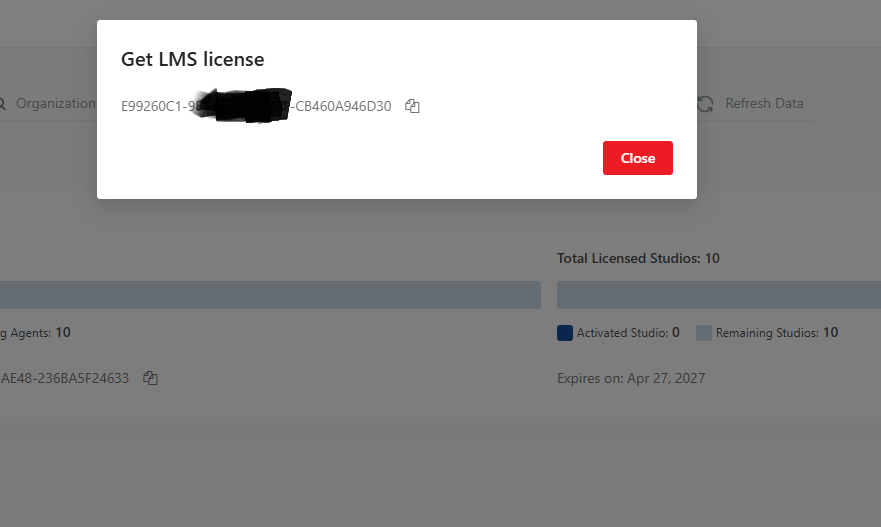
Step 2: Copy the license key to a file in the backup folder, for example lms-license-key.txt.
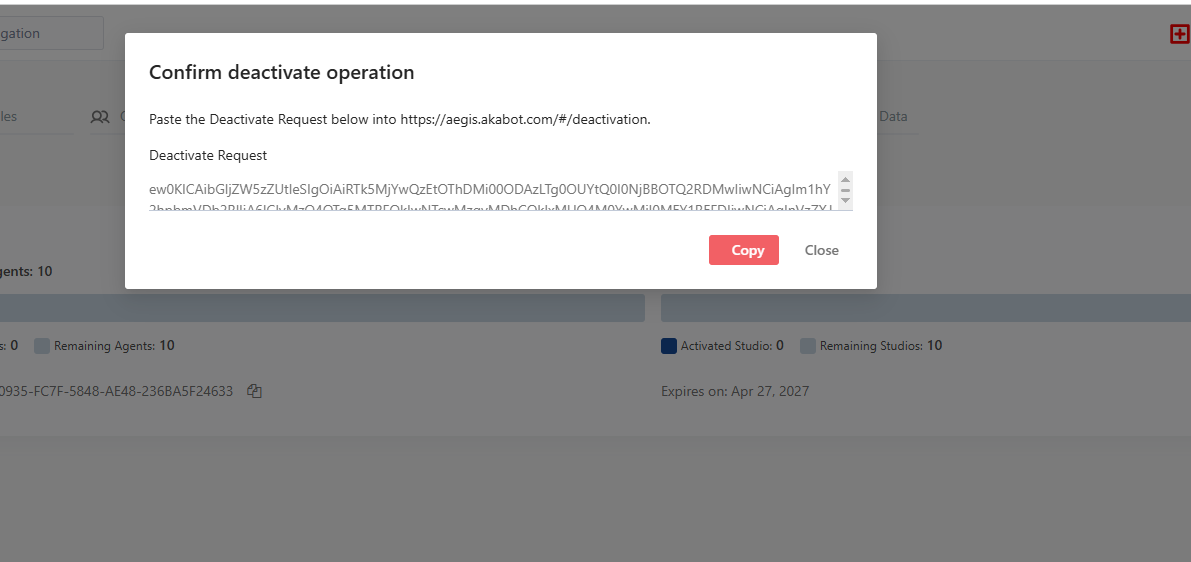
Step 3: Select Deactive License and copy the Deactivate Request.
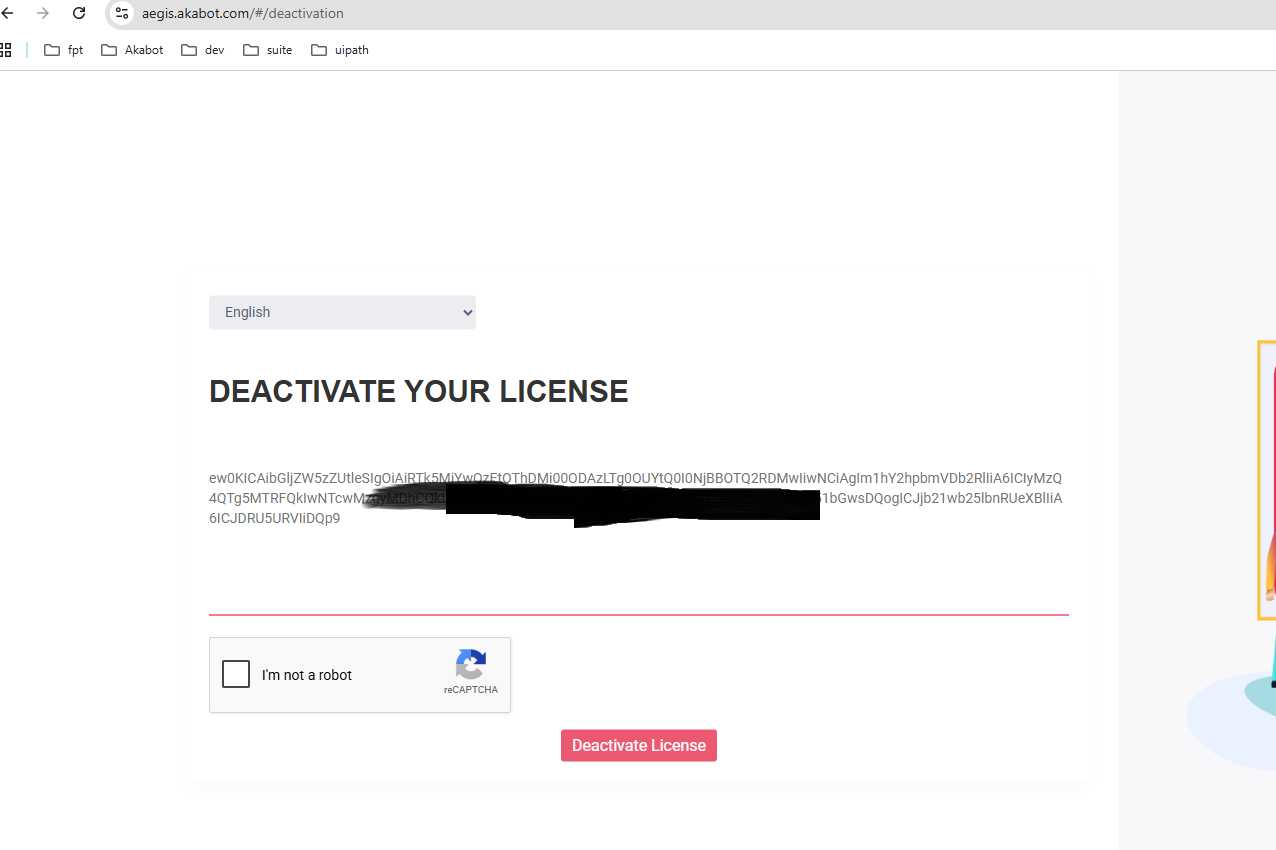
Step 4: Open LMS Deactivation, paste the request, and click Deactivate License.
5. Stop the Old Center and Copy its Data
Wait for running jobs to finish before stopping the old Center.
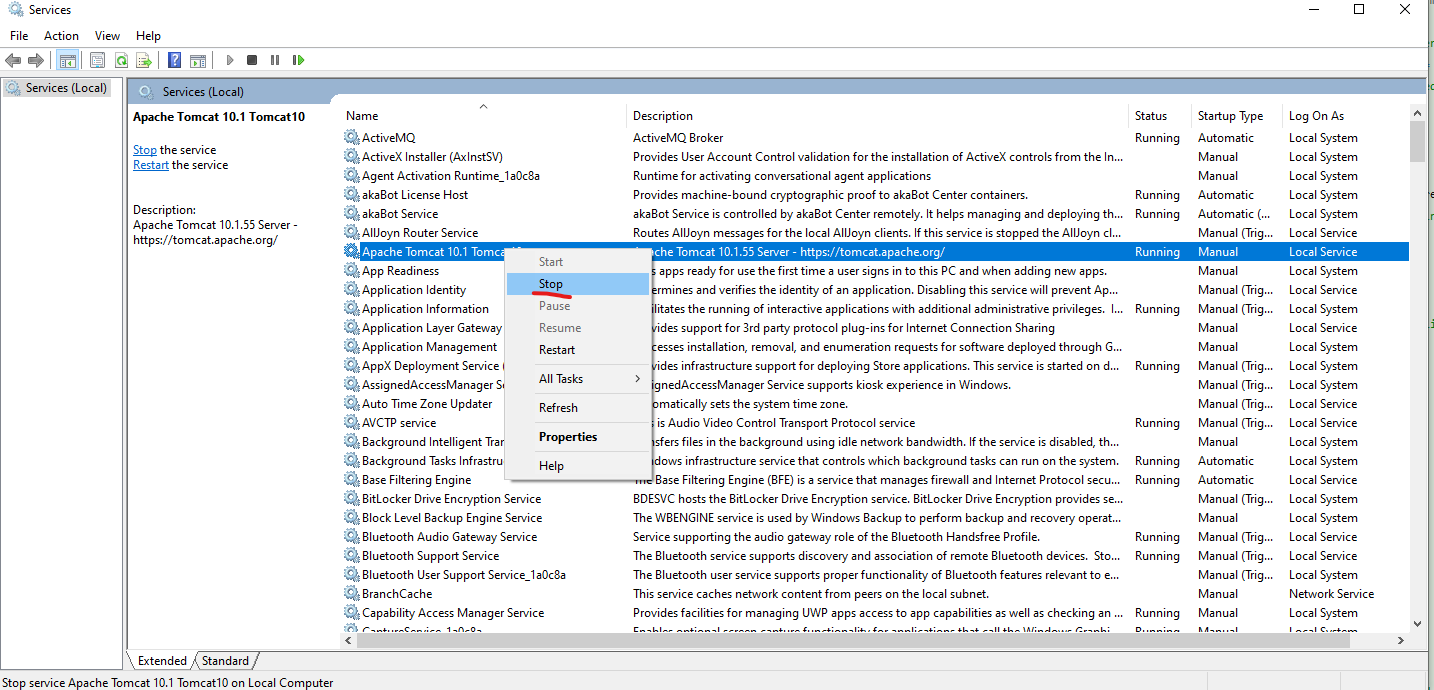
Step 1: Open services.msc on the old server and stop the Apache Tomcat service running Center.
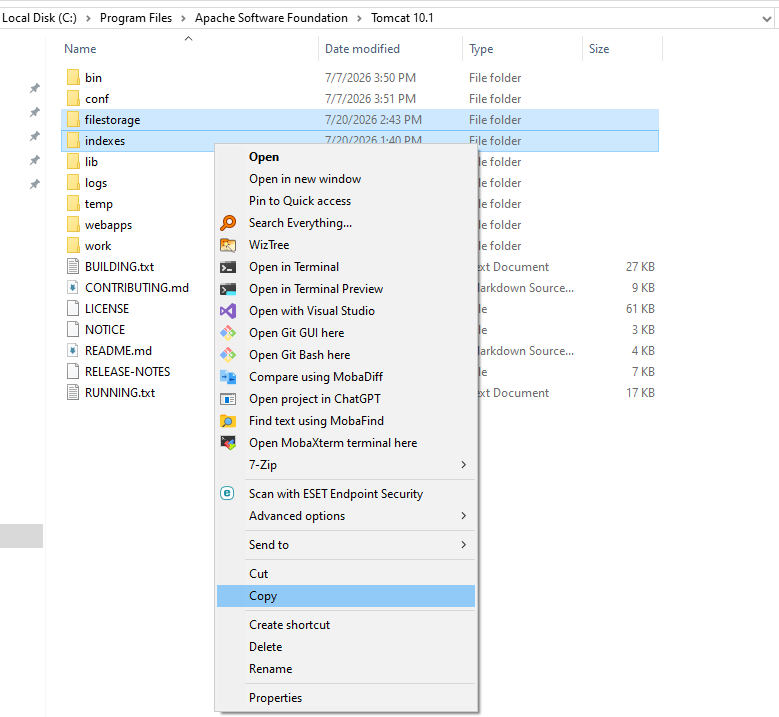
Step 2: Copy OLD_TOMCAT\indexes and OLD_TOMCAT\filestorage into the backup folder.
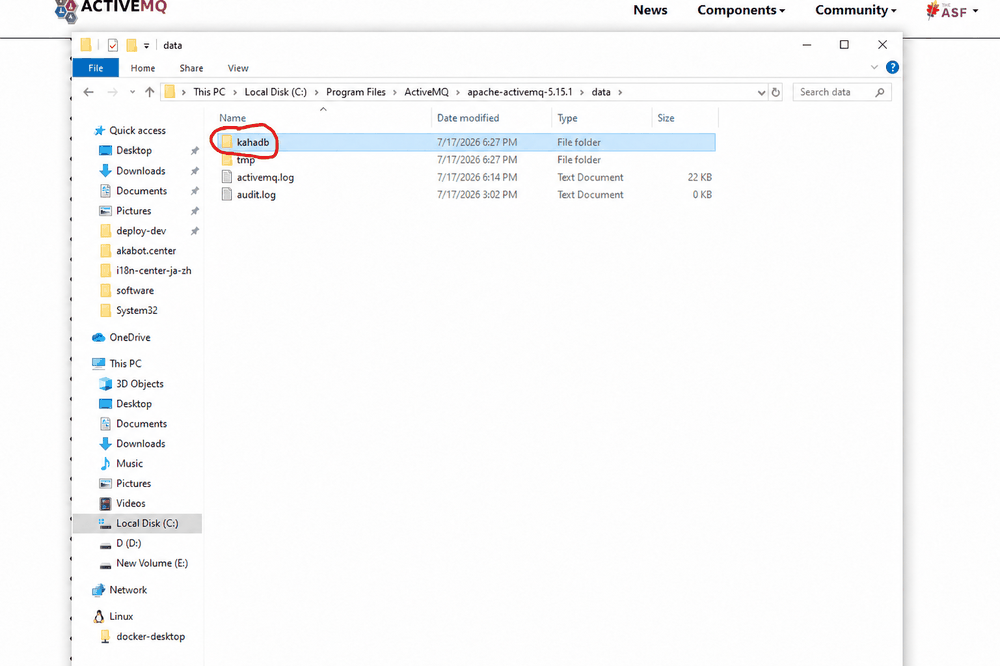
Step 3: Back up ActiveMQ data. With the old Center stopped, stop the old ActiveMQ service and wait until it is fully stopped. Copy the entire kahadb folder, including all its files, into D:\backup-center-data:
| Old server (example) | Backup folder |
|---|---|
C:\akaBot\apache-activemq-5.15.1\data\kahadb | D:\backup-center-data\kahadb |
Use the old installation folder found in Section 2.3. ActiveMQ saves messages to disk in kahadb by default. If the folder was moved elsewhere, use the location set in conf\activemq.xml. Keep the old Center and ActiveMQ stopped after the backup.

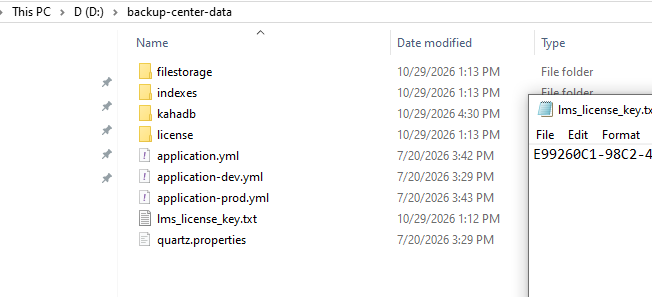
Confirm the backup folder contains license, quartz.properties, the three application YAML files, the saved LMS license key, indexes, filestorage, and kahadb.
6. Prepare the Database
Ask the IT team responsible for your database to complete these steps. Keep the old Center stopped:
- Back up the existing Center database after stopping the old Center, together with the file backups in Section 5. Check that the database backup can be restored.
- If moving the database to another server, prepare that server, restore the backup, and check the restored data. Use database software and a version supported by your Center package. If keeping the current database server, allow connections from the new Center server.
- Check that the account used by Center can log in and has the permissions needed to run and upgrade Center.
- Save the database server address, port, database name, username, and password. Use these details in Section 9.
Use the existing database or the database restored from your backup so Center keeps its data. For SQL Server, your IT team can follow Microsoft: Copy databases with backup and restore and Microsoft: Transfer logins.
7. Deploy Center and Restore Data
On the new server, keep Tomcat stopped:
Step 1: Copy the Center 5.x.x.x WAR to NEW_TOMCAT\webapps\ROOT.war and extract it to NEW_TOMCAT\webapps\ROOT.
Step 2: Copy the backed-up indexes and filestorage folders into NEW_TOMCAT.
Step 3: Copy the backed-up quartz.properties to NEW_TOMCAT\webapps\ROOT\WEB-INF\classes\. In this file, enable the setting for your database type (for example, org.quartz.impl.jdbcjobstore.MSSQLDelegate for SQL Server) and comment out the settings for other database types.
Step 4: Restore ActiveMQ data on the new server. Keep the new Center stopped and confirm the new ActiveMQ service is stopped.
- Transfer the backup folder to the new server. If
ACTIVEMQ_PATH\data\kahadbalready exists from the installation check, move it aside askahadb-before-restore. - Copy the backed-up
kahadbfolder into the new ActiveMQdatadirectory:
| Backup on the new server | Restore destination (example) |
|---|---|
D:\backup-center-data\kahadb | C:\akaBot\apache-activemq-6.3.3\data\kahadb |
- Open
data\kahadband check that the backed-up files are inside it. Avoid creating an extrakahadb\kahadbfolder. If ActiveMQ uses a different storage location, copy the files there. The Windows account running the ActiveMQ service needs permission to read and write these files. - Start the new ActiveMQ service. Check the broker log and
http://localhost:8161to confirm the restored queues/messages are available. Keep Center stopped until the remaining configuration is complete and you reach Section 10. Keep the original backup intact until validation is complete.

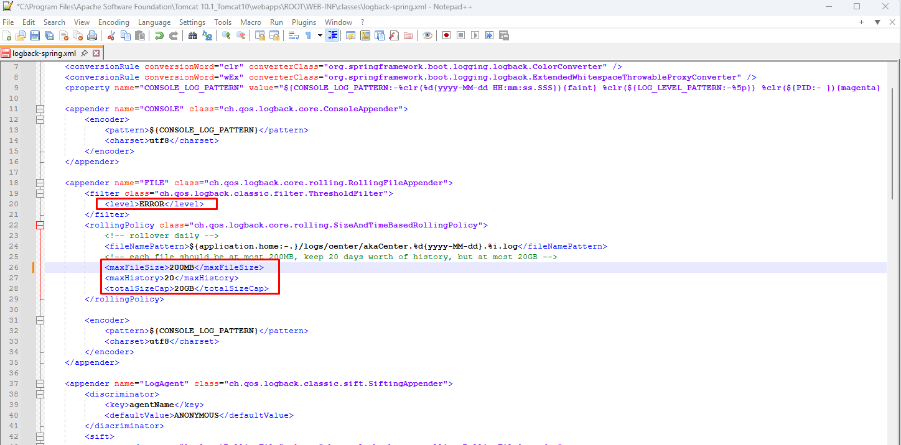
Step 5: Open NEW_TOMCAT\webapps\ROOT\WEB-INF\classes\logback-spring.xml and set maxFileSize = 200MB, maxHistory = 20, totalSizeCap = 20GB.
8. Migrate the Application Configuration
Download and extract the Application Configuration Migration Tool, for example to D:\migration-application-config-tool.
| Tool folder | Files to place inside it |
|---|---|
old | The three backed-up application*.yml files from the old Center |
new | The three application*.yml files from NEW_TOMCAT\webapps\ROOT\WEB-INF\classes\config |
result | Generated by the tool |
Open Command Prompt as Administrator and run:
cd /d D:\migration-application-config-tool
migrate-config.bat
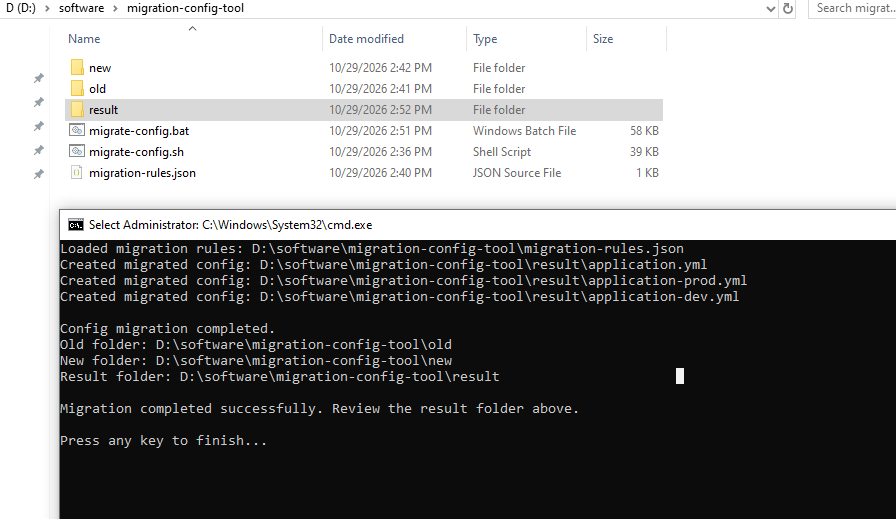
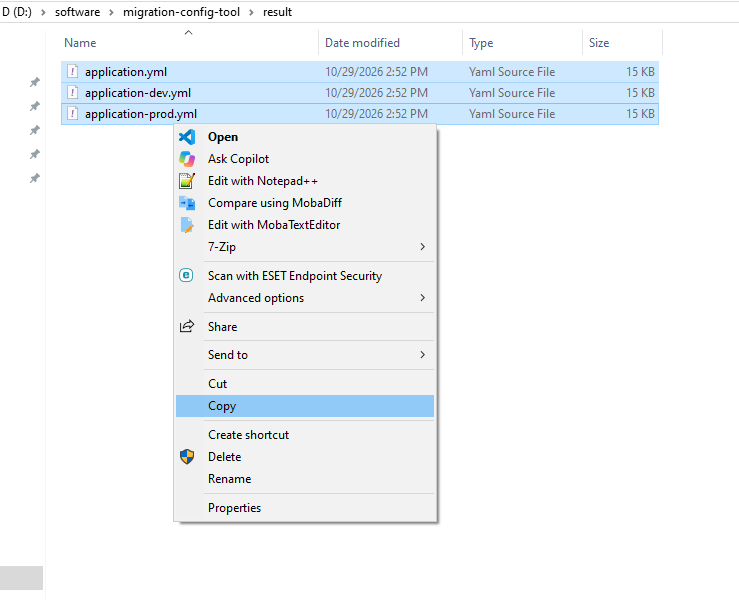
After Migration completed successfully, copy the three files from result into NEW_TOMCAT\webapps\ROOT\WEB-INF\classes\config, replacing the existing files.
9. Check Settings before Starting Center
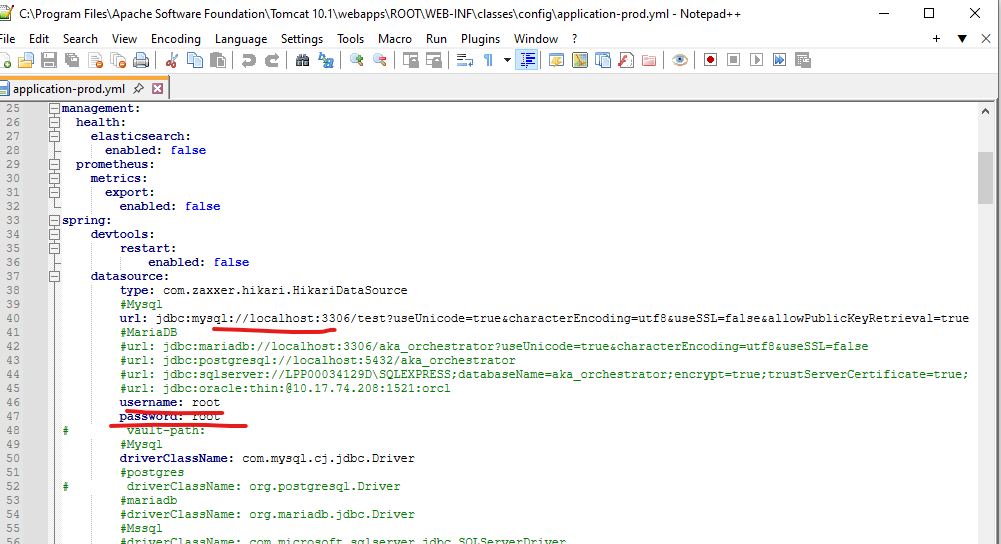
The tool copies connection details from the old server, so check them before starting Center. Find spring.profiles.active in application.yml or the Tomcat Java Options. If it is prod, check application-prod.yml; if it is dev, check application-dev.yml:
- Under
datasource, enter the database address, port, name, username, and password saved in Section 6. If keeping the current database, keep its connection details and check that the new Center server can connect. - In the new file, enable the JDBC driver and JPA settings listed for your database type. These settings tell Center how to connect to and use the database. If the connection uses a certificate, check that the new Center server trusts it.
Also check the ActiveMQ broker URL and credentials, file storage paths, and Center public URL.
10. Start Center, Activate the License, and Verify
Step 1: Confirm the database and ActiveMQ are running, then start the new Center Tomcat service. Keep the old Center stopped.
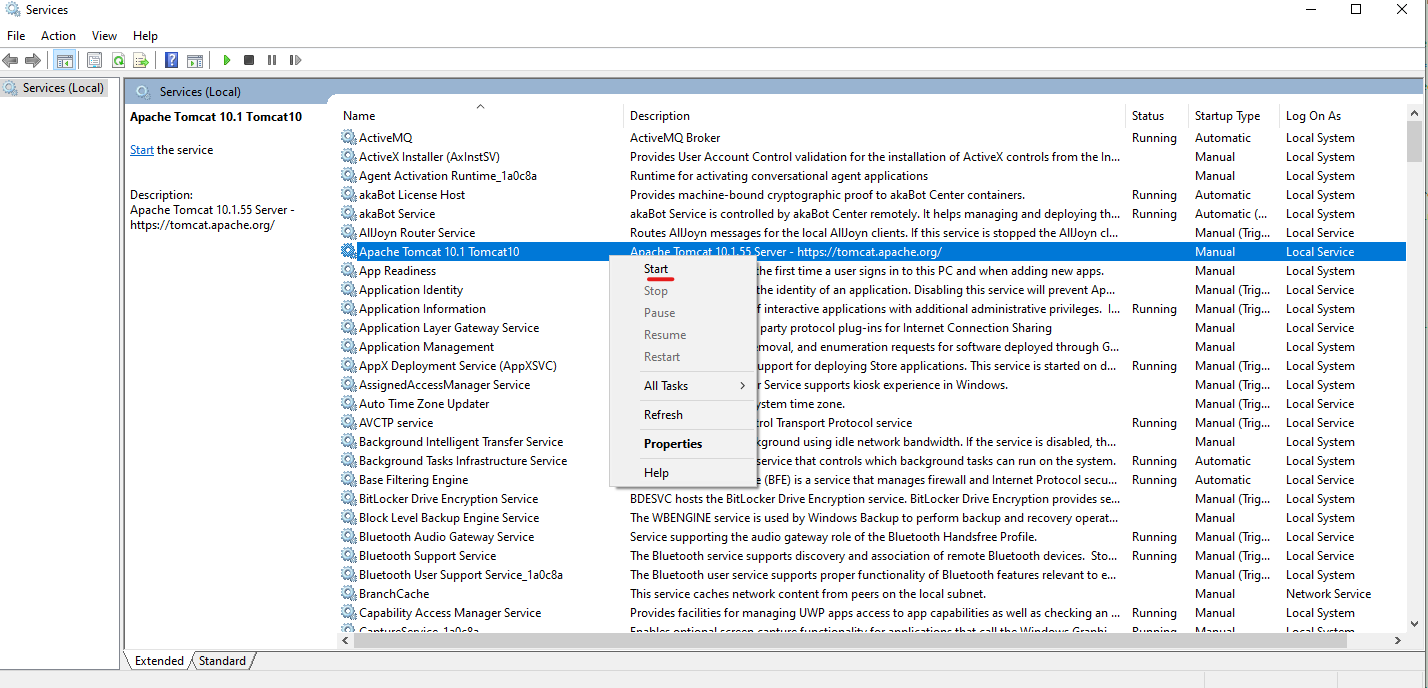
Step 2: Check the Tomcat/Center logs for errors, then open the new Center URL and sign in.
Step 3: Use the license key saved in Section 4 and follow License Activation.
Step 4: Verify the Center version is 5.x and the license is active, and check users, Agents, processes, schedules, queues, and file downloads. Run a test job before switching Agents or DNS to the new server.
Note: Keep the backups until validation is complete. Do not connect the old Center to a database already upgraded by Center 5.x.