Upgrade akaBot Center from version 3x to version 4x
This guide provides instructions for upgrading an existing instance of akaBot Center from Version 3.x to Version 4.x using My SQL as the database engine. The target Operating System (OS) for this upgrade procedure is Microsoft Windows.
Overall, there are 4 main steps:
-
Backup database, configuration files, license, workflow files
-
Uninstall Tomcat(8), Java(11)
-
Install akaBot 4x
-
Restore configuration files, license, workflow files
0. akaBot 3x
Before proceeding, you must ensure that akaBot 3.x is already installed following the standard instructions. View details
1. Backup MySQL database, configuration files, license, workflow files
1.1. Back up database
The database can be backed up using one of the following two methods:
1.1.1 Back up using MySQL Workbench
- Step 1: Open MySql Workbench on the AkaBot Center s computer, select "Local instance MySQL80"
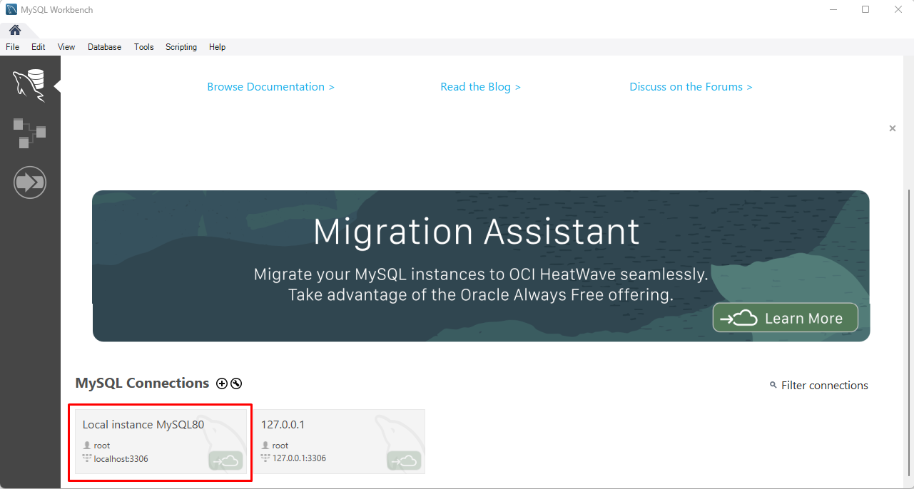
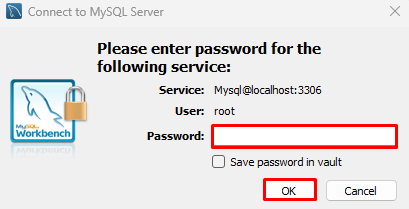
- Step 2: Input password (example: sis@12345). If you have stored your password in vault, please skip this step.
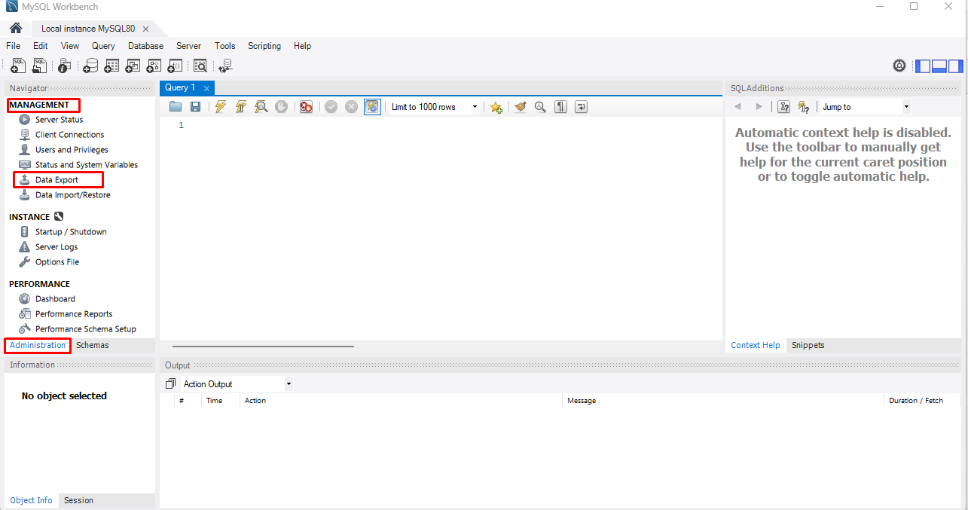
- Step 3: Navigate to "Administration" tab, click "Data export" under Management section
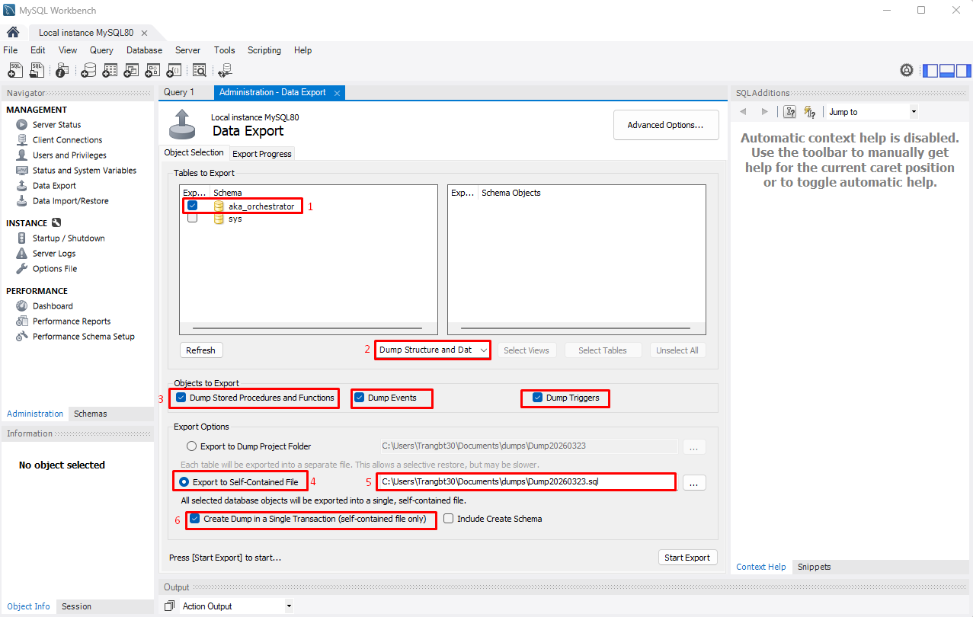
- Step 4: Set backup parameters:
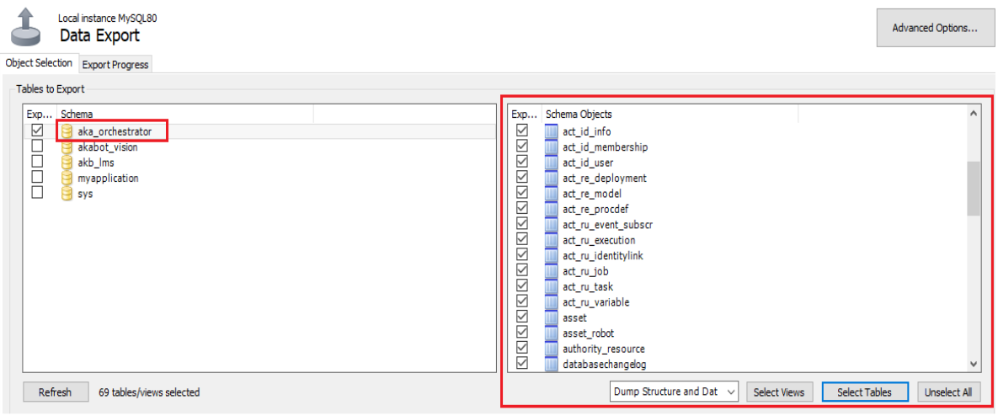
- (1) check aka_orchestrator schema
- (2) choose Dump Structure and Data
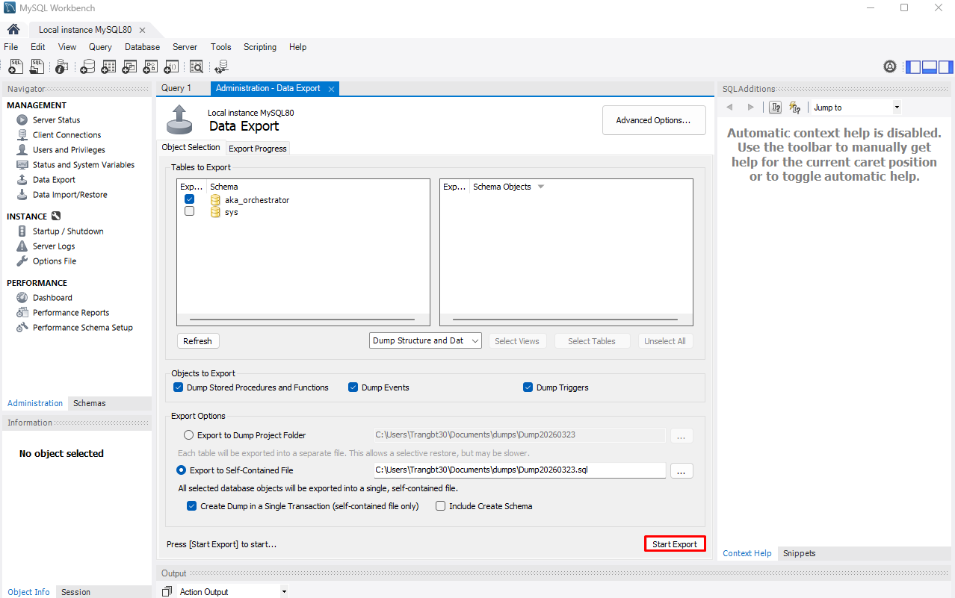
- (3) check all "Objects to export"
- (4) check Export to Self-Contained file
- (5) choose your location to save file
- (6) check Create dump in a single transaction
- Step 5: You can decide which tables, views to export by clicking on the schema aka_orchestrator then check/uncheck tables/views at the right side. If you would like to export all, please skip this step.
- Step 6: Click "Export"
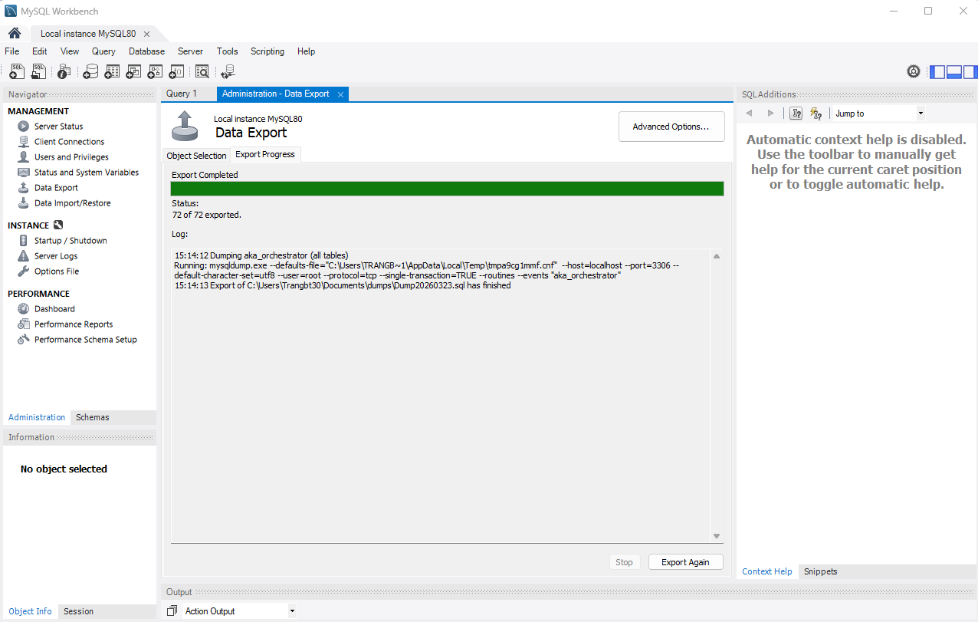
You will see the export progress window. If there is no error, the backup file (.sql) will be generated on your chosen directory.

1.1.2. Back up using command line
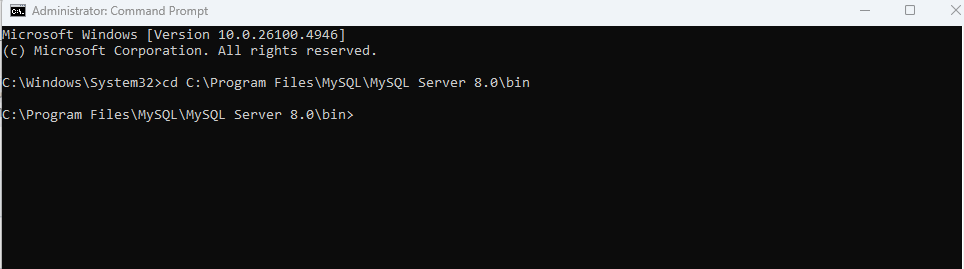
- Step 1: Open Command line, change directory to the MySql base directory (usually C:\Program Files\MySQL\MySQL Server 8.0\bin) by typing into: cd + baseDirectory
 '
- Step 2: Export database with this command: mysqldump u root p --databases aka_orchestrator > file.sql
- ` where file.sql is the file name and location where you would like to save the file. For example: mysqldump u root p --databases aka_orchestrator > d:\aka_orchestrator.sql

- Step 3: The cmd will prompt you to input password for root user. Please put it (ex: sis@12345), press enter and wait for a while. You will see the aka_orchestrator.sql file on the chosen directory. To dump only specific tables from a database, name them on the command line following the database name: mysqldump u root p --databases aka_orchestrator act_id_info act_ru_job asset > d:\aka_orchestrator.sql
1.2. Configuration files, license, workflow files
1.2.1. Copy configuration files from Tomcat 8
-
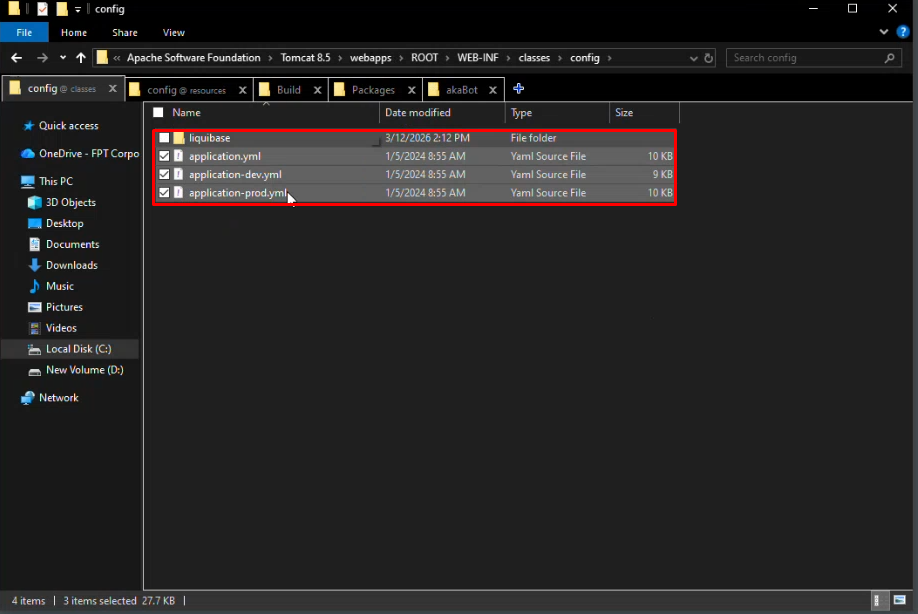
Open Program files > Apache Software Foundation > Tomcat 8.5 > webapps > ROOT > WEB-INF > Classes > Config
-
Copy all these configuration files in the picture and paste to a specific directory.
1.2.2. Copy license from Tomcat 8
-
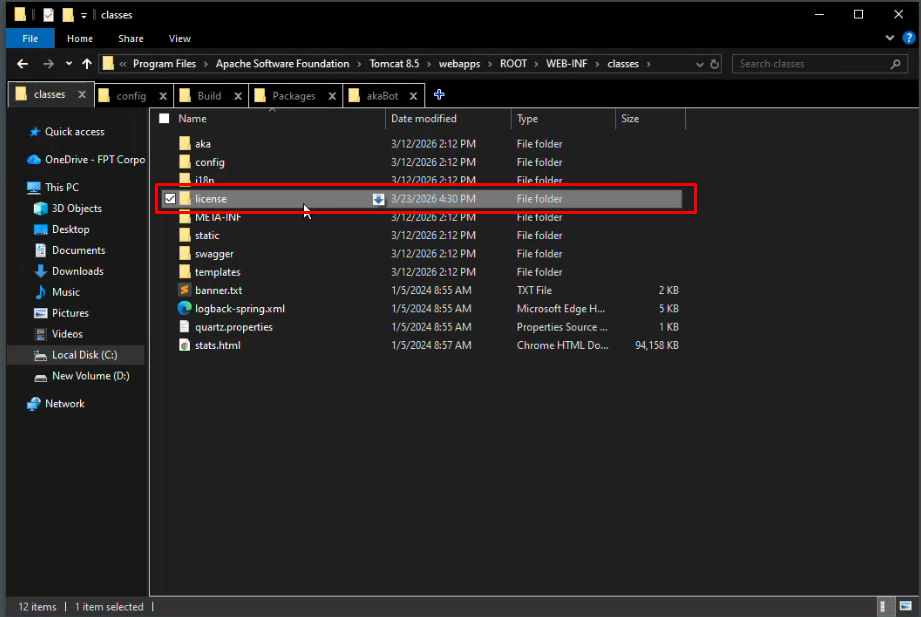
Open Program files > Apache Software Foundation > Tomcat 8.5 > webapps > ROOT > WEB-INF> Classes
-
Copy "License" and paste to a specific directory
1.2.3. Copy workflow files from Tomcat 8
-
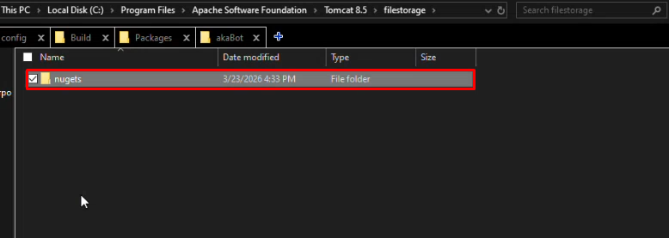
Open Program files > Apache Software Foundation > Tomcat 8.5 > Filestorage > Nugets
-
Copy folder "Nugets" and paste to a specific directory.
2. Uninstall Tomcat(8), Java(11)
2.1. Uninstall Tomcat (8)
(1) Open Settings and select Apps
(2) Choose Tomcat (8) and select option "uninstall"

2.2. Uninstall Java (11)
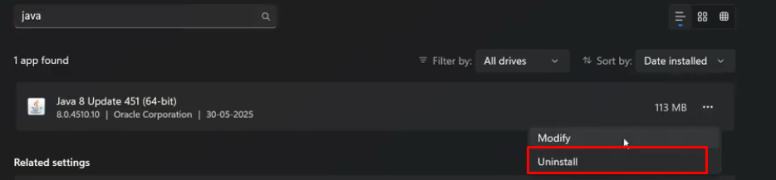
(1) Open Settings and select Apps
(2) Choose Java (8) and select option "uninstall"
3. Install akabot 4x
Download follow the instruction: Install akaBot 4x
4. Restore configuration files, license, workflow files
Step 1: Access the directory where you stored the configuration, license, and workflow files (of Tomcat 8) from the previous step.
Step 2: Copy all of those files
Step 3: Paste these files into their respective locations within the Tomcat 10 directory.